How to Tile a Shower Niche
Step by step guide with pictures showing how to tile a shower niche including measuring, planning, prep, laying tile, and grouting.
Yield: 1 niche
Cost: $200
Equipment
- 1 Drill
- 1 Thin-set Mixing Paddle
- 1 Safety glasses
- 1 Square Trowel Get a small one too
Materials
- Tile
- T-spacers See note for other varieties.
- Wedge Spacers
- Bucket
- Thinset Mortar Use the type that is recommended for your tile.
- Grout
- Tile Sponge
- Niche Form You can also build one/.
Instructions
Mount Your Niche Form
- Either purchase a pre-made niche form or create your own from concrete board. Niches must be secured on all four sides by wood studs. (Photo is the framing for a larger niche we previously did.)
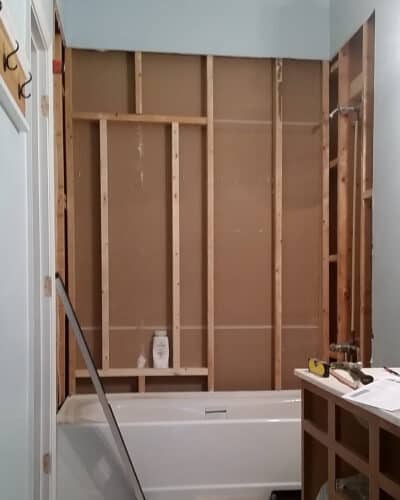
- Proceed to waterproof the niche area and shower tile as normal. I recommend tiling the shower wall first.
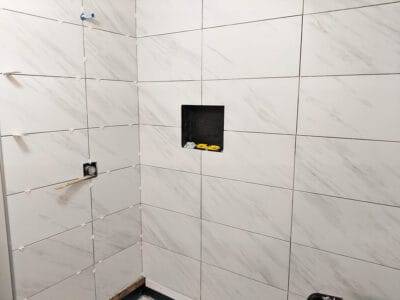
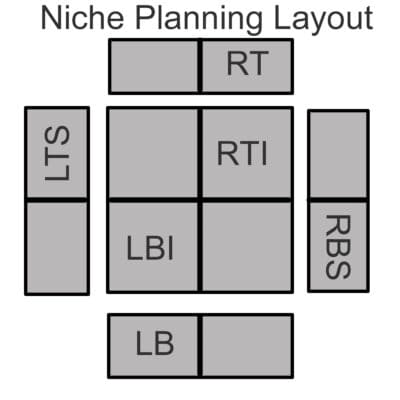
Plan Your Layout
- After deciding your design, do lay out your tile nearby and label all parts. Measure for accuracy before cutting the tile. Dry-fit the cut tiles to ensure they fit properly before applying mortar.
Prepare the surface
- It is best to tile your entire wall first before doing a niche so you can add spacing trim if desired.

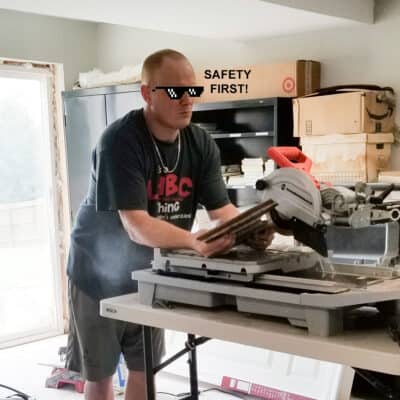
- Set up your tools including the wet saw and cover any areas you want to protect. Measure and mark tiles for cutting using a tile marker or pencil. Use a tile cutter or wet saw to make precise cuts.
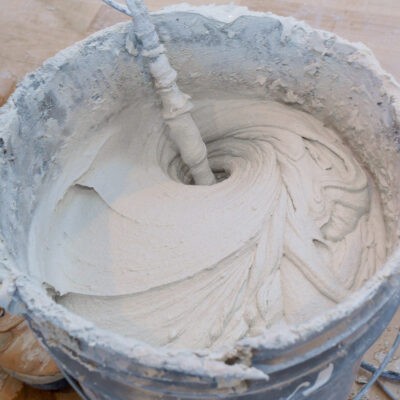
Mix the Mortar
- Use the mortar manufacturer instructions for mixing ratios and setting time. Pour the appropriate amount of water or additive into a clean bucket. Start the drill with the mixing paddle attachment. Slowly add the dry mortar mix to the water while mixing continuously. Continue mixing until you achieve a smooth, lump-free consistency. Mix only enough that you can use before the setting time.
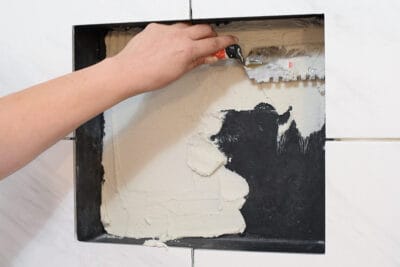
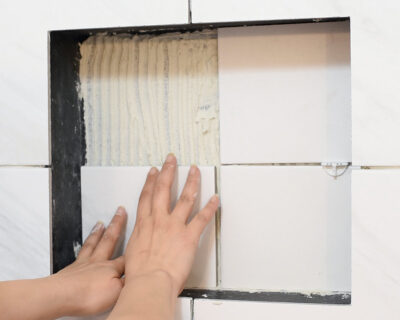
Apply the Mortar to the Niche.
- Spread a thin layer of mortar onto the area using a notched trowel. Then, hold the trowel at a 45-degree angle to create ridges in the mortar.
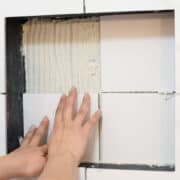
Add tile.
- You can tile either the back or sides first. I find it easier to tile the back and work outwards, but tiling the sides first is sometimes better too.

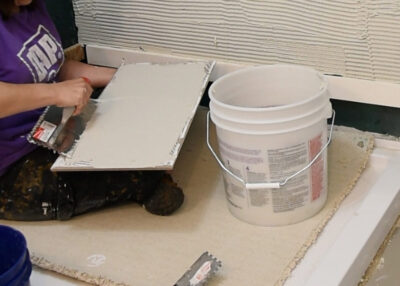
- If desired, back butter the tiles (scrape a thin, flat layer of mortar on the back of the tile with a trowel at about 30 degrees).
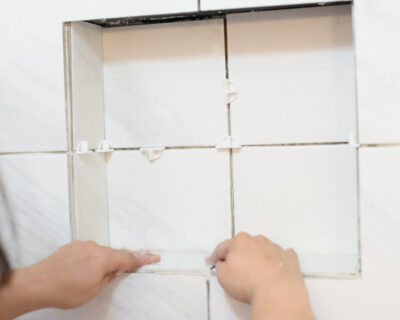
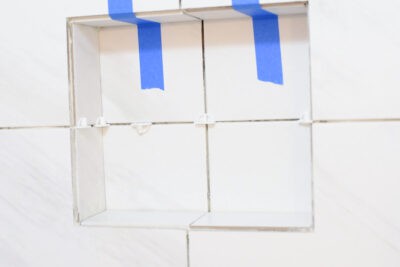
- Press the tiles firmly into the mortar, using slight twisting motions to ensure good adhesion. Check the edges are level with adjacent tile. Insert tile spacers between each tile to maintain consistent spacing. Wipe away any excess mortar from the tile grout lines and surface before it dries.
- The bottom tile should be at a slope at least 1/16 of an inch back to front to allow water to drain. The top tile should be done last and can be taped to hold in place while the mortar dries. Tape can also be used to hold bullnose or trim tile.
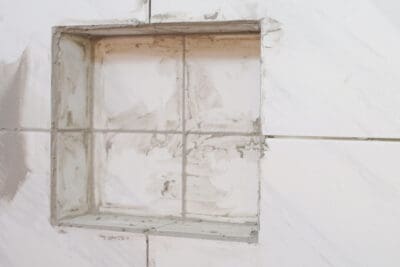
Dry Time and Grouting
- Let the mortar dry according to manufacturer instructions before grouting, which typically takes 24-48 hours. The process for mixing grout is the same as mortar, mix enough grout to use within the setting time, or about 20 minutes.
- Use a grout float or your hands to push the grout mixture into the lines and then wipe away excess grout. Make sure to push and wipe in multiple directions to completely fill the gaps.
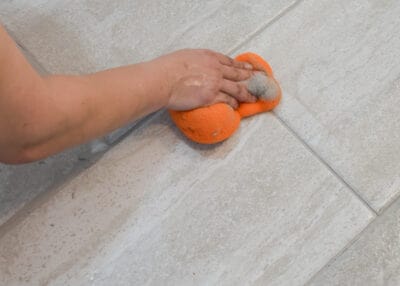
- After about 10-15 minutes, use a damp grout sponge to clean excess grout and make the lines smooth. Cleaning as much grout as possible will make haze removal easier later.
Haze Removal
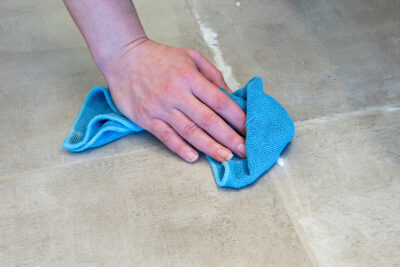
- Wait at least 24-48 hours and wipe several times with a clean, damp sponge to remove any haze. The longer you wait, the harder it is to remove. Use a water bucket to rinse the sponge constantly and change out the water frequently. It may take a few cleanings to remove all of the haze. More will show up as it dries.
Sealing Grout
- I do recommend sealing all new grout for longevity and maintenance. Even those with pre-treatments in them will last better with an outer sealant.
Notes
For spacers, there are a variety you can use, but they need to be sized to your desired grout line. The most common sizes are 1/16 and ⅛. My preference is to use these T-spacers in between tiles on the wall, these leveling spacers on floors, and these wedge spacers for areas that can vary (like a tile not sitting straight or the edge of the bathtub on the bottom row).
I don't recommend hidden tile spacers in joints at all. They provide a weak point for grout to crack.
