How To Caulk a Shower
Transform your bathroom with this easy guide on how to caulk a shower surround like a pro.
Yield: 1 shower
Cost: $15
Materials
- 10% Bleach Solution
- Painter's Tape
- Bathroom Caulk in Matching Color waterproof, non-paintable
- Paper Towels
- Latex or Nitrile Gloves
Instructions
Remove the Old Caulk
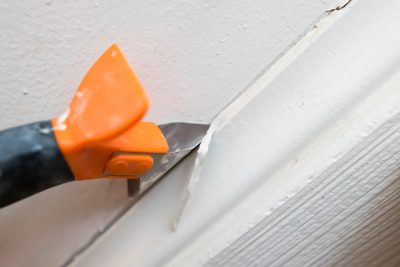
- Remove the old caulk using the caulk remover tool. Use a flat scraper blade to remove all remaining traces from the surround.
- If the tile and surround are in good repair, vacuum up any dirt or debris. Remove mildew and/or soap scum from surface. Spray a 10% bleach solution into the area of the caulk and allow to sit for at least a few minutes. Wipe with a clean, dry cloth. Allow to air dry overnight.

Caulking the Shower
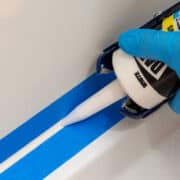
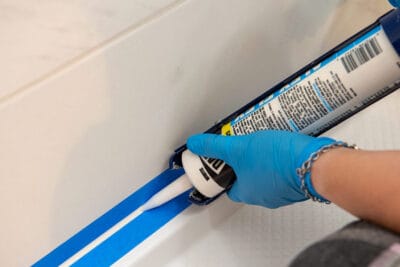
- To create a straight line of caulk, use painters' tape on both sides of the seam.
- Cut the caulk tube at a 35–45-degree angle. If you cut the tip flat at a 90-degree angle, you'll waste caulk and create a round bead rather than an angle bead.

- Position the tip in the seam area and move in a straight line with the bead of caulk. Check for gaps or globs as you move along. Fill the space well so it doesn’t cave in.
- Smooth out the caulk with your index finger or a caulk smoothing tool. Apply even pressure as you move along. Generally, I go over once to get any excess caulk. Then I go over the line a second time to smooth it completely, moving from end to end in one sweep.

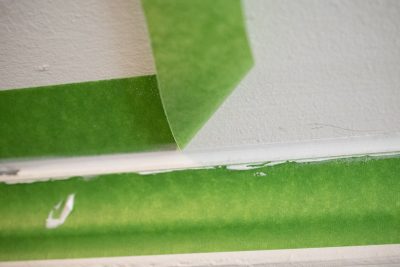
- Pull up the painter's tape. Make sure that you can see the edges of the tape, or you'll have odd ridges when you pull the tape up.
- Allow to cure according to directions before exposing to water.
Video
Notes
My Favorite Tool for Smoothing Caulk
My index finger. A dab of dish soap rubbed over the gloves keeps caulk from sticking to your finger. Fingers have just enough flexibility to go over any ridges while keeping the caulk nice and smooth. Put on some latex gloves and make sure they are tight fitting around your finger (no ridges or ripples). A dab of dish soap keeps the caulk from sticking to your finger!
Buy a Quality Caulk Gun
If you use viscous materials (such as sanded caulk or adhesives), have a BIG job, have poor hand strength/arthritis or would just like something that doesn't require you to squeeze as much, get a high thrust caulk gun. This is the one that I use for bigger jobs.
