Transform your mantle this season with a lush, layered Christmas garland! Learn simple tricks to hang garland on a mantel including how to add fullness, mix textures like berries and ribbon, and get the most out of delicate garland styles like cedar and Norfolk pine. With these tips, your mantle will become the cozy, festive focal point of your holiday decor.
I love a lush garland but am often disappointed when I purchase something that looks great in a photo only to find it thin and underwhelming. Over years of learning, time, and patience I have developed many no-fail secrets to get the lush look while being damage-free to walls and mantels.
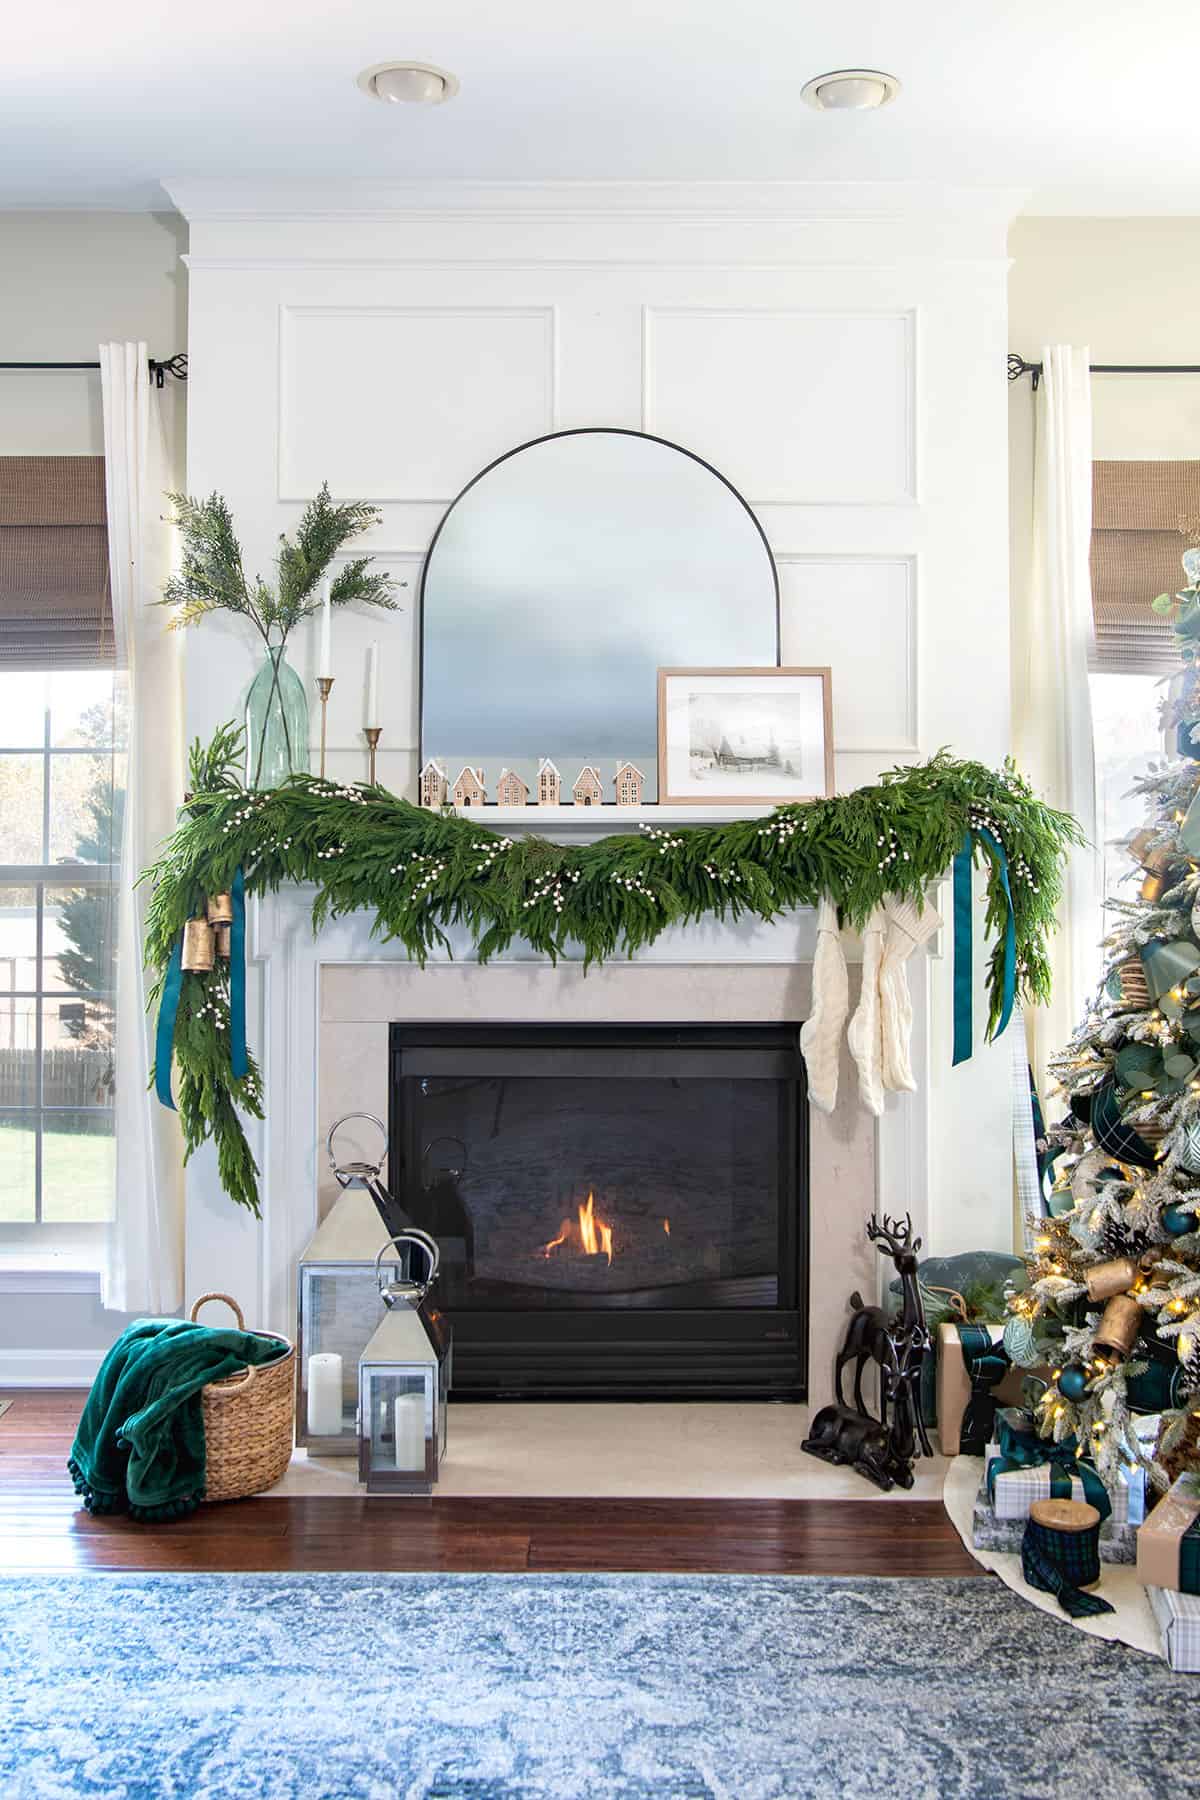
For this year’s fireplace mantel, I wanted something ultra simple and realistic looking, while trying out the trendy Norfolk pine style. I “borrowed” this garland from the media center next to the basement Victorian Christmas Tree as I wait for sales for next year.
From choosing the perfect garland to the supplies you need, bookmark this step-by-step tutorial to use each holiday season!
Supplies Used
While I often change or refresh the mantel yearly, the tools and tips are always the same. Here is what I used to create this simple droopy garland:
- Hooks – see below for types.
- Twine or Floral Wire
- 3 9-foot strands of norfolk garland
- White berry branches
- Norfolk Pine Stems – or other faux greenery, I used 9 stems
- Yard Cuttings for additional texture (I have cedar trees)
- Emerald Green Ribbon
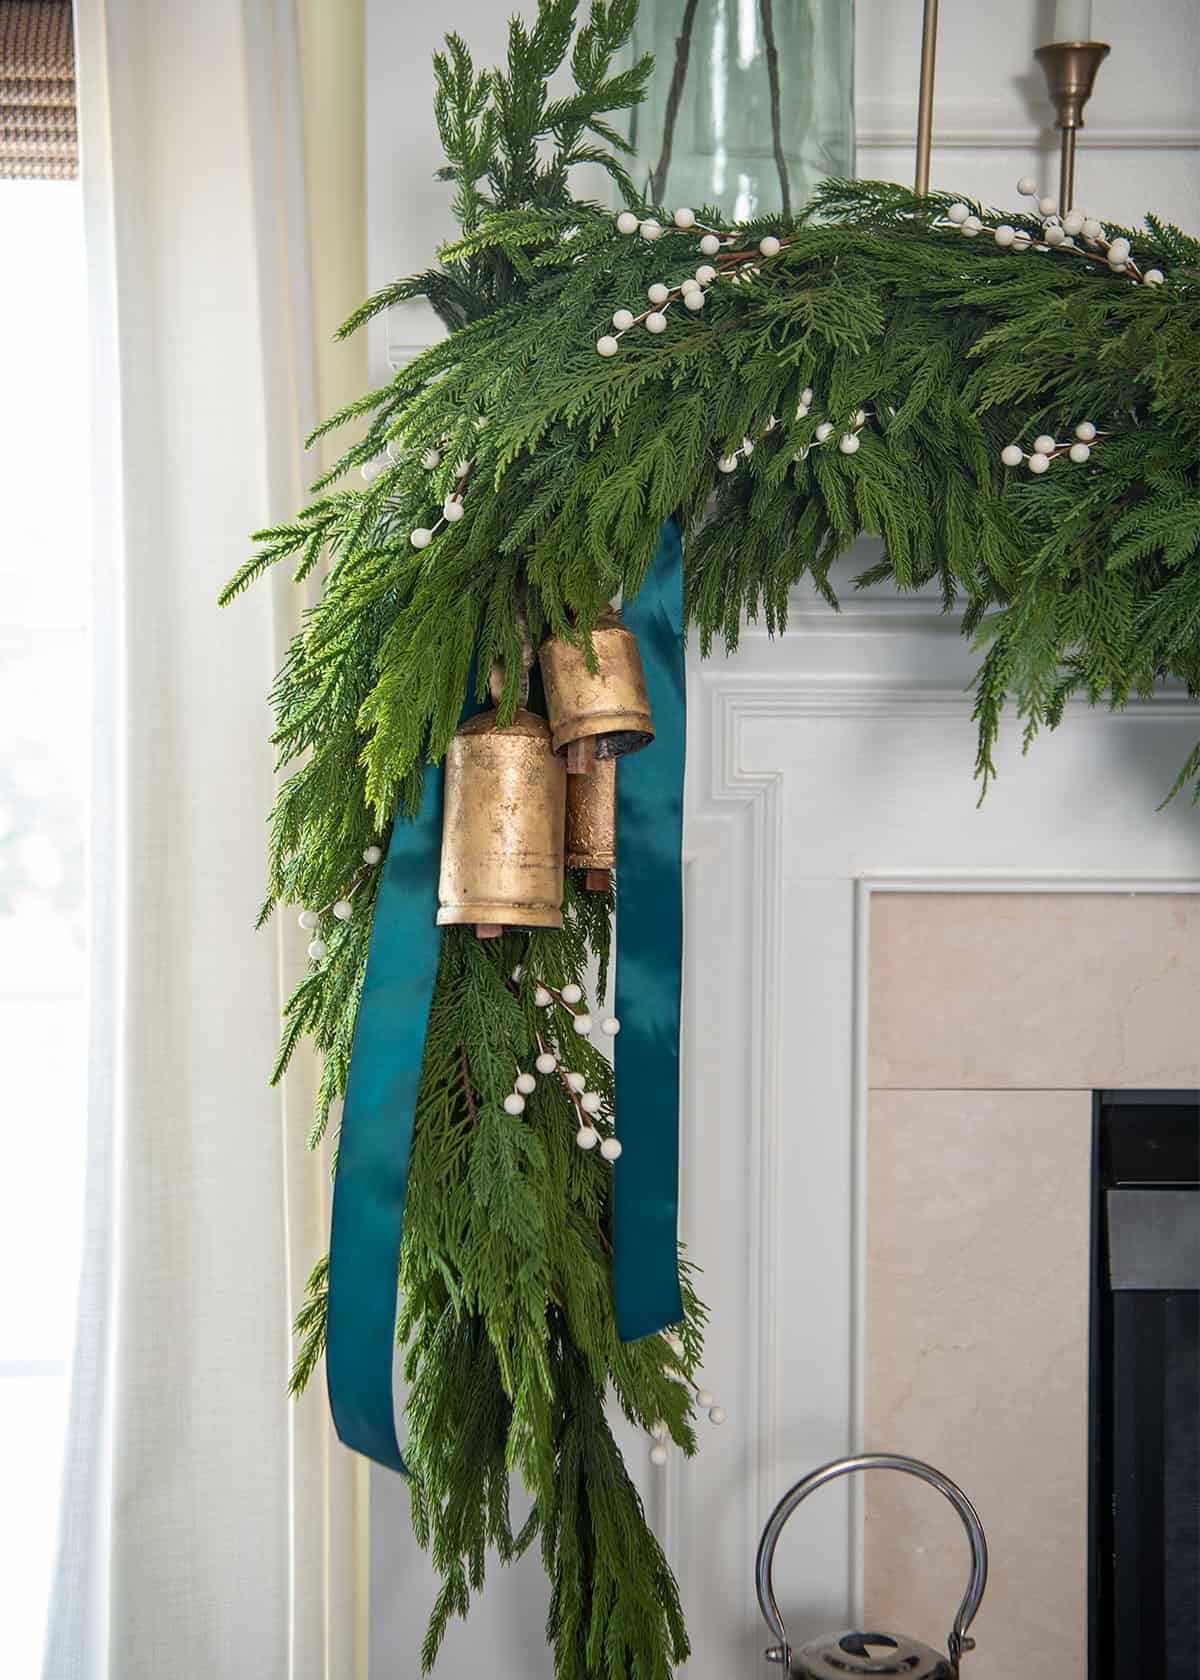
- Antique Tin Bells
Deciding a Garland Style
Shape. For my living room, an asymmetrical shape works best to balance our large tree and painted entertainment center. Your ideal shape may vary-try sweeping one side to the floor, extending both ends, swag each side out from the center, or keeping it simple and straight across the mantle.
Flow. Different types of garland have different patterns in which the leaves flow. Some may starburst outward, while some may flow in a specific direction.
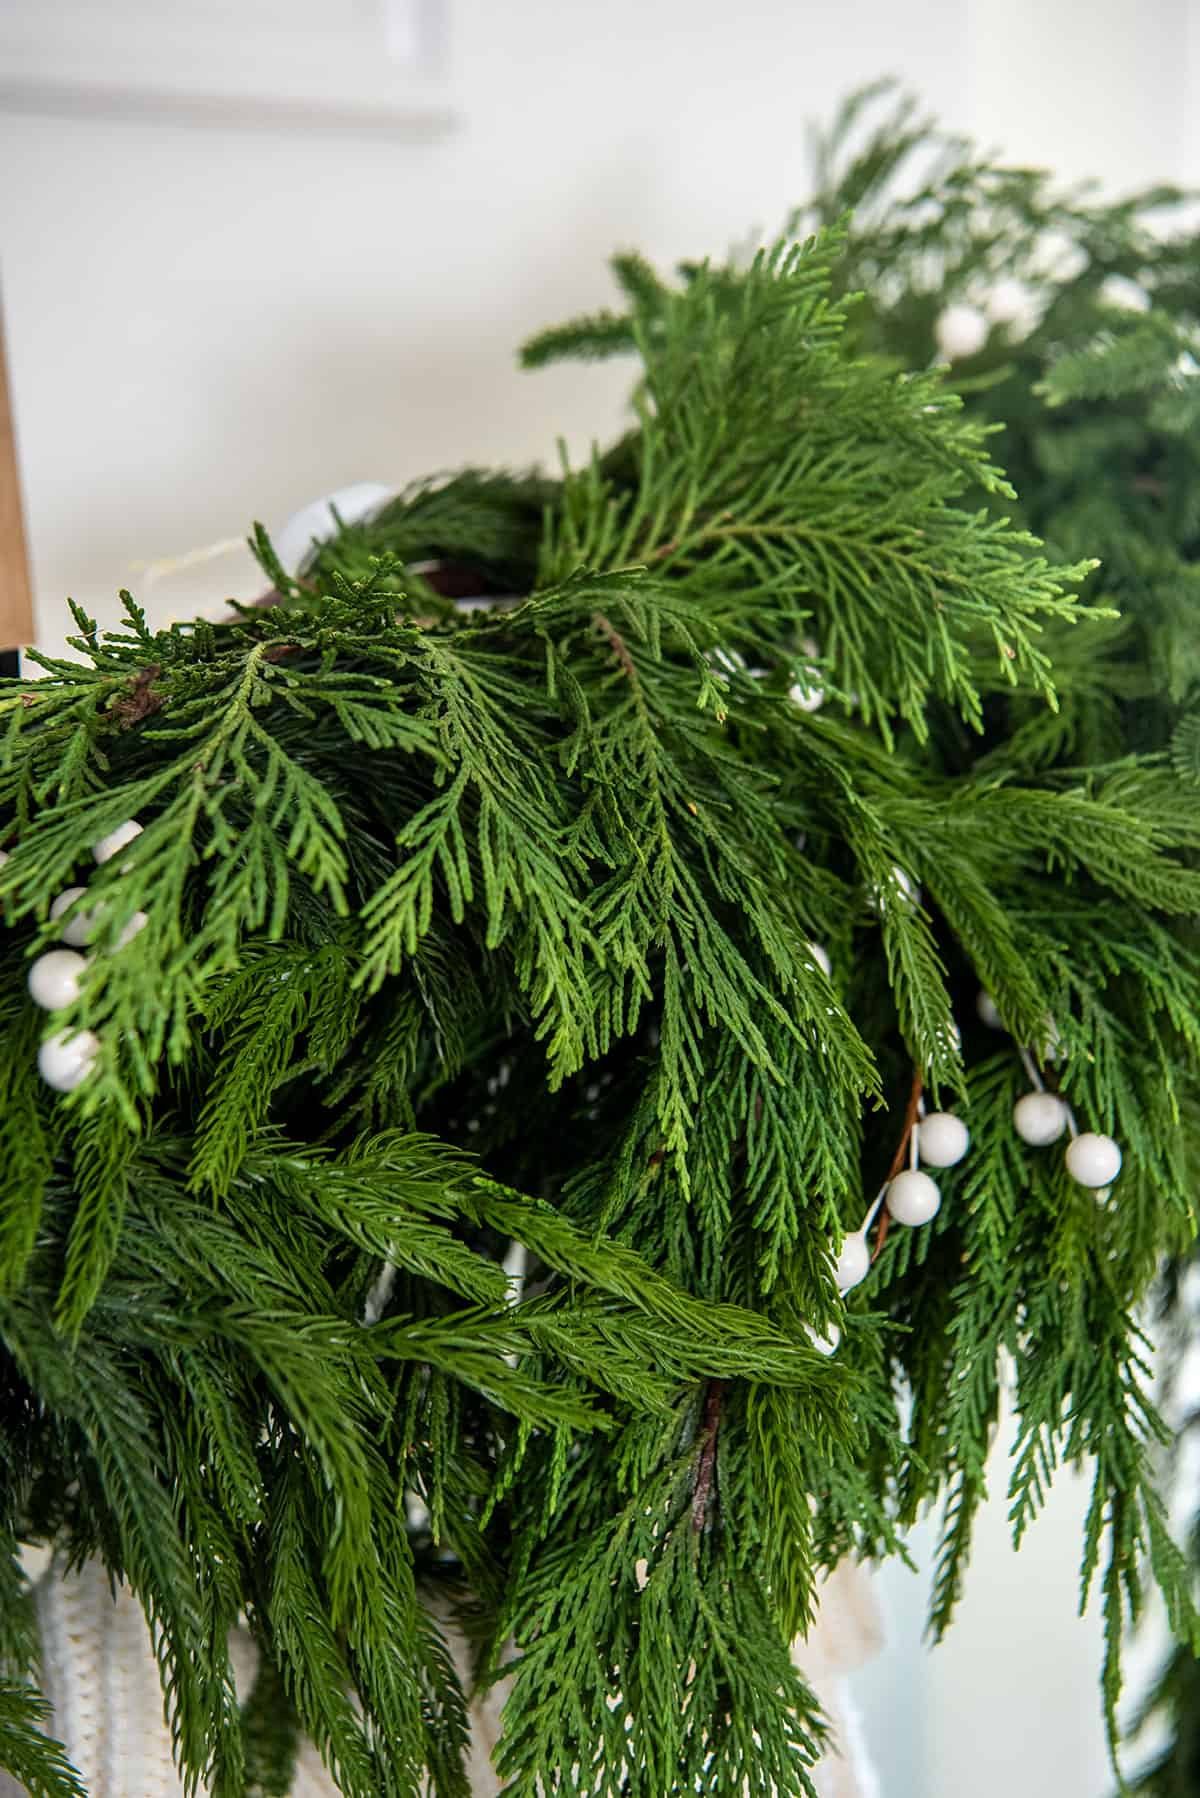
Texture. Mixing greenery types, like cedar with Norfolk pine or eucalyptus, adds visual interest. Incorporate different accent accessories-berries, pinecones, or metallic accents-for depth and a more dimensional design. You can also weave some string lights or fairy lights through to add some sparkle.
Color Scheme and Decor Theme. Decide if you want it to coordinate with other holiday decor, like your Christmas tree or stockings. Truthfully, I agonized over this as I have a flocked tree, but the contrast highlights the beauty of both the mantel and tree, while still coordinating.
Artificial Garland or Real Garland. I prefer artificial garland actually on a fireplace mantel because the real stuff gets very brittle and dry. I also have to decorate very early for content, so it won’t last through the holiday season.
Remember to step back and take a look at your progress as you go. And keep in mind-nature is beautifully imperfect!
How to Hang Holiday Garland Without Damaging Your Walls or Mantel
Decorating without nails or damage has never been easier and you don't need any tools. I have a few favorite methods that have their specific uses:
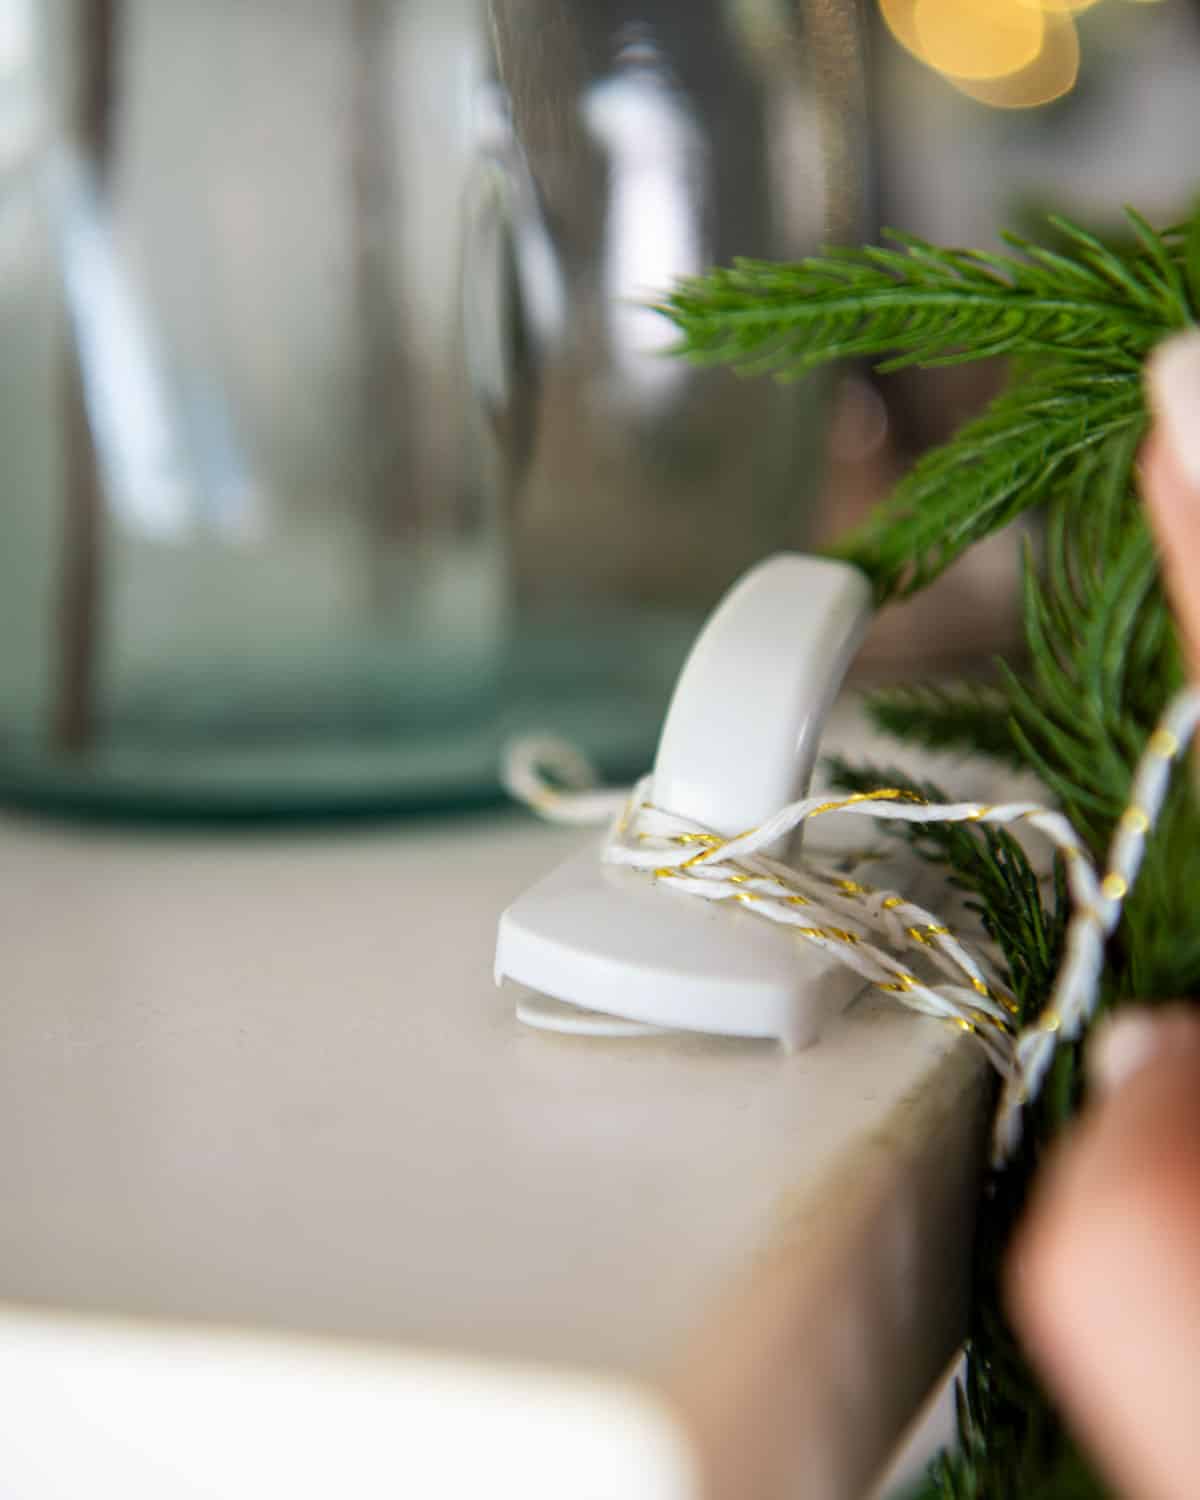
- Large Command Wire Hooks – These are the BEST because they have a low profile that is easy to hide, and the ball head keeps the string from slipping off.
- Large Command Velcro Hooks – I like these best for the exterior and such where I need to pin the spines in place, so wind won’t knock the garland off. The Velcro sticks great, but also makes it easier to place and remove.
- Clear Command Hooks. To hang garland on my mother’s hand scraped wood mantel, I strung wire across the back of the mantle and secured it with clear command strips on the wall. The garland was strung with brown floral wire to disguise it.
Pro Tip: I generally go with the largest size command strips I can hide effectively. I’ve been using this technique for many years and never had garland fall or break.
If you have some damage, it’s not the fault of the adhesive. It’s most likely that the wall or mantel finish is not in good shape or not bonded/cured well. Sometimes cheap paint in full sun can remain sticky too.
Preparation Tip! Some cleaning products leave a residue that may keep the strips from adhering well. If necessary, use a bit of rubbing alcohol to remove residues and let dry completely before installing. Also, do not neglect the instructions for how long to let the adhesive cure before adding weight.
How to Layer Garland for Fullness
My mantel is just over six feet across, so I used 3 nine-foot swags of Norfolk pine garland. For a fuller look, here are some tips to bring your vision to life when working with multiple layers:
- Hang the garland 1 piece at a time. Drape and secure the first garland perfectly before adding more layers.
- If your garland swag is directional, consider hanging layers in alternating directions. Certain styles of garland are constructed where branches flow or fall in one direction. You may or may not like this look. To create more fullness and a natural look, I draped the second garland in reverse, then the last garland in the same direction as the first garland.
- To hide the spine, fluff the layers outward and over the top of the previous swag.
- Zip tie as needed to keep the spines together. Clear or dark green zip ties work best.
- To cover bare ends, use stems in the same or similar style. This garland has bare ends on one side. So, I secured these pine stems in the ends to mask the ends.
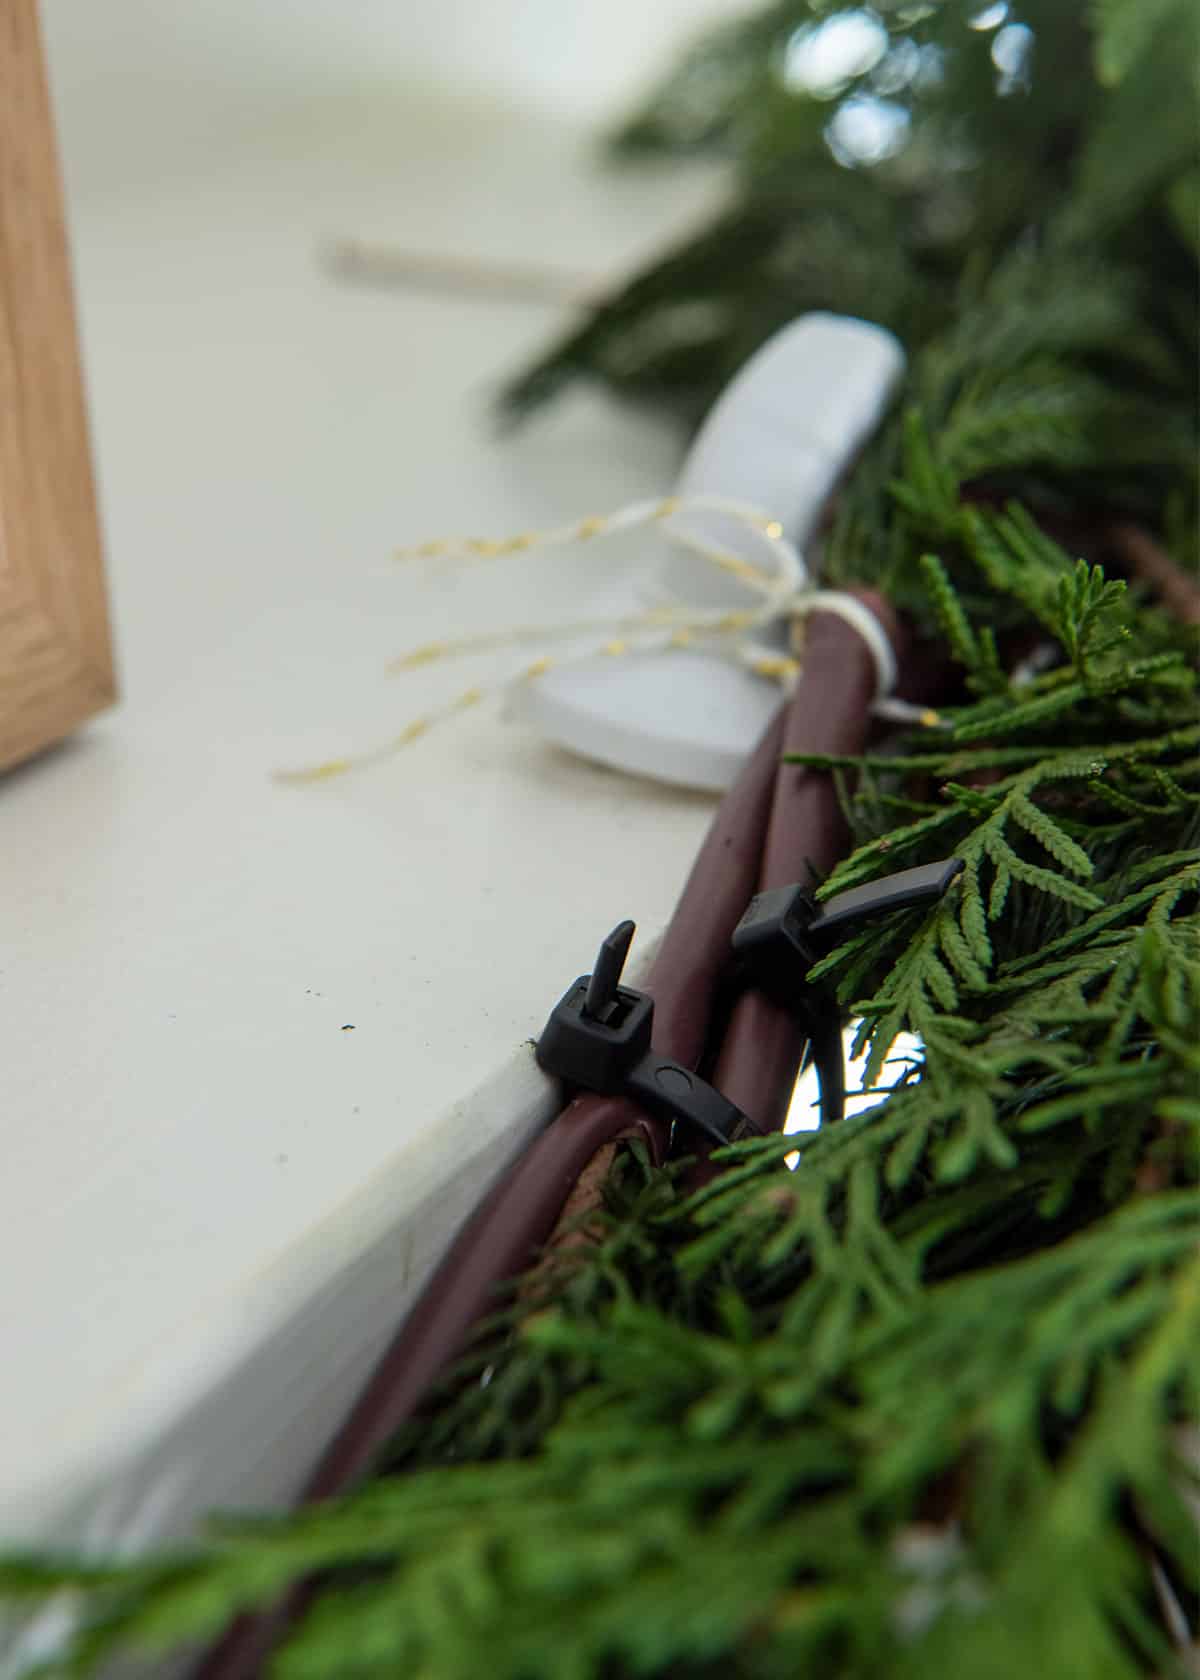
For the garland example today, I used 4-5lb Velcro Command strips for additional support. I have had these for years and I have never had garland fall or removed paint. I used black zip ties to keep the strands together and secured.
Add Floral picks or Yard Clippings to Fill Gaps
It’s not entirely necessary, but I love to add clipping from the yard. We have a few massive trees in the backyard that I believe to be red cedar so that’s what I used. The variety of leaves adds more dimension and texture, while also being FREE!
Add Ribbons and Decorations
Because I created 3 new tree themes this year, I wanted to give the mantel a simple and soft yet festive touch. I added the same tin bells that are on this Cottage Christmas Tree along with a simple coordinating ribbon, also from the tree.
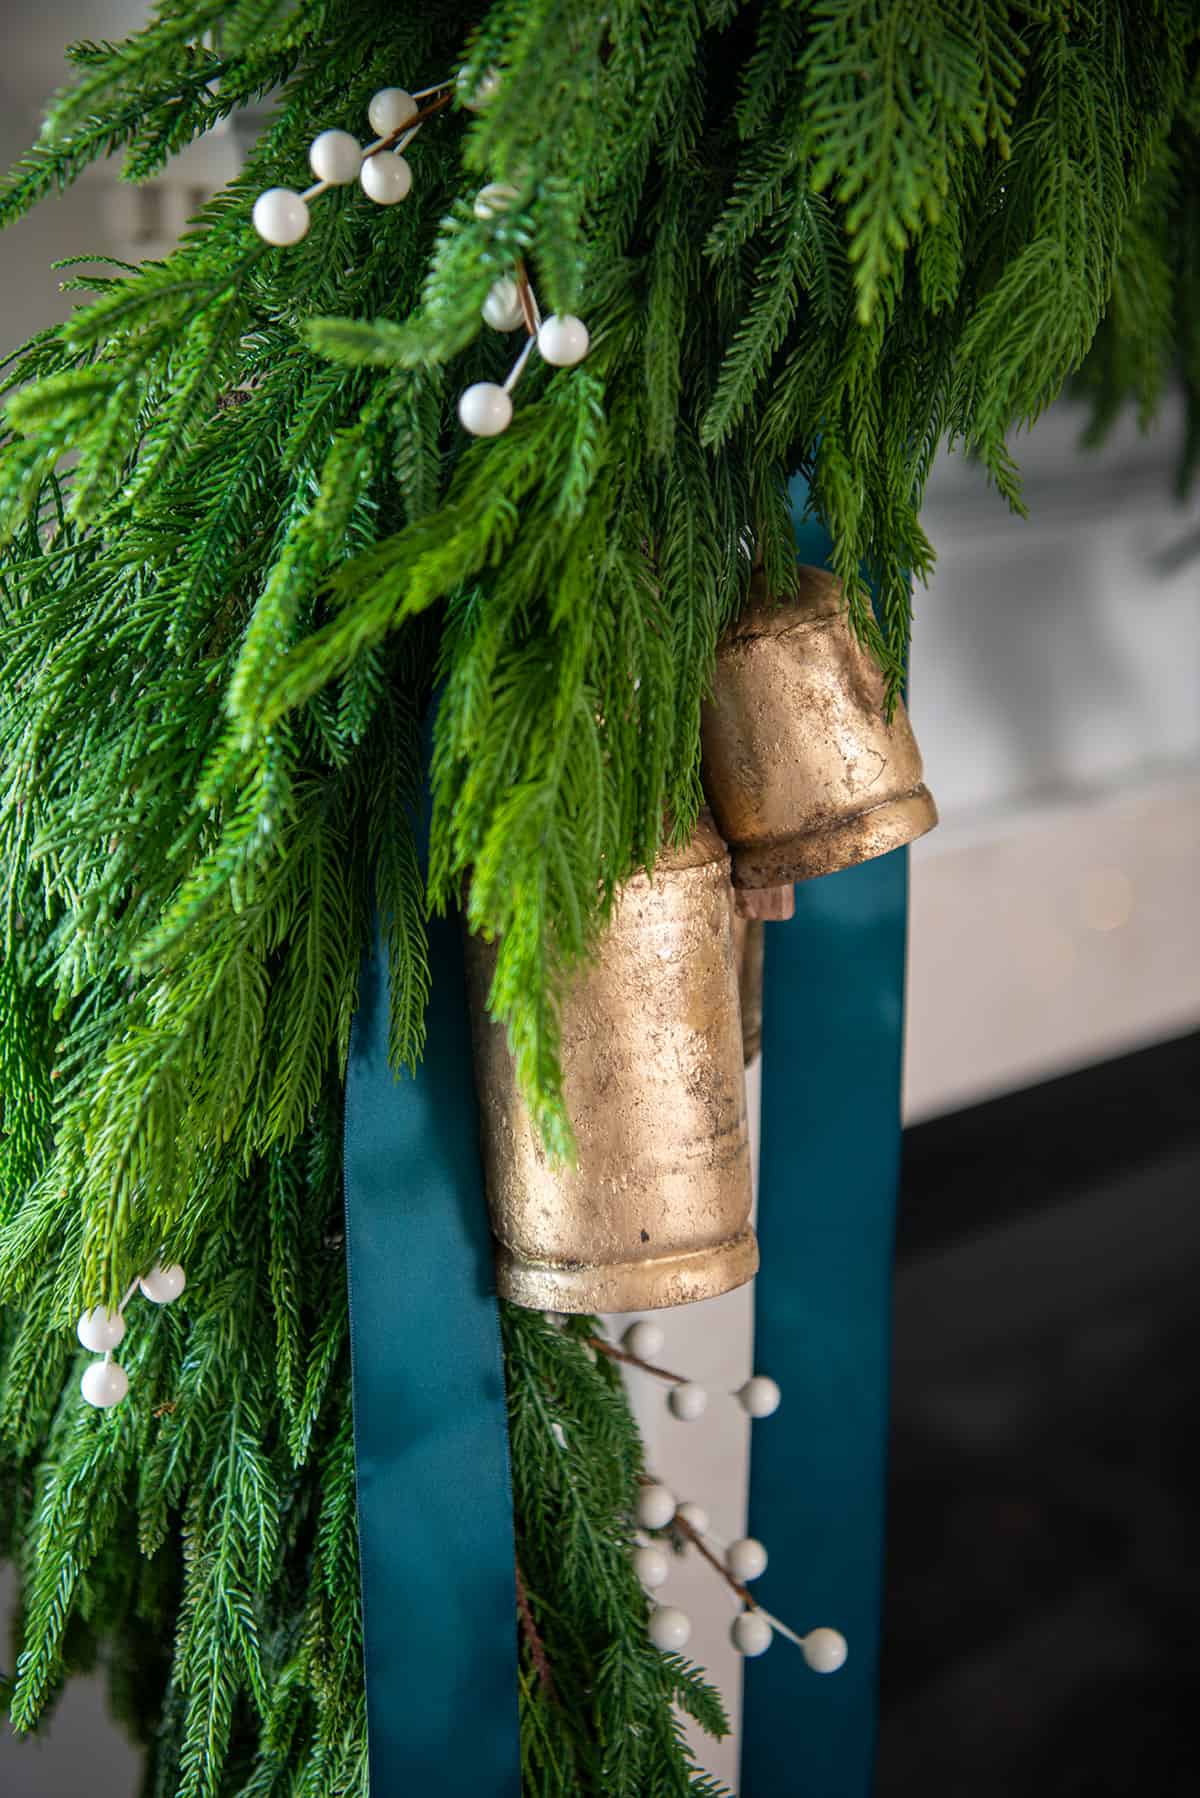
I simply tied the bells together to hang from the same command strip, but you could add new strips if you wanted to adjust where the bells hung. Stocking hangers, such as these also work well.
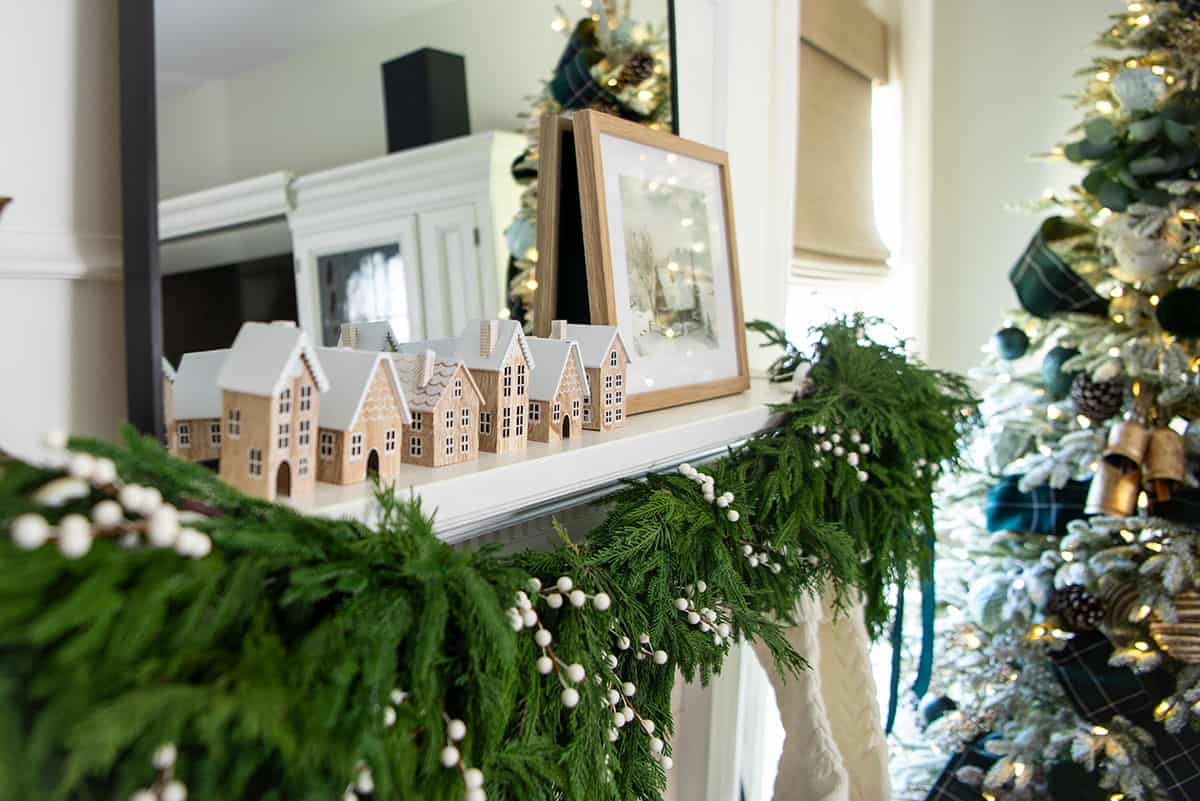
A simple mirror, some candles, and my happy little collection of houses pulled in the wintery feeling on top of the mantel. I do feel like a wreath would have been better on the mirror, but that’s a project for another year.
I hope you enjoyed this easy tutorial on how to hang a garland on your mantel without damage. It’s so easy and simple to get exactly the full look you want without worrying about ruining the paint surface.
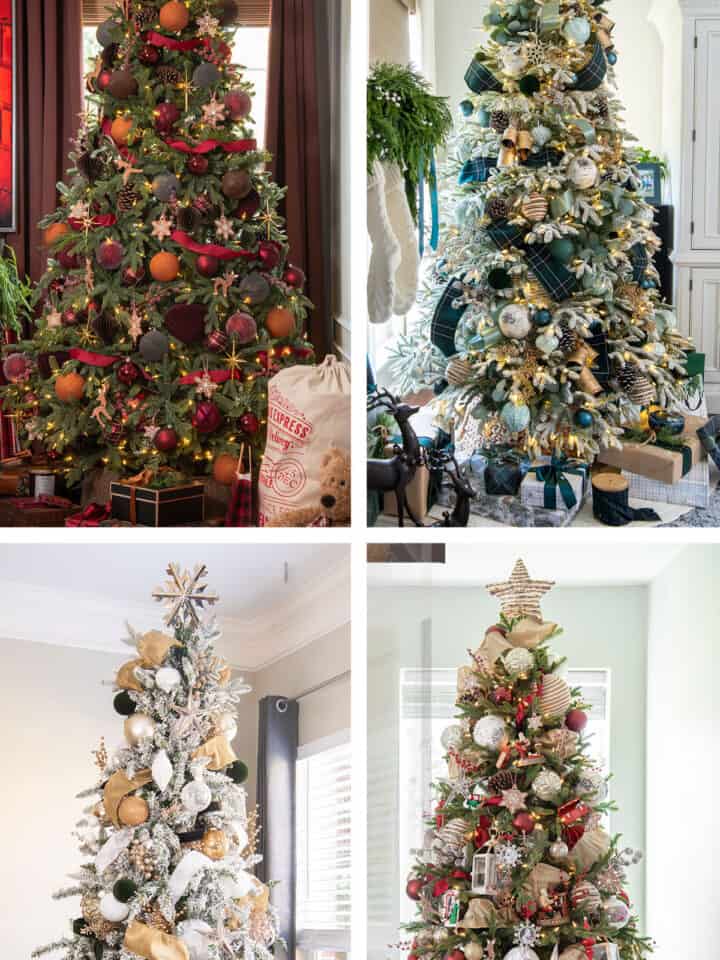
More Christmas Decorating Ideas

Grab our free series "Weekend Home Projects that will Transform Your Life" Sign up below to receive updates including free printables, organization tips, home improvement projects, recipes and more! |
More Christmas Decorating Posts
PS I love seeing your creations! Be sure to take a photo and tag #cravingcreative on Instagram! You can also stay in touch with me through following me on Instagram, Pinterest, and subscribing to the newsletter!
Leave a Reply