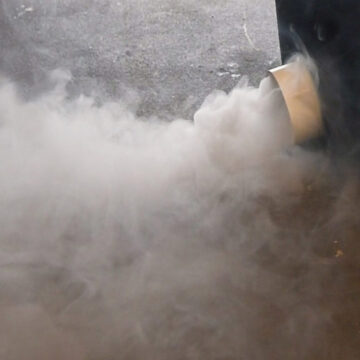
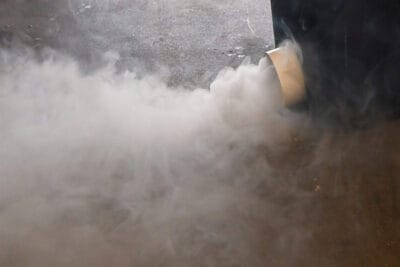
There's nothing like a carpet of fog rolling across the lawn for Halloween. A fog chiller makes it so the mist hugs the ground creepily crawling along. Below I'll show you the compact cooler method Ive used for years successfully.

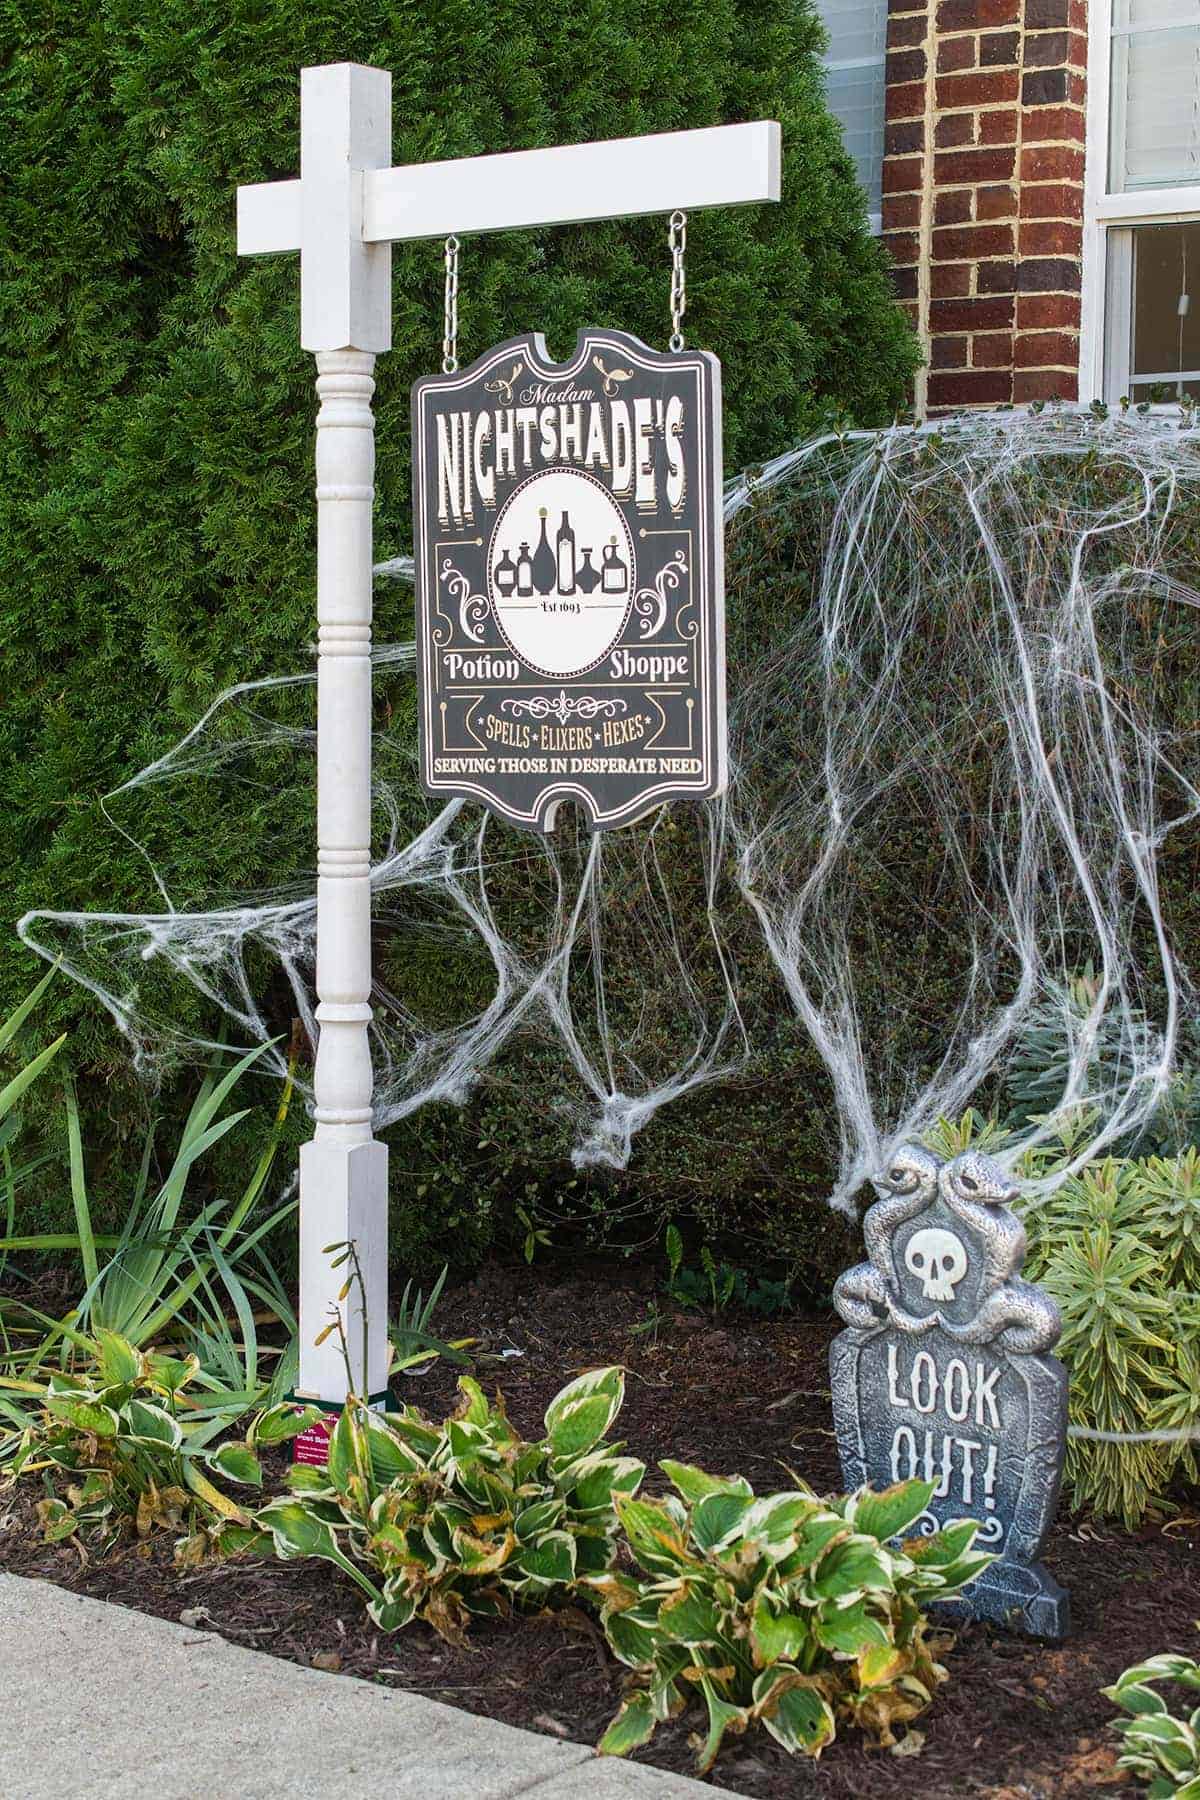
Imagine this: It’s Halloween night, and your front yard is transformed into a hauntingly eerie Halloween graveyard with mist curling around the tombstones. You don't need fancy equipment with a little DIY magic! Today I'm sharing how to make a DIY fog chiller that transforms regular fog into a low-lying mist for a truly spooky yard.
This easy project pairs perfectly with your outdoor Halloween decorations, pumpkin topiary, or Halloween party table setup, and it's budget-friendly too. Let's get started and turn your yard into the ultimate haunted scene!
Benefits of this Setup
- The cooler is insulated, which makes the inside air cooler and the ice won’t melt as fast.
- Works with regular ice or dry ice, albeit a little bit differently for dry ice.
- Leaks are minimal or not at all, which means you don’t have to tape shut.
- Easy to refill with ice if needed.
- Fog juice tank is accessible for easy refilling, if needed.
- Less ground footprint required which makes it easier to hide.
Why do you need a Fog Chiller to make Low Lying Fog?
To make a spooky fog for fun Halloween effects, you only need a fogger machine and some fog juice. However, what you may find is that the fog floats upwards and creates a misty cloud rather than low lying tendrils.
This happens because the fogger heats up the juice to create a vapor. What a chiller does is cools the vapor down as it sinks through a layer of ice to condense into a thicker vapor. This allows the vapor to stay closer to the ground.
Note: If you live in a warm climate or sunny day while the fogger is in use, some fog will rise again as it is heated from the ambient air. The effect is still a vast improvement over thin fog and smoky, obscured decorations.
What You will Need
The full supply list and instructions are included in a handy printable how-to card at the bottom of this post, but I include many of the “why’s” for things we used.
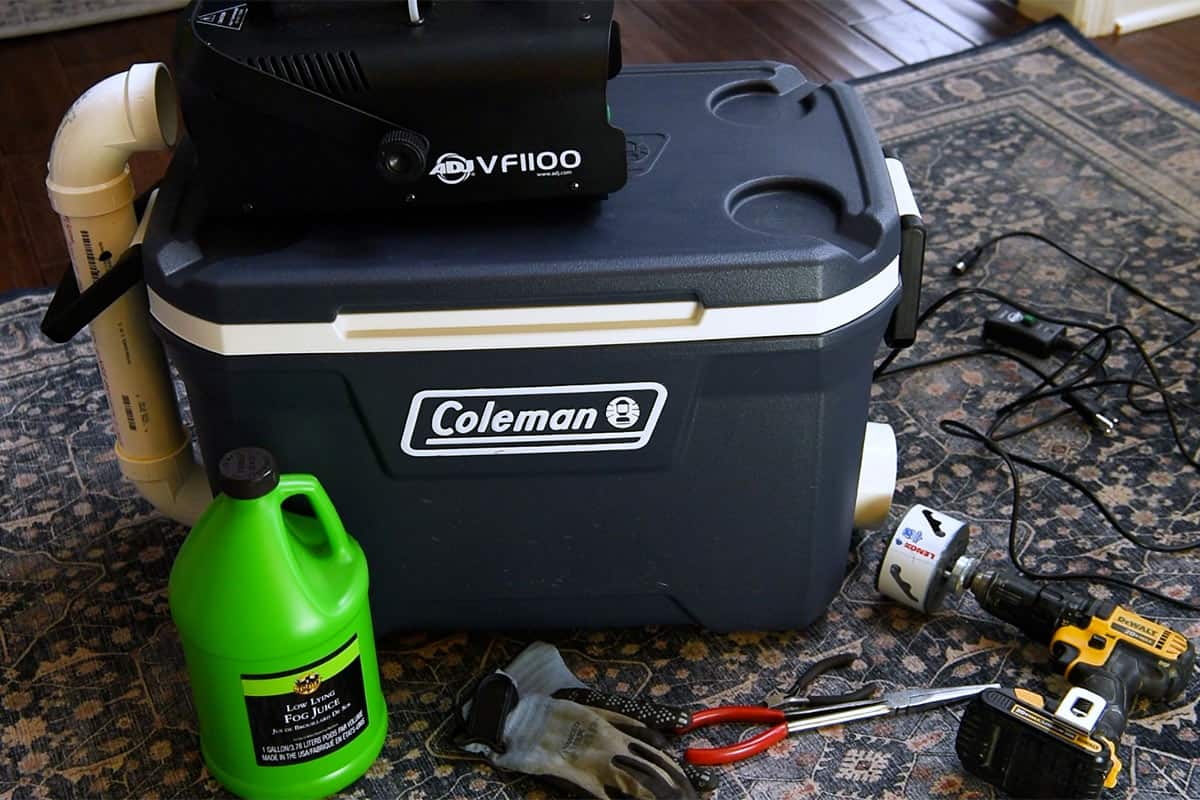
Fog Machine. The higher wattage, the more fog the machine will produce. We purchased this 850-watt machine, which fills about a 12-15 square foot area pretty well through a single port.
Low Lying Fog Juice. Fog juice is water-based, and any type of fog juice will work, but low lying definitely works better and stays lower to the ground for longer.
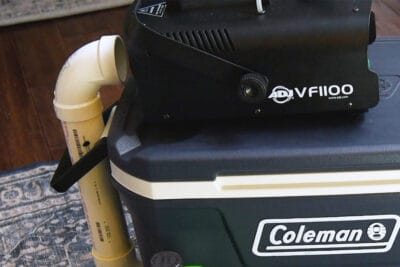
Large Cooler or Container. I have seen storage bins and garbage cans used, but they can be quite leaky and don’t have any insulation to keep the ice cold, so a cooler is better. The bigger the better, but bigger can be harder to hide. Our cooler is 52qts.
Straight PVC plumbing pipe. You need about 3-4 feet or so depending on the size and shape of your container. We used 2 inch diameter pvc pipe.
Something to cut pvc pipe. This can be a pipe cutter tool, hacksaw, bandsaw, or a jigsaw tool.
PVC elbow couplings. We used 2-inch 90-degree PVC hub adapters and added a pvc increaser on the outflow side. Make sure they fits well with your straight pvc pipe before installing.
PVC Glue. We used PVC cement to seal and glue together all of the pipe. You do not need the purple primer, since this isn’t actual plumbing.
Caulk. 100% waterproof caulk will help seal the holes in the cooler around the pvc pipe and close any air gaps.
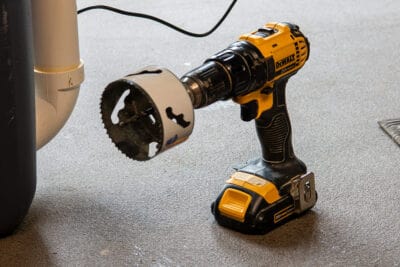
2.5-inch Hole Saw bits and Drill. Use whatever size matches your pvc pipe fittings.
Chicken wire or grates. This is used at the outlet end to keep the ice from clogging and to allow the melted water to leave.
Ice. Procuring dry ice is not easy in many areas. However, this setup is designed for regular ice because it lasts longer and won’t need refilling often. We have used this machine for a few hours at a time without needing to be refilled.
Is dry ice or regular ice better for fog chillers?
Dry ice works much better because its colder and it actually creates fog when it comes into contact with water or water vapor, which multiplies the effect. Dry ice does not create fog without humidity or water. A 2lb brick of dry ice only lasts about 15-20 minutes in the right circumstances. However, if you had enough dry ice, you don’t technically NEED an additional fog machine.
Tips for the Ultimate DIY Fog Chiller
- The bigger the container (and thus more ice that the vapor comes in contact with) the better. We used a 52qt cooler due to hiding this in the bushes.
- The hot fog will pass through the area of least resistance, so keep that in mind for how much ice you add.
- Make sure your fog machine is about an inch away from the pvc elbow input to prevent backflow of the fog hitting the adapter.
- As the ice melts, the water needs to drain away because the vapor can’t pass through it.
- How much ice you need depends on the size of your container. For this compact cooler, we used 30 pounds of ice.
- Low lying fog juice is thicker and thus denser than regular juice so it’s better at crawling across the ground.
More Halloween Ideas for Fun!
My family loves decorating for Halloween. We have tons more fun ideas for you to check out like:
Troubleshooting
- Fog rises instead of staying low: The fog is not cold enough or it is hot outside. Add more ice, increase the duct path or time between spurts of mist, or use larger container. Also check wind - even a little breeze will lift fog more than you think.
- Fog seems thin / wispy: Increase the fog machine output (higher wattage) and make sure the vapor goes through the cold chamber.
- Ice melts too fast: I recommend putting ice into the container early to pre-chill it, then add more when you are ready to setup. A larger cooler will also help.
- Leaks at duct holes: Re-seal with silicone caulk or tape as needed. If the vapor is leaking out the top of your container, you can duct tape it or add a gasket all the way around.
Safety Precautions
- Ensure proper ventilation to avoid inhaling excessive fog.
- Never enclose a fog machine entirely; it needs to cool its heater. Keep machine vents clear and allow airflow.
- Electrical concerns: Keep the fog machine and electrical components away from moisture and water sources. Use outdoor rated cords for outdoor setups.
- Maintenance: Make sure the fog machine is properly maintained and cleaned according to the manufacturer’s instructions.
- Dry ice caution: use heavy gloves, do not touch skin, and follow local regulations. Avoid enclosed spaces when using dry ice.
DIY Fog Chiller Video Explanation
While I am quite camera shy, I put together a video explanation of how this mechanism works and how we made it in about a half an hour.
FAQs
You can mix 25% vegetable glycerin and 75% distilled water (or ¼ cup and ¾ cup respectively) to create a DIY fog juice. Use 100% pure products or you may gum up the machine with minerals and residues.
Modern fogging machines work by heating up the fog juice into a vapor, but particularly if you live in a warm climate, that fog dissipates into the air like a fog cloud. If you want a low-lying creeping fog, you can create your own fog chiller to achieve that effect.
While there are dry ice fog chillers, these machines only use dry ice and a fan to direct the water vapor cloud out. They aren’t the same as a fog machine that heats up a solution to create fog.
Before storage, make sure to run out or remove any leftover juice from the machine as it can evaporate and ruin your machine with clogged residue. If you use it often for parties or special effects, the general rule is that you should clean your fog machine every 60-80 hours of use.
The higher wattage of the fog machine, the more fog this will produce. We purchased this 850 watt machine, which fills about a 12-15 square foot area pretty well. A slight breeze or sunny day however will cause the fog to move or dissipate more quickly.
You can, as long as it is sturdy enough not to have the ice put holes in it. We did not do this because it would be difficult to get the tubing to stay where we want it and pvc pipe isn’t that expensive comparatively.

Grab our free series "Weekend Home Projects that will Transform Your Life" Sign up below to receive updates including free printables, organization tips, home improvement projects, recipes and more! |
More Halloween DIY posts


PS I love seeing your creations! Be sure to take a photo and tag #cravingcreative on Instagram! You can also stay in touch with me through following me on Instagram, Pinterest, and subscribing to the newsletter!
DIY Fog Chiller
Tools
- 2.5 inch hole saw
- Pliers
- Fog Machine We use an 850 watt machine.
- Hacksaw something to cut pvc pipe like a miter saw or pipe cutter
- Marking Pens
Supplies
- 1 Cooler or Storage Bin, we used a 52qt cooler
- 3-4 feet PVC pipe 2 inch inside diameter
- 1 PVC cement
- 3 2 inch PVC elbow
- Chicken Wire
- 1 100% waterproof caulk
- 1 Low Lying Fog Juice
- 1 PVC increaser optional
Instructions
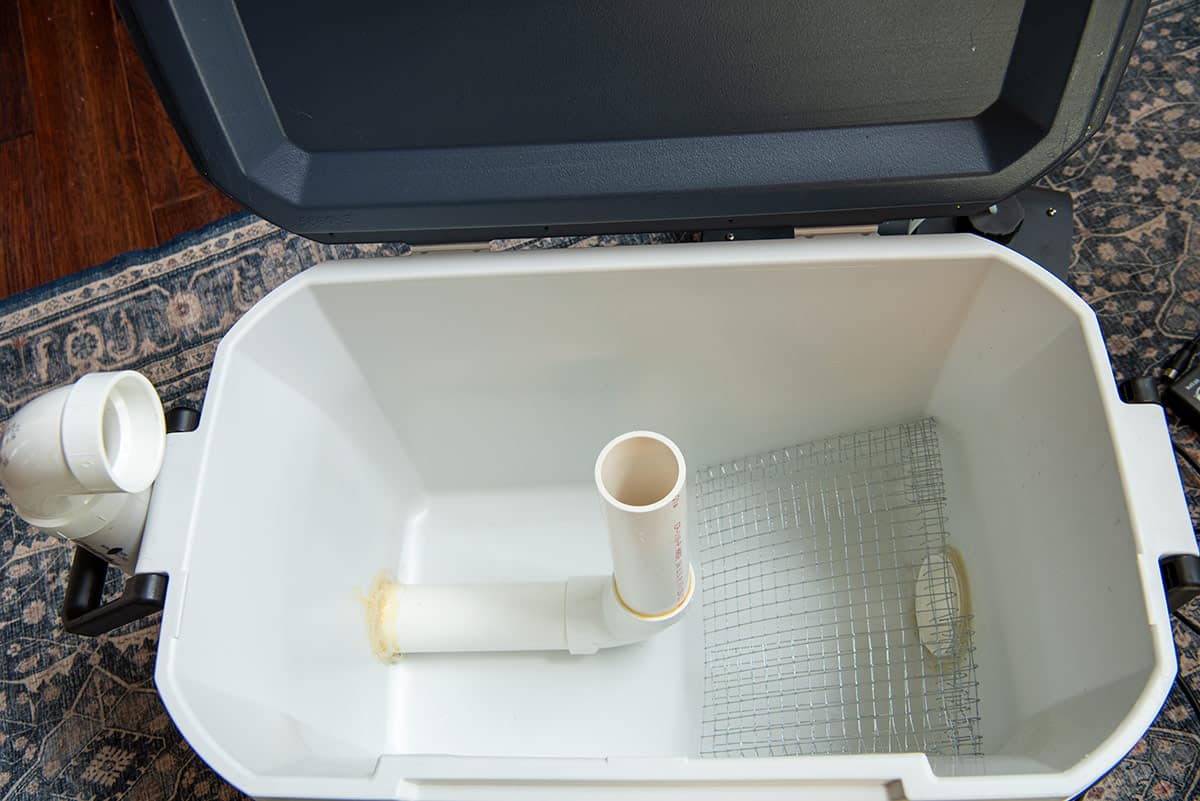
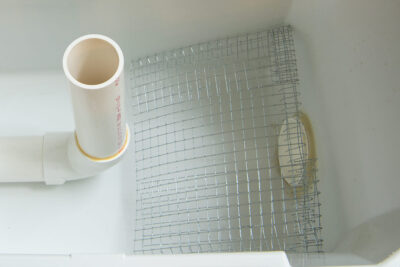
- Drill a 2.5 inch hole with the hole saw drill bit in each side of the cooler near the bottom, but high enough to clear the insulated floor of the container. The drain plug should give you an idea how high to cut.

- The pvc pipe must be long enough to line up with the fog machine when the machine is placed on top of the cooler. Cut the pvc pipe to length, taking the elbows into account.
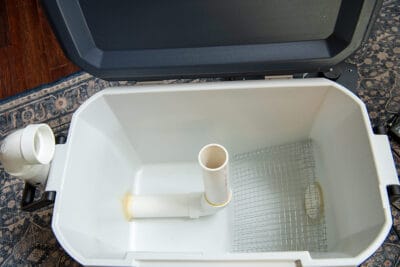
- On the inside, cut two lengths of pvc pipe. One to go from the outside of the cooler, through the hole and to the middle of the cooler bottom. Dry fit with an elbow and cut the second piece an inch or two below the lid of the cooler.
- For the outlet side on the front of the cooler, you can use either a short section of pvc pipe or a pvc increaser. We used an increaser so we could angle it downward a little.
- Using pvc cement, attach all of the pvc components together in place after you are sure you have the correct measurements. I prefer waterproof caulk instead of hot glue, around the cooler holes to seal it well.

- Prop a piece of chicken wire near the vent opening to keep the ice from clogging the front and to give more room for the fog to flow out.
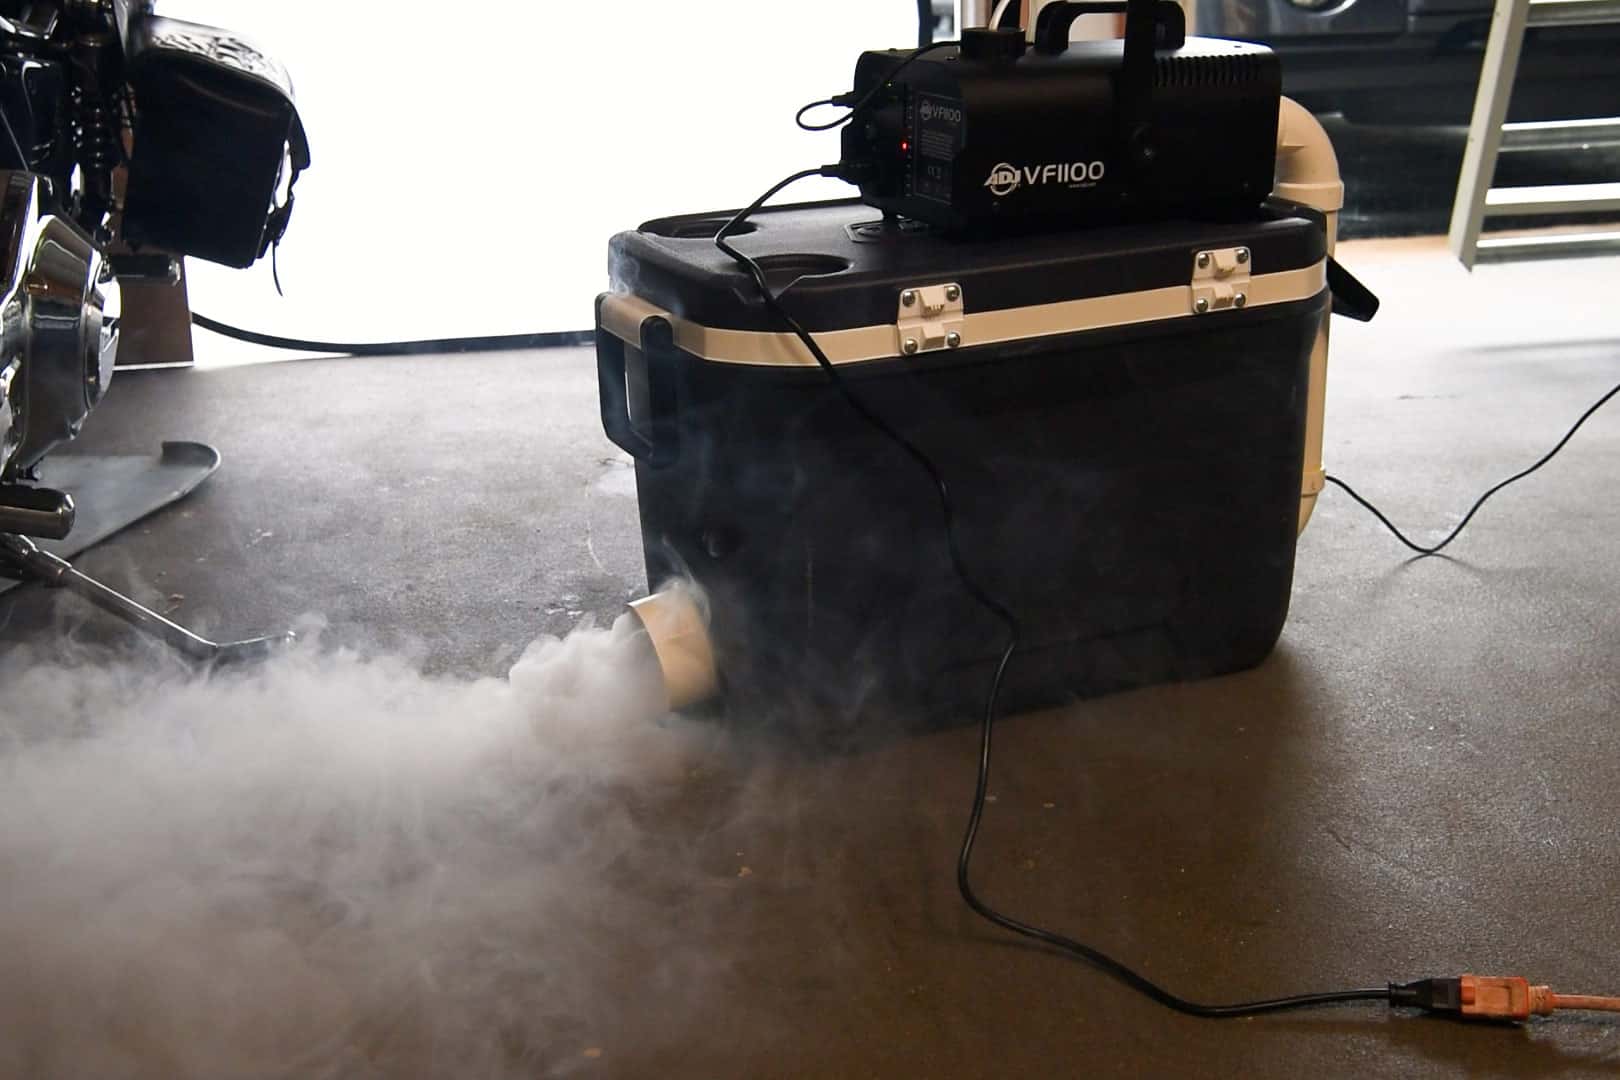
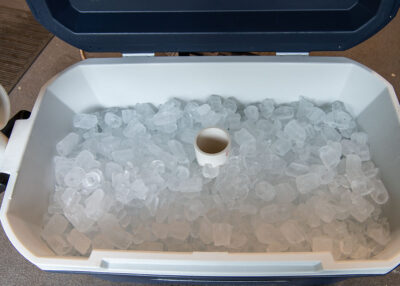
- Place ice inside the cooler. The cold air and ice will cool down the fog as it passes through the cooler. Dry ice works great but can be hard to find.

- Setup your fogger. The fog machine generally must be 1 inch away from the entrance tube to prevent back pressure. Fill with juice and run per manufacturer's instructions. If you have any air leaks from the lid, you can tape closed.

Notes
- The bigger the container (and thus more ice that the vapor comes in contact with) the better. We used a 52qt cooler due to hiding this in the bushes.
- I have seen storage bins, garbage cans, and coolers used.
- Even a slight breeze is going to have major negative effects on the fogging ability.
- The hot fog will pass through the area of least resistance, so keep that in mind for how much ice you add.
Leave a Reply