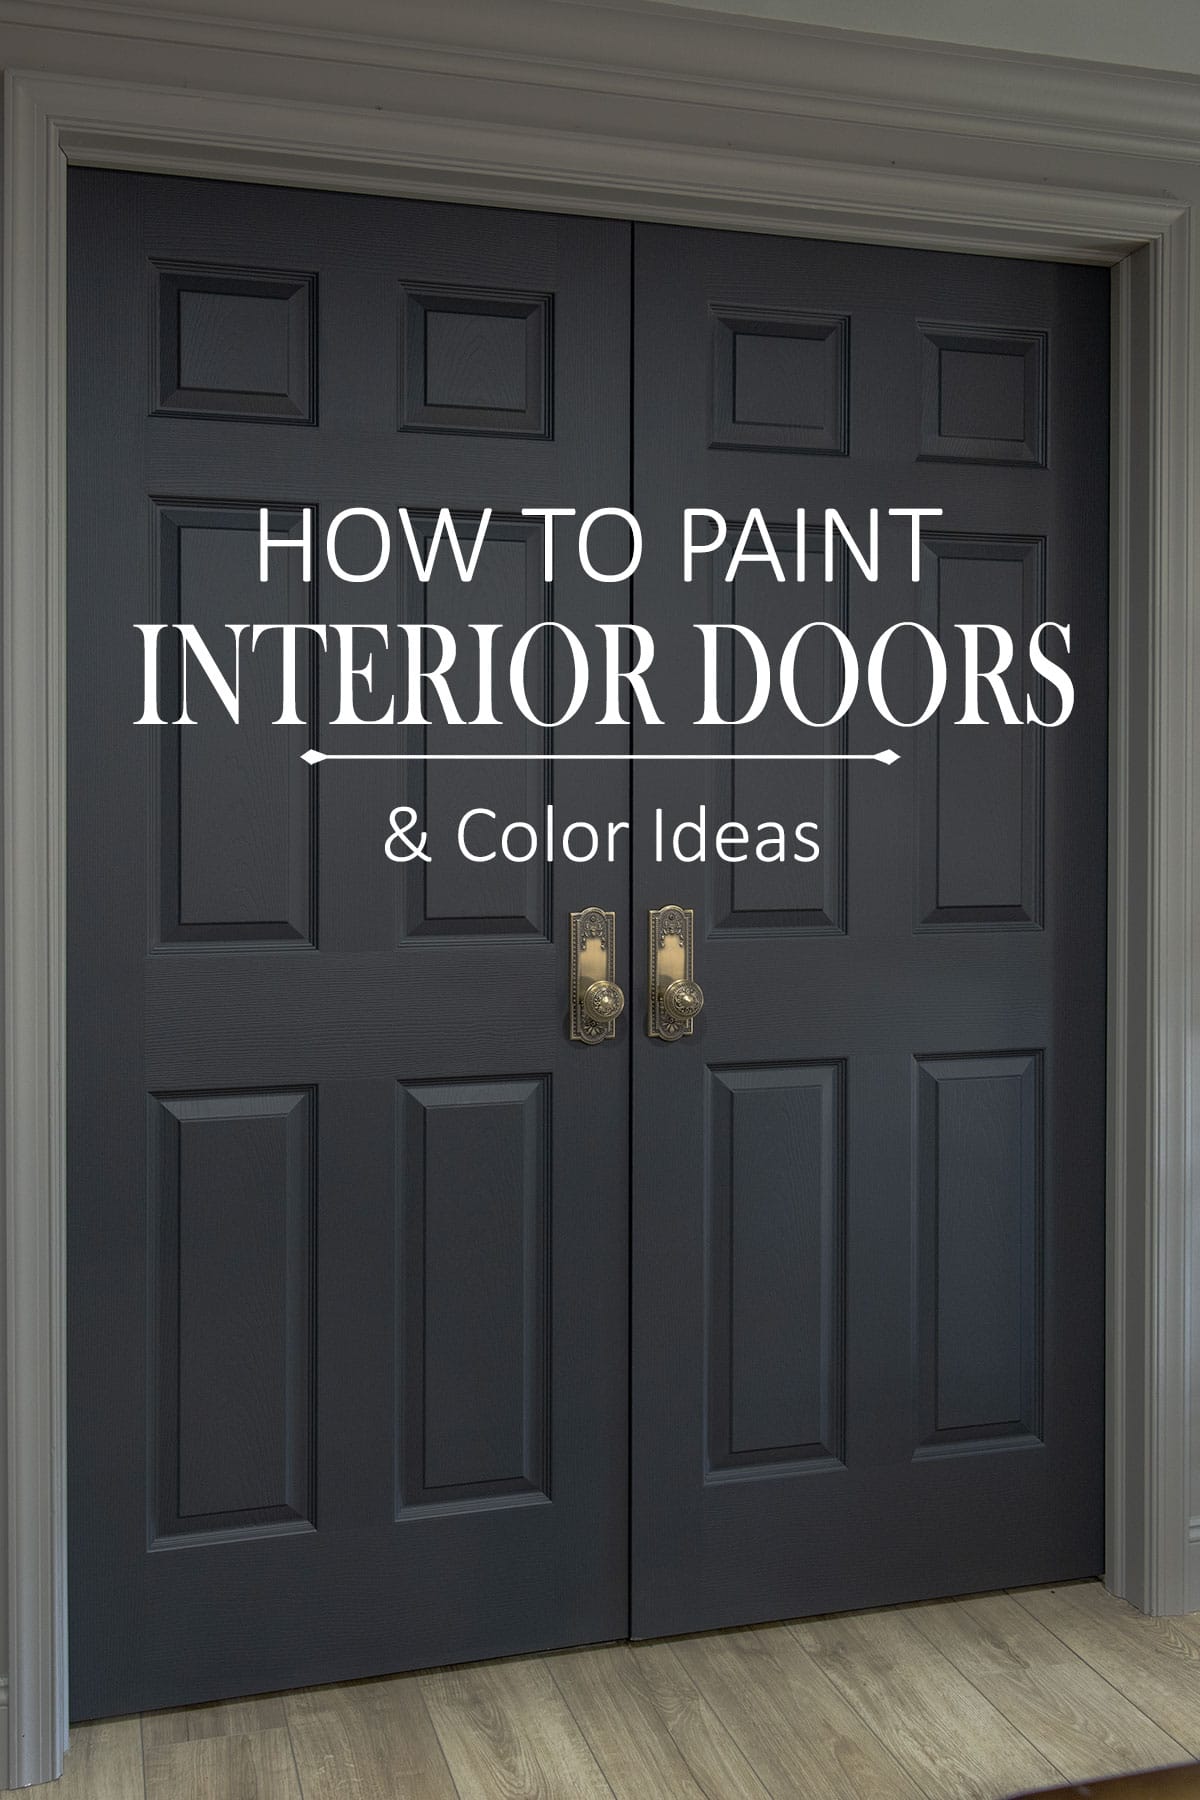
With the right color and technique, interior doors can add depth, character, and a designer feel to any room. This step-by-step guide shares tried and true techniques for painting interior doors, pro tips, and favorite paint colors to help you tackle your own door makeover.
We're finally rounding out our long basement remodeling project. I originally held off on painting the doors until after the walls and trim were finished, mostly because my husband and I couldn't quite agree on the color direction. After some debate (and plenty of swatches), we landed on a compromise that turned out to be exactly the right choice.
While I have painted dozens of doors and baseboards in homes, I know that it’s the small details that make a clean, professional-looking finish. I am sharing all that I've learned about how to prep and paint interior doors including the best tools and techniques for a smooth result. I've also included our favorite door color picks, including the rich, smoky black we used in this space.
How do I prep doors for painting?
If your doors are scratched or dented, take a moment to assess the material. If you have significant wear or dents with hollow-core or metal doors, replacement may be easier because filler often doesn't bond well to the surface. For solid wood doors, however, filling and sanding are better suited.
1. Clean and Remove Hardware
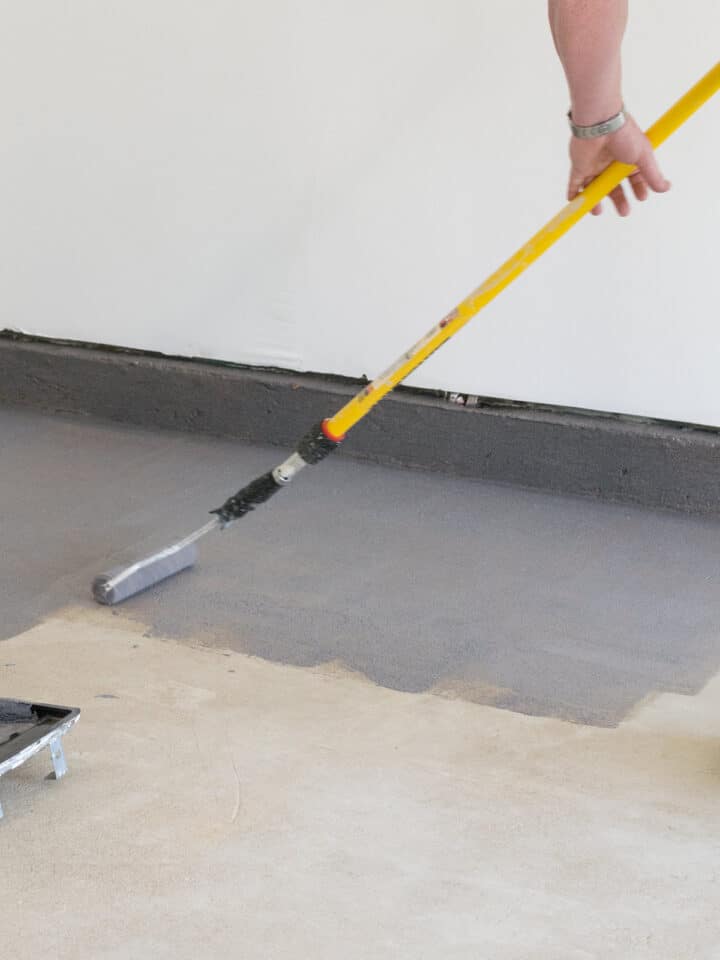
Start by removing handles, locks, and any hooks or hangers. If you’re painting the door in place, tape off hinges carefully. Then clean thoroughly with a degreaser like Krud Kutter or a mix of warm water and dish soap.
Pro Tip: Even brand-new doors can have a waxy coating or invisible residue, so you should always clean them. Paint will not bond well to greasy fingerprints or waxy coatings.
2. Do I need to sand and prime?
New doors are often primed, so you don’t need to sand or prime. For previously painted doors, lightly sand with 150-220 grit sandpaper to give the surface some tooth. Focus on glossy areas or old paint runs. If needed, spot prime areas that have wood filler patch.
Pro Tip: Not sure if you have previous oil or water-based paint? Rub a small area with rubbing alcohol. If the paint comes off, it's latex. If it doesn't, it's oil-based and needs a primer like this one for moving from oil to water-based paints.
3. Paint in Place or Paint Lying Down?
It’s a personal choice, but I like to paint while the doors are hung so that I can paint both sides.
Painting flat gives better control, especially if you’re aiming for a super smooth finish with a sprayer or roller. It also reduces the risk of drips-but you'll need more space and time for drying, and you cannot paint both sides at the same time.
Painting in place is faster and avoids the hassle of reinstallation. Just make sure to tape carefully around hinges and use a drop cloth. A wedge underneath (like a wood shim or even a paint stir stick) to keep the door from swinging while you work.
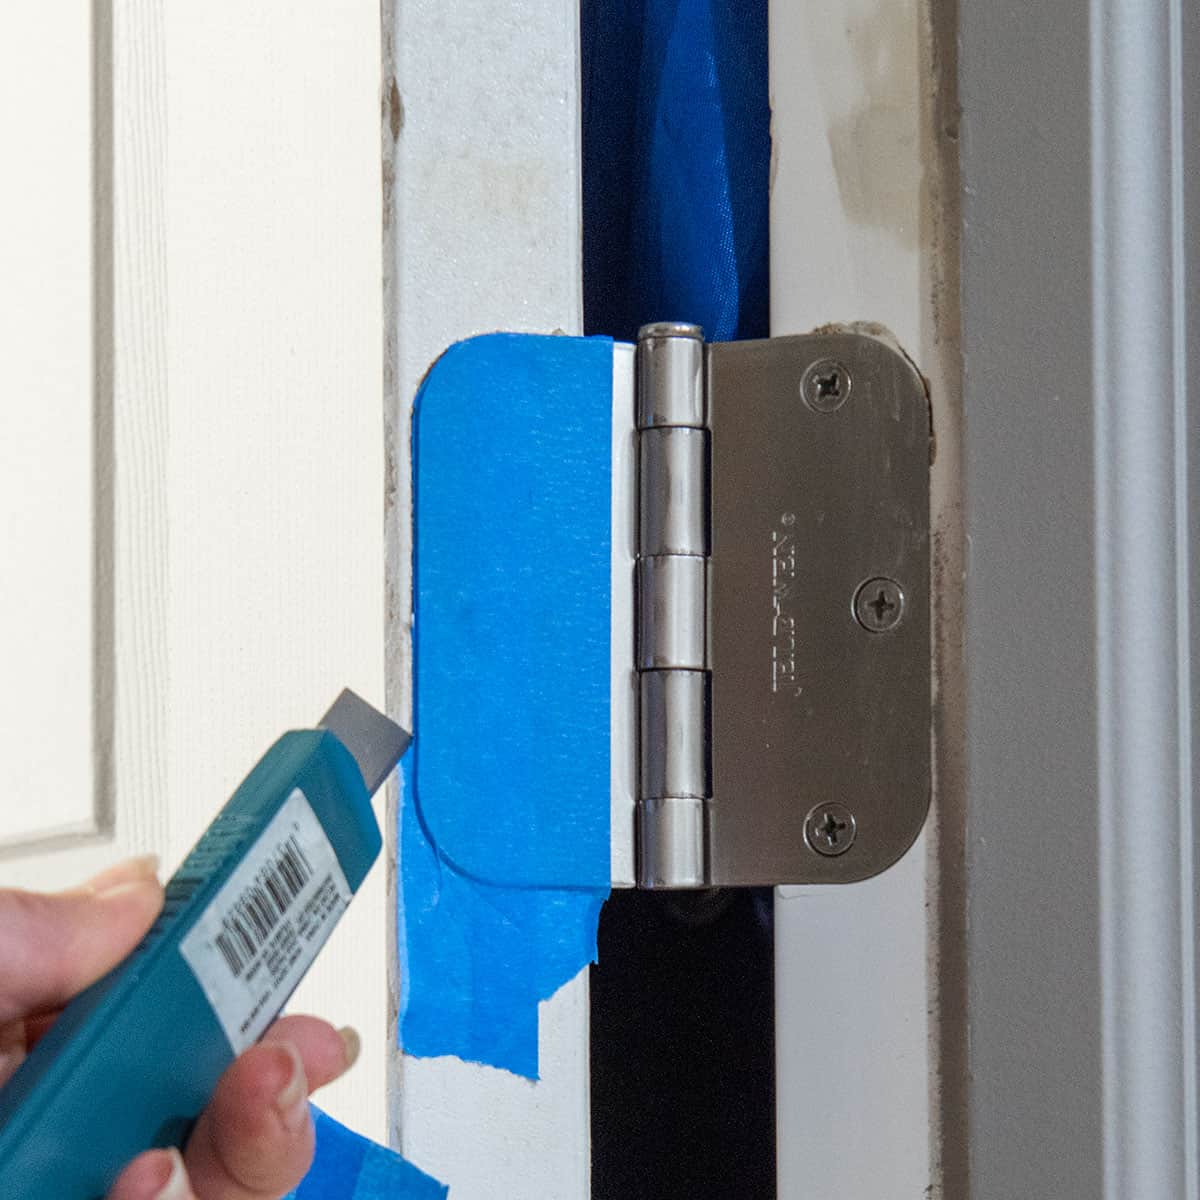
For taping door hinges, it’s easiest to put some tape over the mortise hinge and the cut out the shape.
Don’t forget to tape both sides if painting both sides of the door. Above is how I tape around the outer hinge and the door can still be moved if necessary.
Painting Steps: Smooth and Even
Painting doors is pretty forgiving, but I do like a certain order to keep from drip marks and overlapping streaks.
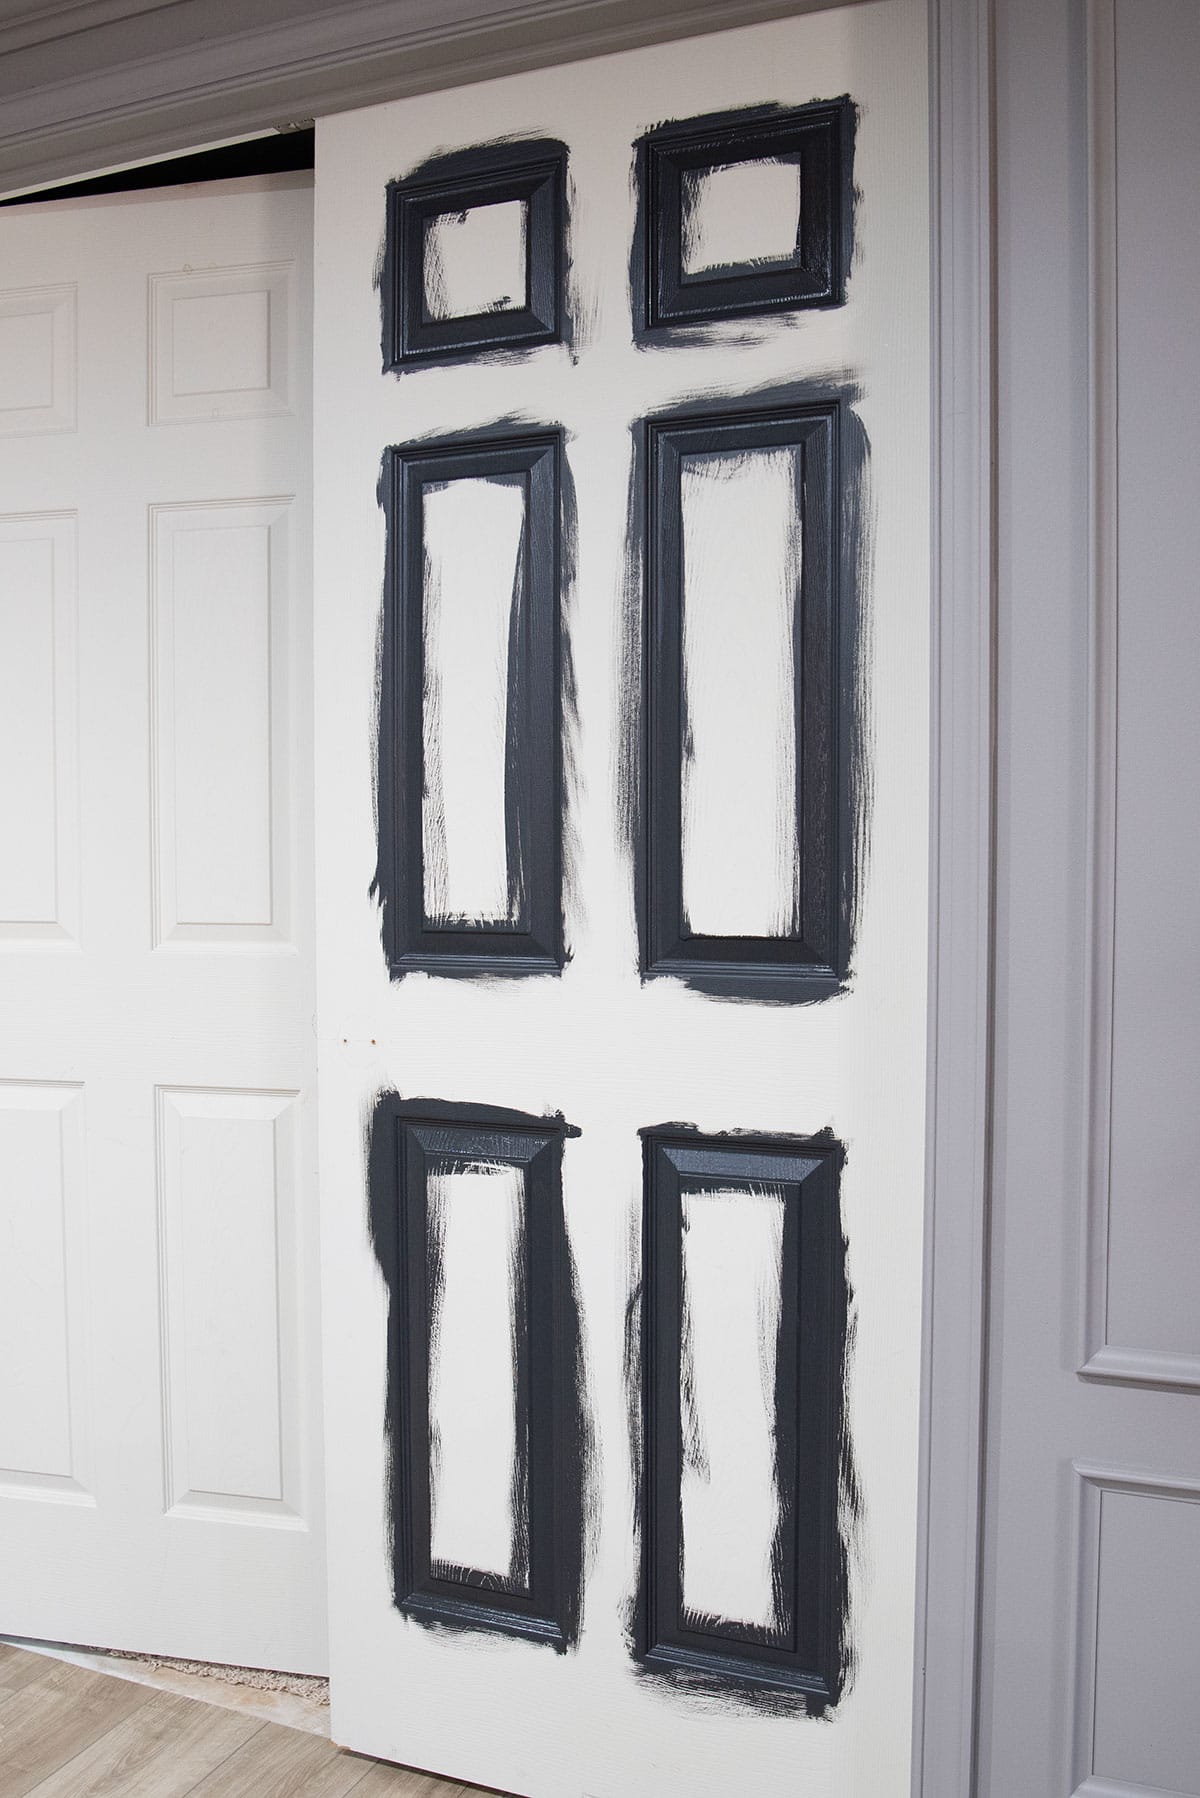
Begin by brushing around recessed panels and decorative edges with a high-quality angled brush. Feather the brush strokes into the surrounding areas to avoid lap marks when rolling later. The only other part I use a brush for is the side of the door with the hinges because the roller won’t fit.
Once the detailed areas are brushed in, use a small foam or microfiber roller to cover the flat surfaces. Work quickly and maintain a wet edge for a smooth finish.
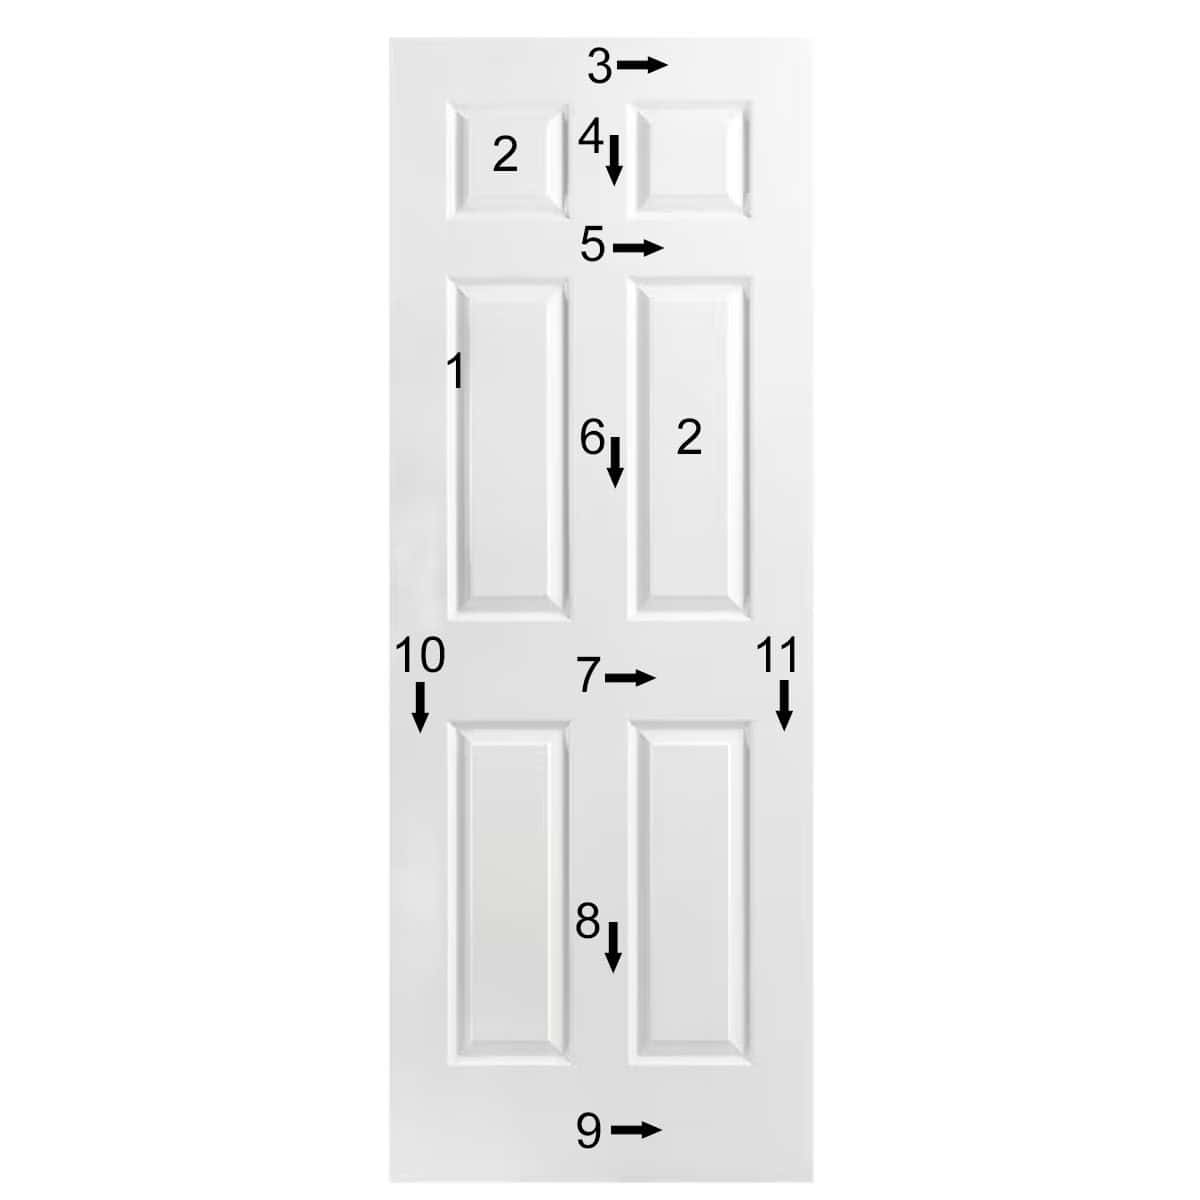
Suggested Order for rolling flat surfaces:
2. Raised or Recessed Panels.
3-9. Work top to bottom on the center parts in a hopscotch type pattern, painting in the direction of the woodgrain (shown in arrows as either horizontal or vertical).
10 & 11. Outer vertical edges.
12. Sides of the door and top (if painting).
Choosing the Right Color for Interior Doors
Most people default to white or black doors-but interior doors are a great place to add personality, contrast, or depth to a space. Whether you’re going for timeless, bold, or cozy, the right paint color and finish can set the tone for the whole room.
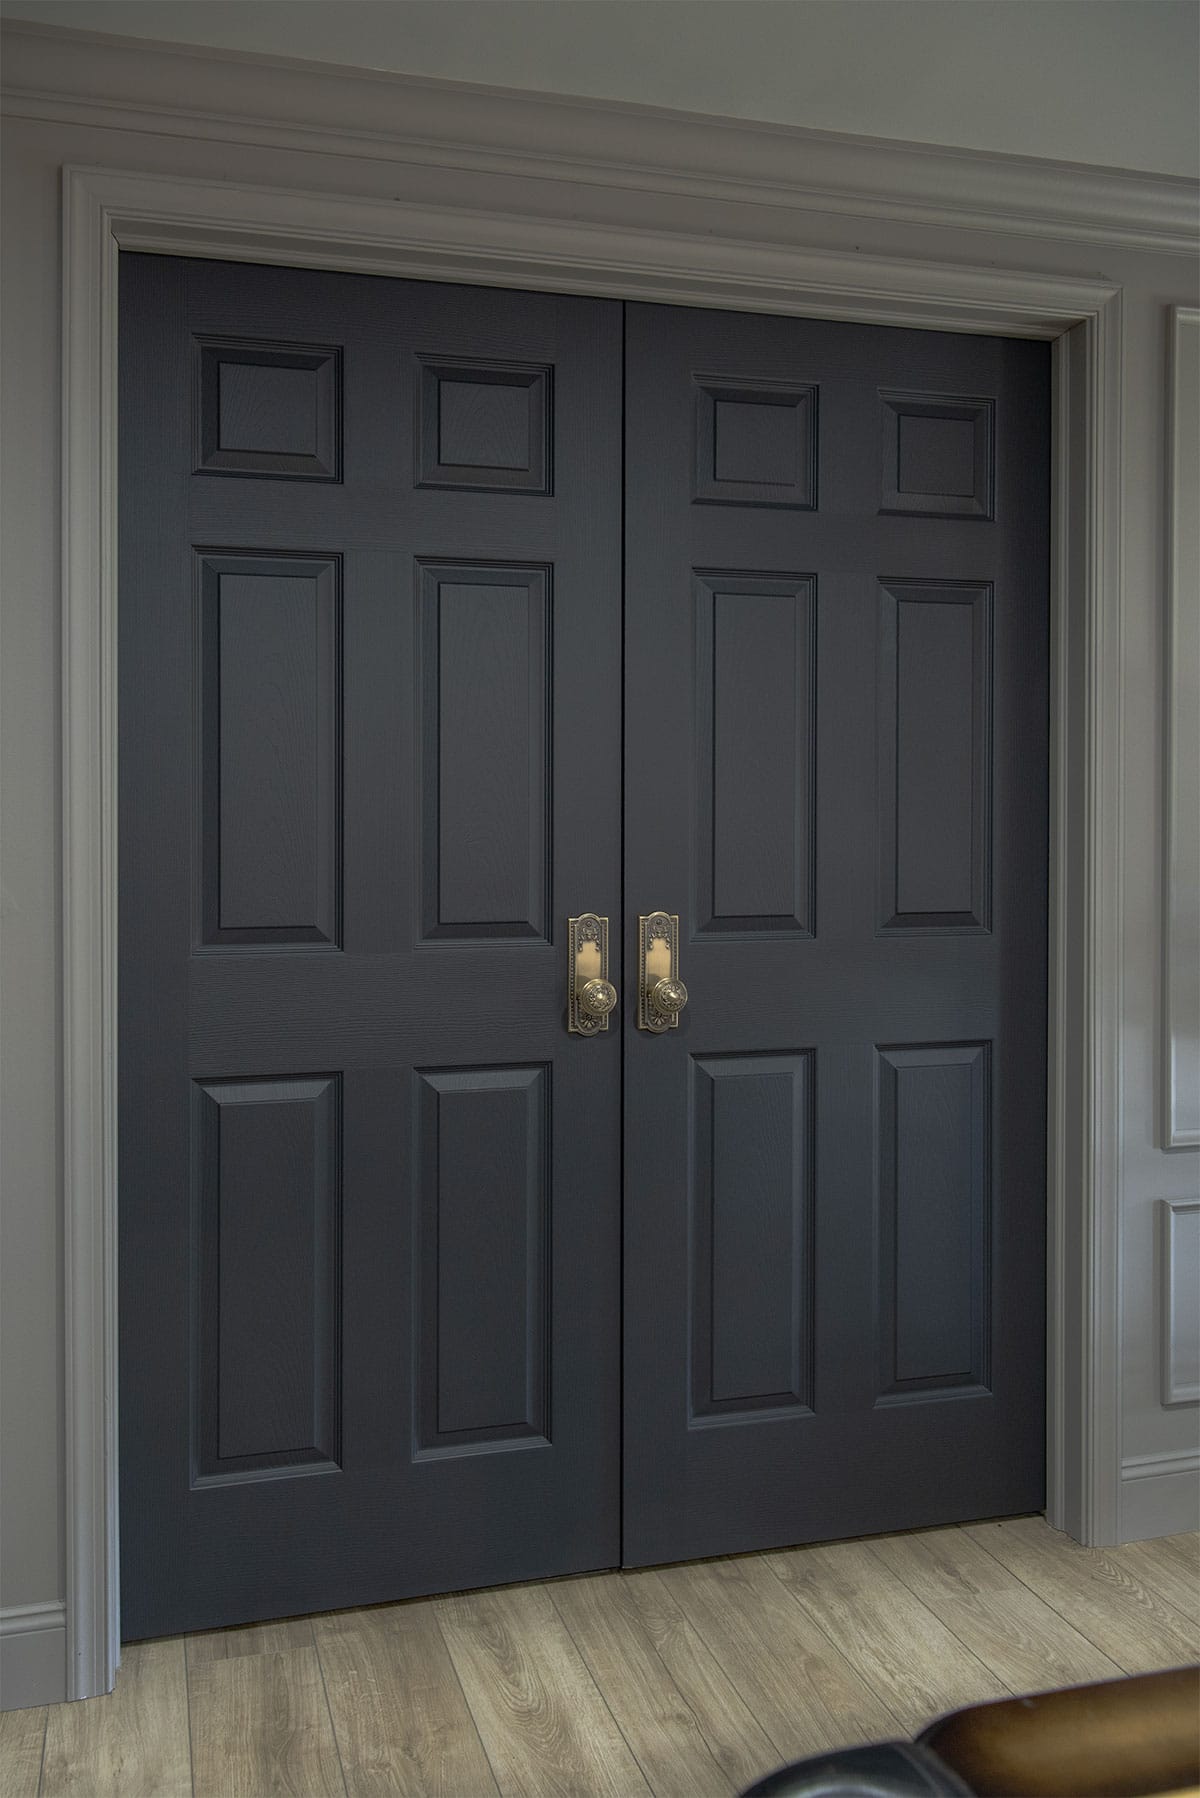
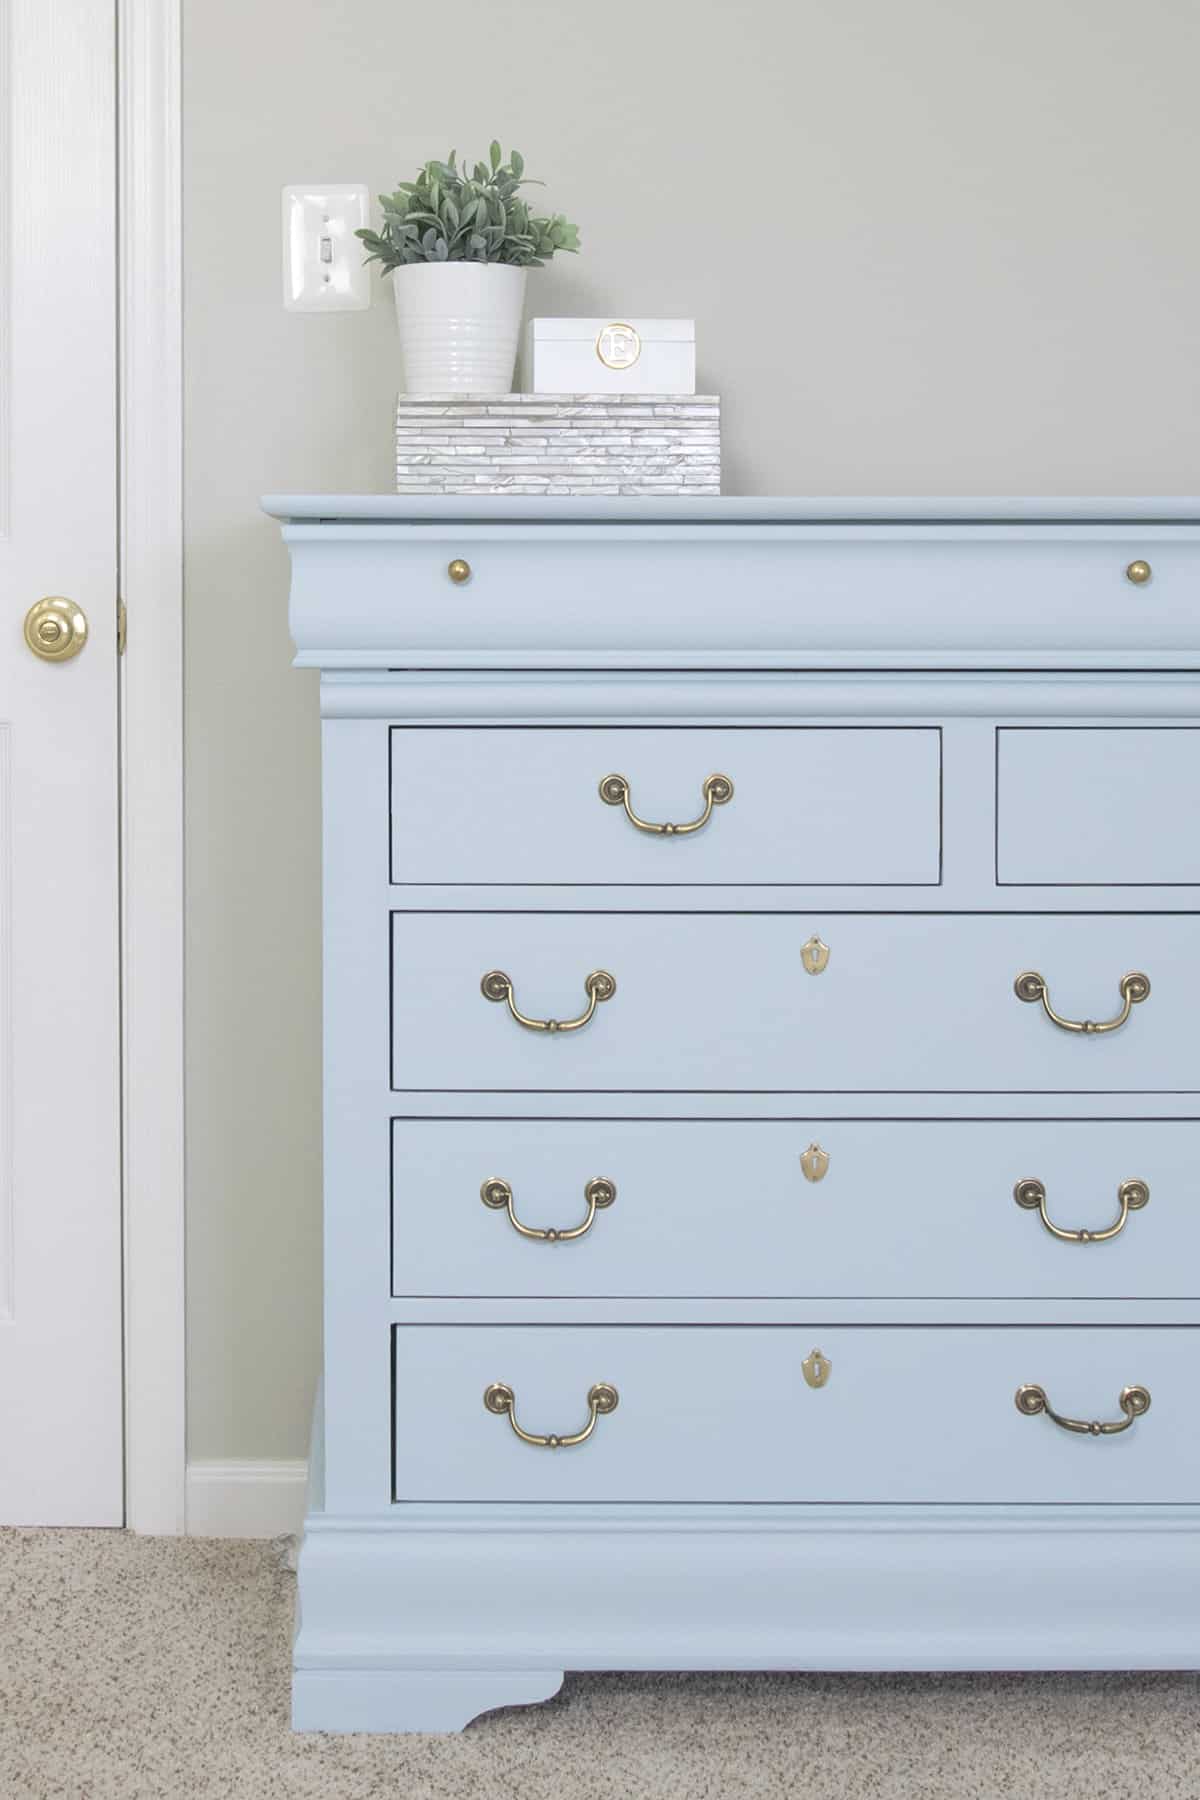
For our basement project, we chose a soft black with a moody, smoky undertone. I lightened Fusion Mineral Cast Iron just a bit. The exact ratio to cover the cabinets and these doors was 4 pints of Cast Iron + ¾ cup of Victorian Lace, and I still have some left over for touchups.
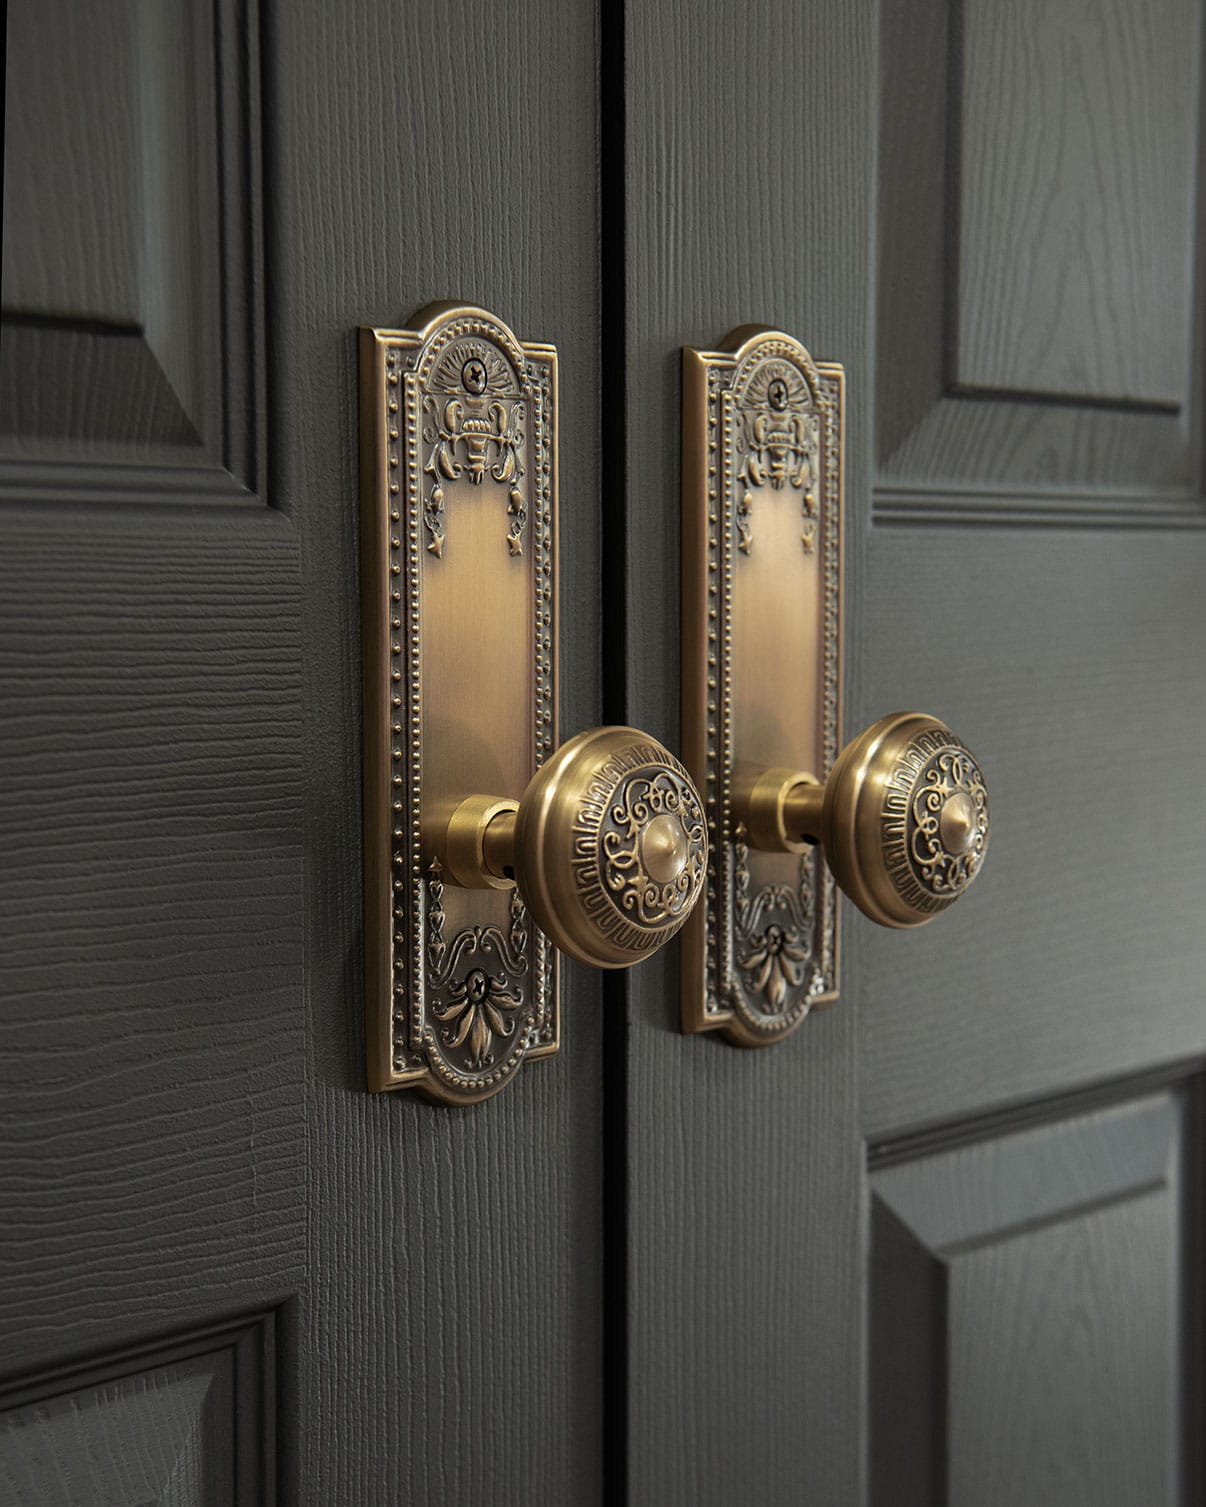
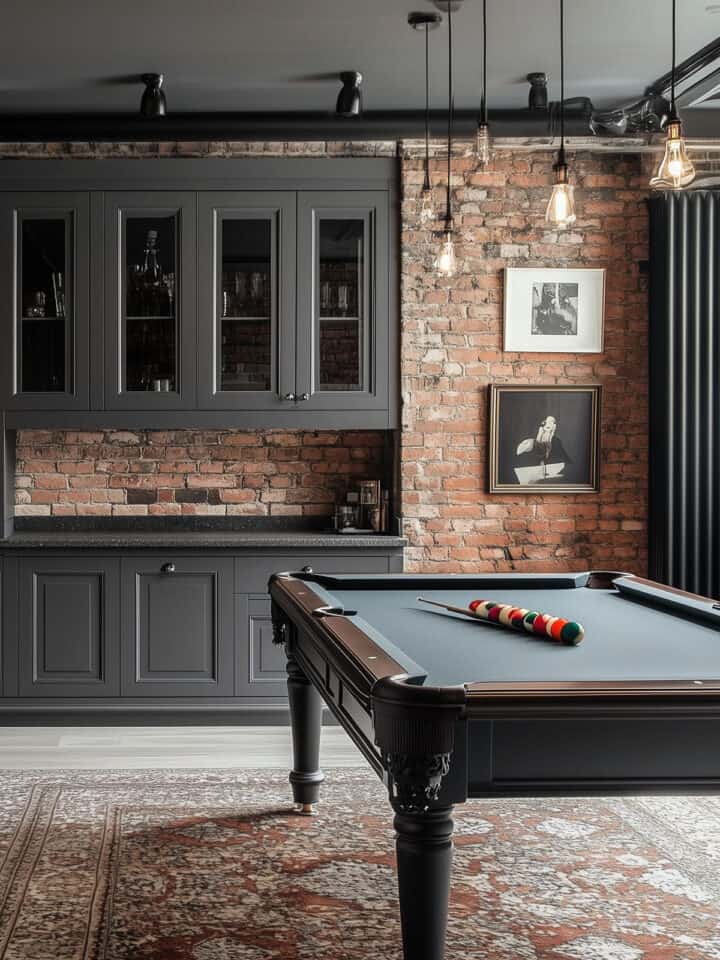
The color as well as these antique brass handles perfectly match the opposing built-in cabinets, creating a seamless, color-drenched effect across the space. You can see that transformation on my post what to know when painting cabinets black.
Designer-Approved Interior Door Colors
Not sure where to start? Here are some stunning and tested interior door color ideas, grouped by mood and style:
Moody & Sophisticated
- Benjamin Moore Wrought Iron - deep charcoal with softness
- Sherwin-Williams Iron Ore - a rich, charcoal black
- Farrow & Ball Railings - blue-black with classic edge
→ Explore more moody paint colors we've used in our projects.
Earthy & Organic
- Behr Nature's Gift - a soft sage green
- Tempe Star by Sherwin Williams - a sophisticated calming blue green.
- Farrow & Ball Lichen - mossy and timeless
→ Find more ideas in our guide to sage green paint colors.
Bold & Unexpected
- Magnolia Home Moody Fig – a saturated deep burgundy with brown undertones.
- Benjamin Moore Hale Navy - a tried-and-true classic
- Sherwin Williams Lemon Twist – A bright, vibrant golden yellow
→ Check out our favorite blue and navy paint colors and how to use them.
More Like This: Paint Colors & Projects
I'm a firm believer that doors and trim deserve just as much design love as walls and furniture. If you’re inspired to give your space a little extra polish, here are more paint color guides and DIY projects to explore:
FAQs
I typically recommend at least 2 paint coats for full and even coverage. That does not include the primer coat.
For most projects, a satin or semi-gloss finish works best. These sheens are durable, easy to clean, and more resistant to scuffs than flat. Satin is a little more matte, but I also recommend springing for a more durable paint made for trim or furniture like an acrylic enamel.
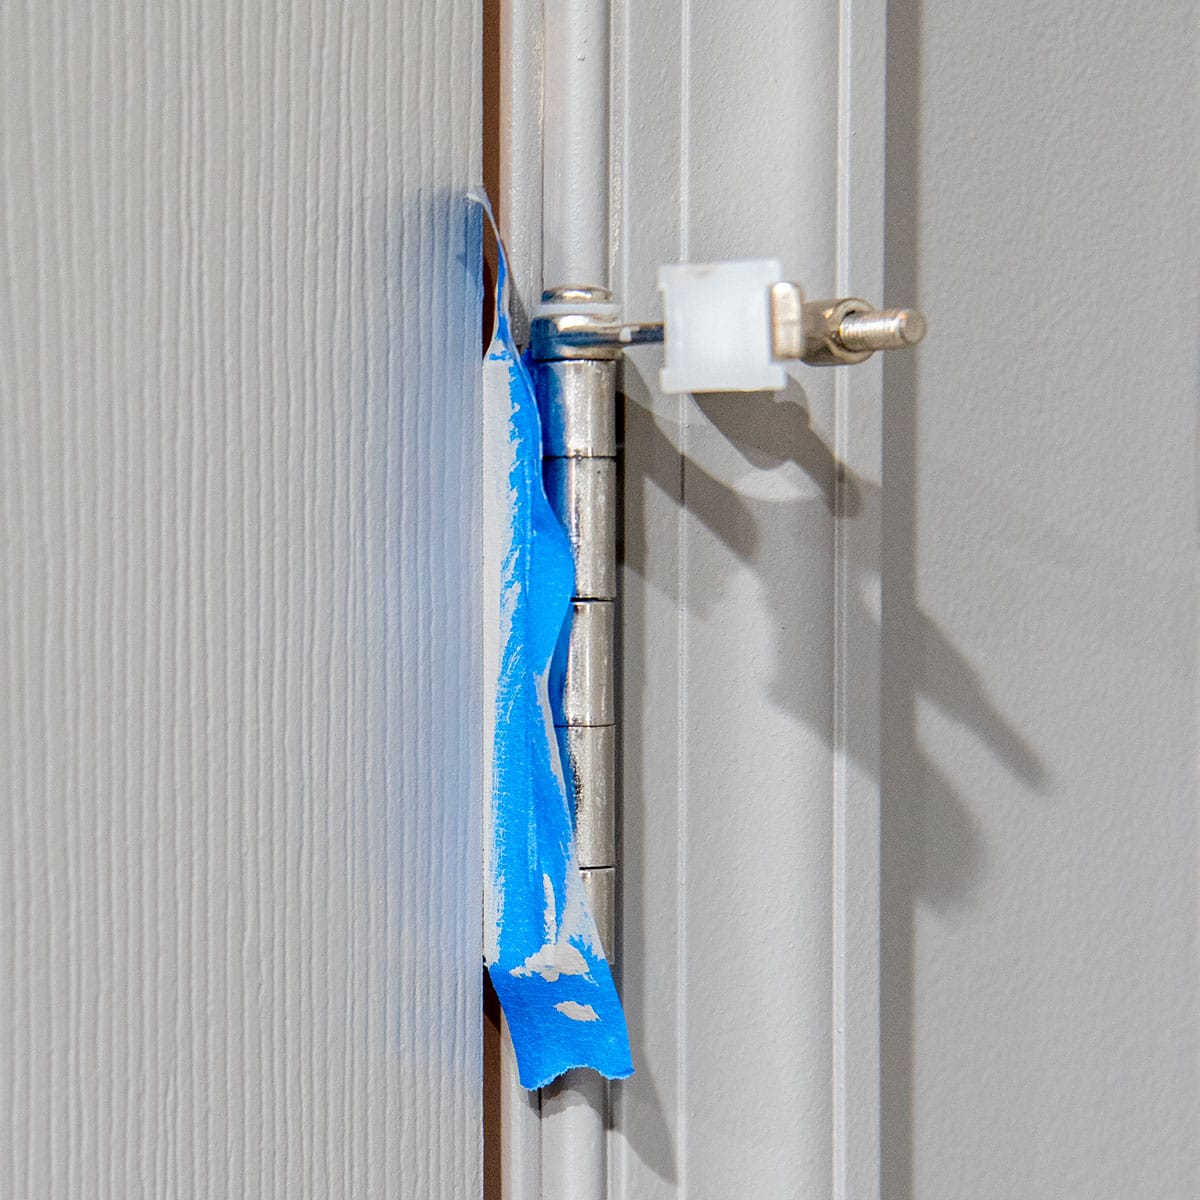
Remove the tape while the paint is still wet or tacky to keep it from tearing the paint.
Yes, I find this method easiest, especially if both sides need to be painted. You will still have to remove doorknobs and tape around hinges though.
While white may show mars and scuffs a little more, black doors and furniture have a tendency to show dust even more than white.
The brass handles are from Nostalgia Warehouse. I mix and matched the Egg & dart knob with the Meadows backplate.
To create this door color, I lightened Fusion Mineral Cast Iron just a bit. The exact ratio to cover the cabinets and these doors is 4 pints of Cast Iron + ¾ cup of Victorian Lace, and I still have some left over for touchups. I never recommend making your own paint colors, but its sometimes understandable in order to get the look you want with the sheen and durability in mind.

Grab our free series "Weekend Home Projects that will Transform Your Life" Sign up below to receive updates including free printables, organization tips, home improvement projects, recipes and more! |

PS I love seeing your creations! Be sure to take a photo and tag #cravingcreative on Instagram! You can also stay in touch with me through following me on Instagram, Pinterest, and subscribing to the newsletter!
Leave a Reply