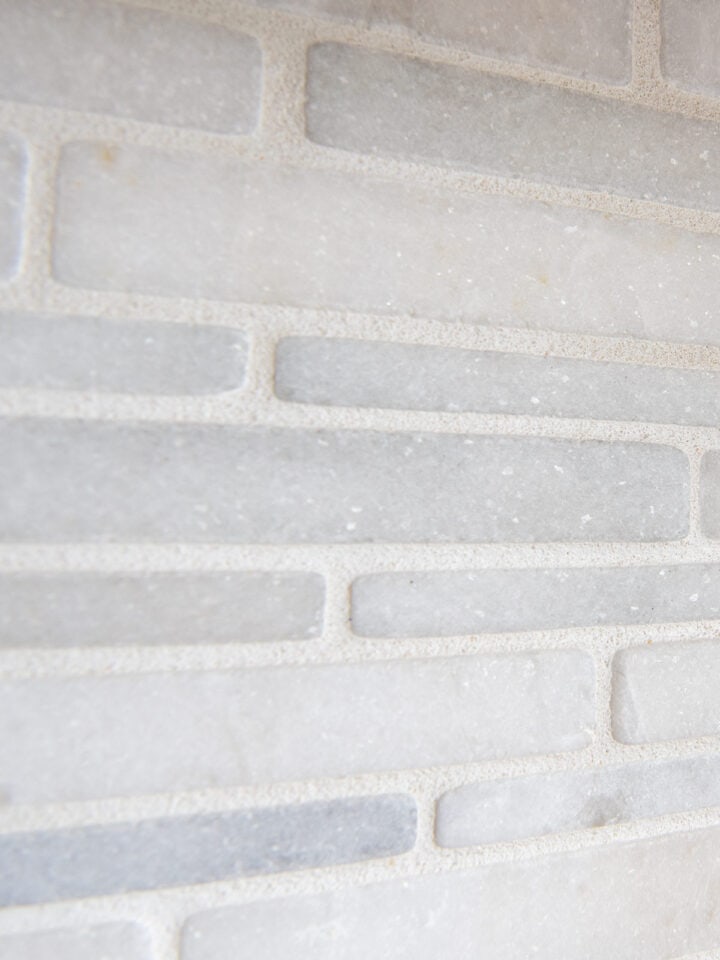
Like elegant bricks, Beveled Subway Tile has a low-maintenance, timeless style that works beautifully in kitchens and bathrooms. However, there are some important characteristics you need to be aware of before installing beveled tile.
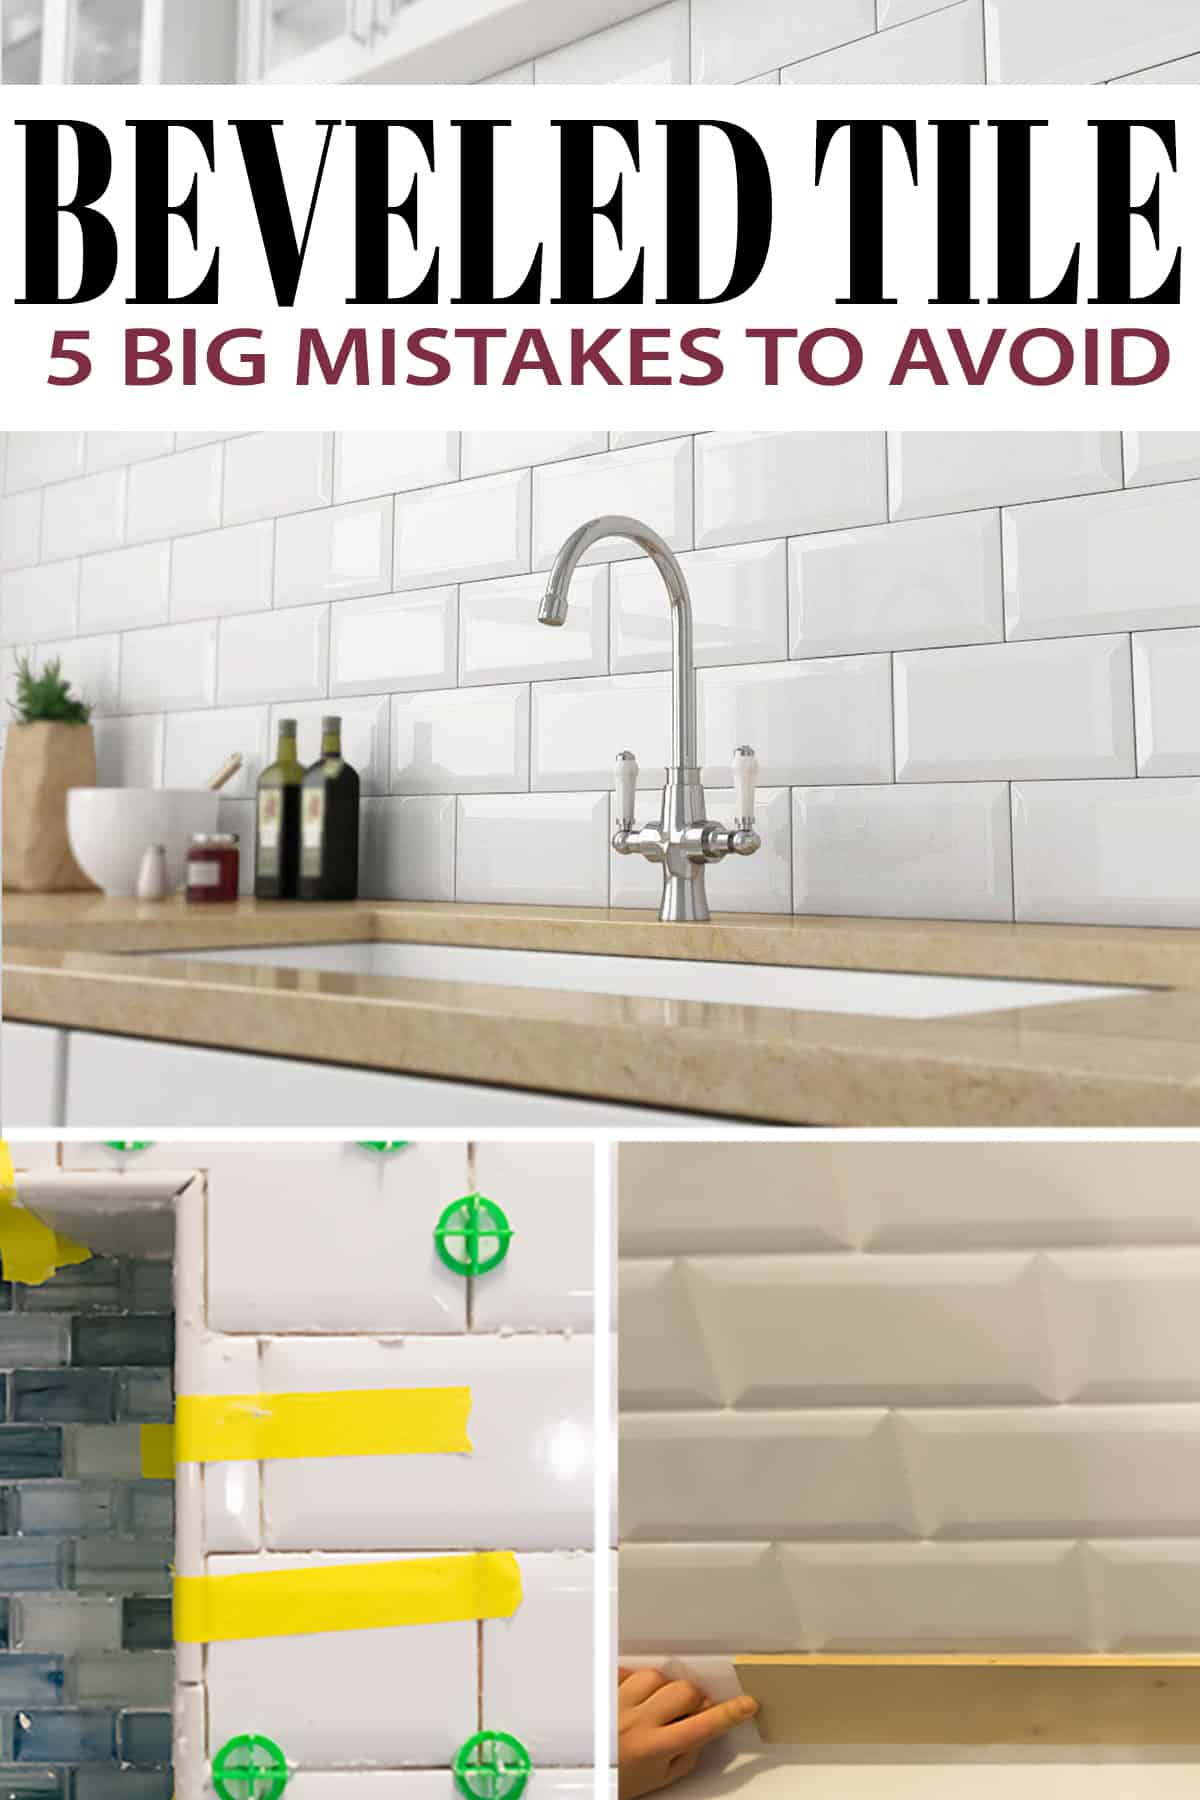
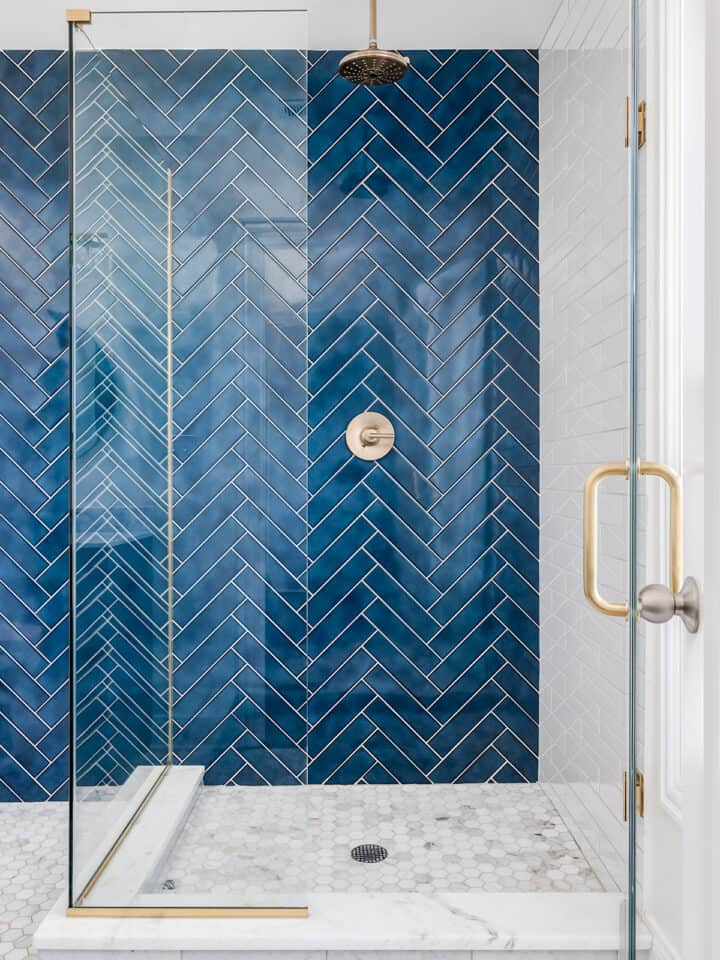
Classic Subway Tile is a big trend that doesn’t seem to be going anywhere. It has a clean look that coordinates with many different décor styles, such as our modern classic bathroom we are showcasing today, the herringbone tiling installation, and our traditional wainscoted bathroom. The beveling gives it an elevated, sophisticated brick characteristic.
However, when installing a beveled subway tile, there are some important characteristics that make it a bit different to work with than other tiles.
6 Quick Tips to Expertly Install Tile
- Use a mortar mixer paddle attachment. It’s much faster, more consistent, and easier to mix than by hand.
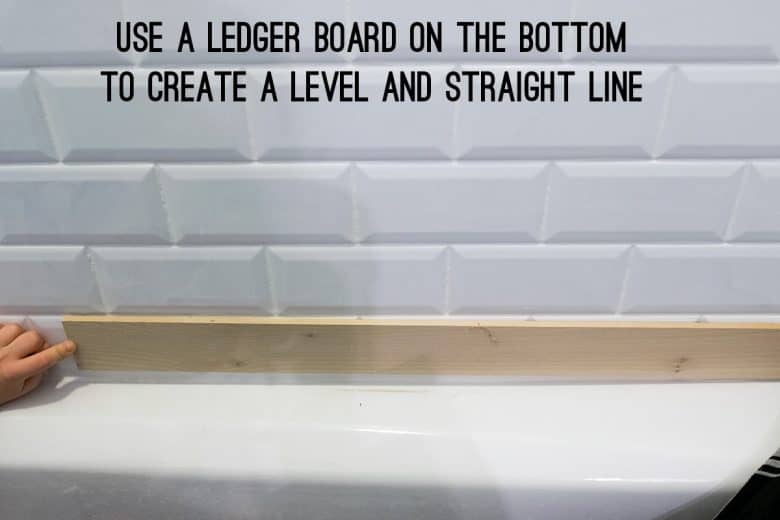
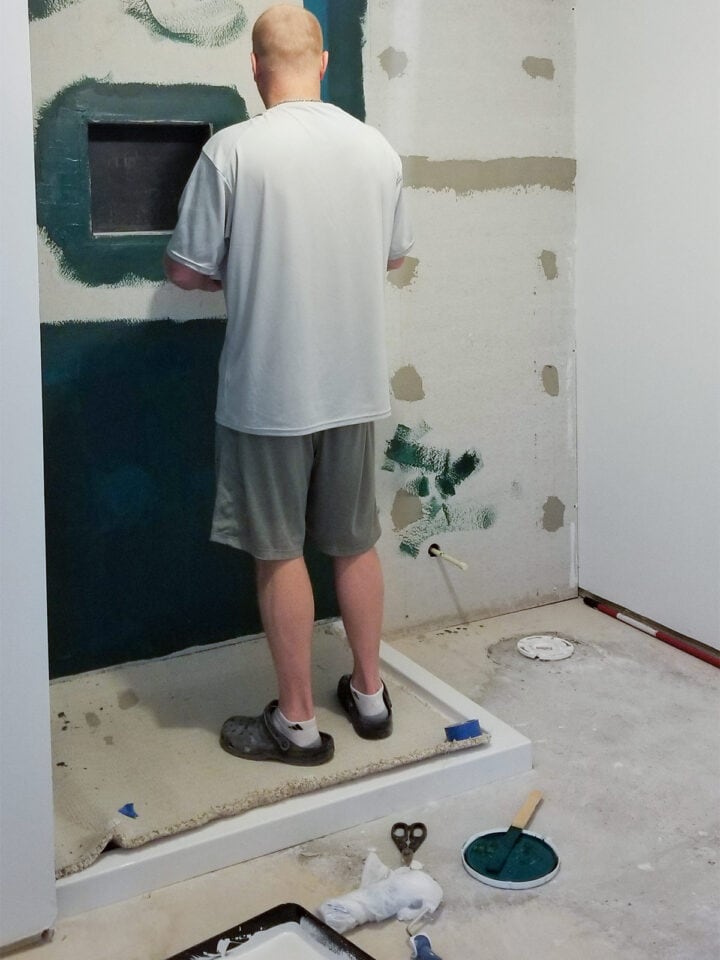
- When starting, use a ledger board in place of the first row. This will allow you to get perfectly straight lines moving upward. (The photo below is me holding one up in place since I forgot to take a photo of it before tiling.)
- I have used quite a few brands over the years, and my favorite grout to work with is Mapei with the Grout Maximizer.
- I still clean and seal my grout yearly. While they say it’s not required, I can confidently say it lasts longer and stays cleaner this way.
- If using a natural stone, in particular marble, check the porosity as some grouts may stain it. With real marble, only use a white or very, very light grout. Marble will pull the grout color into the tiles.
- Wipe off excess mortar from the fronts of the tiles and grout lines BEFORE IT DRIES. Chiseling out excess mortar that grout won’t cover is much longer. I clean the tiles as I go.
The Most Common Mistakes with Beveled Tile
Mistake #1: Ending a Row on the Bevel
One of the biggest problems is ending with a full piece, which gives an uneven looking edge. For a more finished look, layout your design so that the beveled edges are cutoff when butted next to an endcap piece. This is also true when working in corners or if you are ending into a wall.

Mistake #2: Not using an endcap tile.
Ceramic tile has a glaze on top. This glaze does not extend inside so you have an ugly edge when you cut. To hide this edge, you need an endcap tile. Often times, you can edge with the same tile, but not when installing a high beveled tile.
There are several styles including tiles, tile trims, and metal edging trim. If using a tile, the tile must be as thick as the thickest part of the main tile.
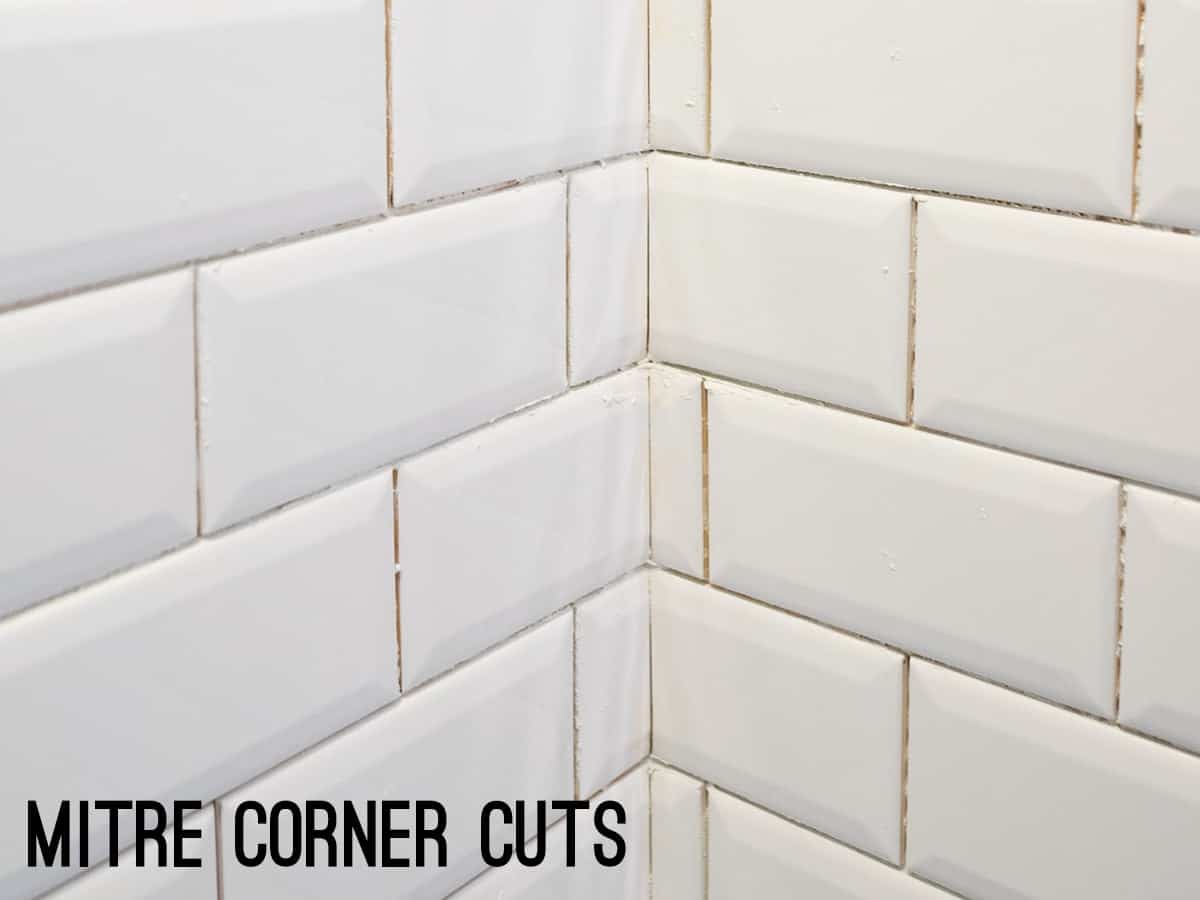
Mistake #3 : Not Cutting Bevels in the Corners
In corners, mitre cuts are an absolute necessity when installing beveled edge tiles. A mitre cut means that the cut is done at a 45-degree angle so that both ends connect together to fit a 90-degree angle.
The one thing you will find is that walls in your house may not be perfectly square, or 90 degrees, so you may end up with a tiny gap between the tiles. Don’t worry, grout in the corners will cover that up without problem.
Pro Tip: If you are looking for a tile saw, this one is a good Tile Saw on a budget (which does mitre cuts).
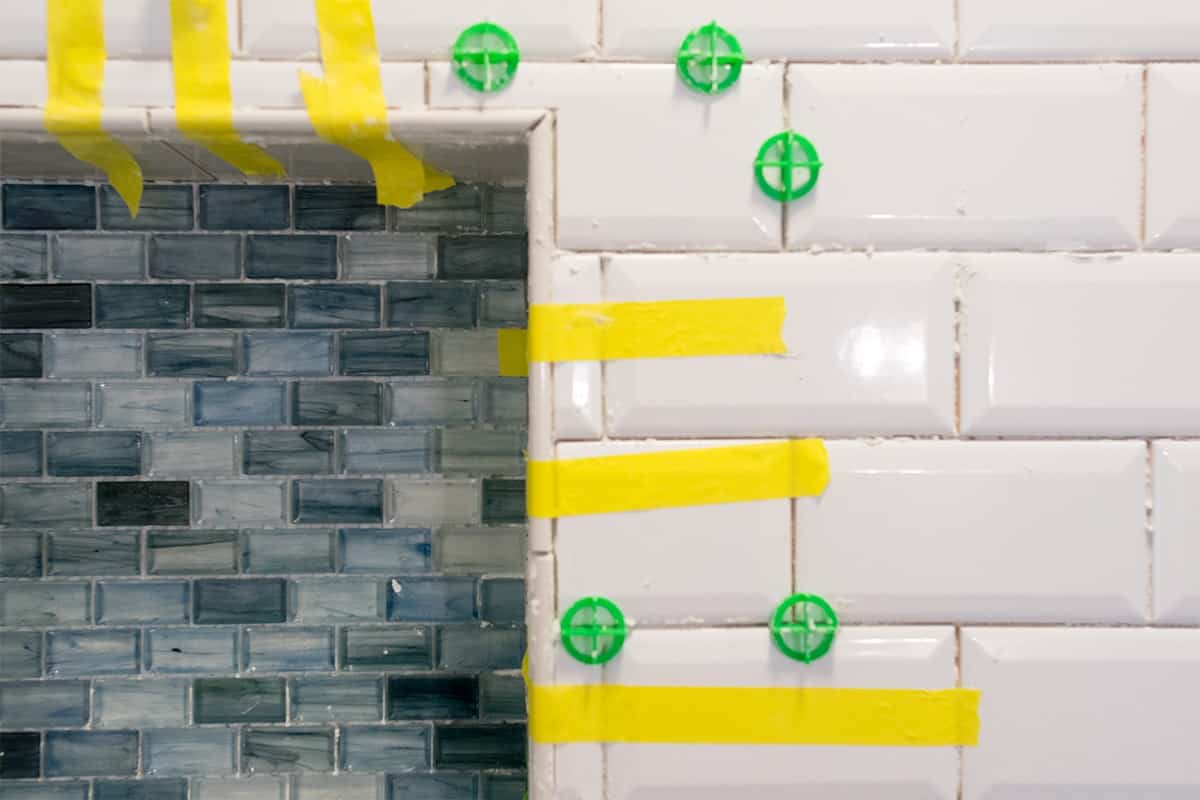
Mistake #4: Not Using The Right Spacers
I recently had to tear out a professional tile installation for my mother-in-law’s brand-new house because the contractor believed hexagon tiles don’t need spacers. The tile job was so terrible that the grout lines varied from nothing to 3/16 of an inch. Please don’t do this.
I am old school when it comes to spacers and very picky. Over time, I have come to prefer T-spacers rather than X-shaped spacers (pictured below), but either will work with this tile. I also keep wedge spacers on hand because they are so handy for keeping proper alignment. You can cut them to size.
Mistake #5: Complex Cuts
Tile that requires multiple cuts are the hardest to get correct fit. To make this easier cut a piece of paper and fit into the tile space to create a template. After the tile is cut to the shape of the template, dry fit to check before installing.
Grouting Beveled Tiles
With most tile, I recommend using a hard rubber float for grouting around the tiles. However, beveled edge tiles make it difficult for a rubber float to properly push into the grooves, resulting in a lot more wastage of grout mixture.
A softer masonry float can be used that will result in less wastage. I personally still use a black rubber float to spread the grout onto the tiles and then, using my dry fingers, removed the excess back to the bucket.
Whichever float you choose, you will still need a tile sponge to even out the grout and create clean professional lines.

Subway tile is a beautiful option whether you choose beveled edge tile or another option. I admit that I am a very messy tile installer, but the look of this tile is worth the effort of thinking a bit ahead. If you have any questions, let me know in the comments below!
Update: You Can See Our Completed Bathroom Renovation Here.
Looking for More DIY Home Improvement Projects? Check These Out:
- How to Avoid the Most Common Bathroom Design Mistakes
- Simple Tile Shower Niche Installation
- How To Choose the Right Bathtub for Your Remodel
- How to Caulk a Shower
- What to Know Before Finishing a Basement

Grab our free series "Weekend Home Projects that will Transform Your Life" Sign up below to receive updates including free printables, organization tips, home improvement projects, recipes and more! |
More DIY Tile Tutorials
PS I love seeing your creations! Be sure to take a photo and tag #cravingcreative on Instagram! You can also stay in touch with me through following me on Instagram, Pinterest, and subscribing to the newsletter!
Mick says
Hi, I see you do miter cuts for internal corners, what do you do for external corners?
Thanks.
Mick.
Rachel says
It depends on the situation. You can either do miter cuts (but reverse the angle) or you can use an edge piece. Our shower niche is edged in a long edge tile, which you can see in the photo with the yellow tape. Those long pieces are taped in place to keep them from moving until dry.
Betsy says
Is there a way to install grab bars in a shower with beveled subway tile without leaving large gaps that need caulking?
Rachel says
Grab bars should have large flanges at either end that will cover the tile edges, similar to the plate behind the wall water knob. That flange should have a foam or similar ring around it on the backside that will keep water from running behind the plate. You can always add more caulk or something like 3M tape around the ring to be sure, but it makes it harder to remove in the future if you needed to.
Danielle says
Hi – We are very interested in installing 12×12 Ice Bevel subway tile as a black splash on a large wall that will not have cabinets. Since the space is a little larger and a focal point, I wanted to install the tiles vertically. I googled images and cannot find any pics – am I able to do this with this type of tile or is it not recommended? Hence why I can’t find any pics. Any HELP would be greatly appreciated 🙂 Thanks!
Rachel says
You are just ahead of the curve. 😊 I can’t think of any reason that the tile couldn’t be placed vertically. Depending on the layout of your wall, there may be a bit more waste to take into account.
Ann Harris says
I am about ot tile my alcove bathtub walls with a beveled grey subway tile. A am considering mixing tile patterns by doing herringbone on the back wall and a regular brick pattern on the two end walls. Have you ever mixed tile patterns in this way and if so, any tips I should avoid? Or based on your experience, should I avoid mixing patterns in this manner?
Rachel says
Yes, I have mixed tiles in several projects, both on the blog and for clients. I did one project very similar to yours in our herringbone pattern tutorial. It is an inset rather than a whole wall. I can’t think of any specific tips to mixing patterns as long as the tiles are a similar thickness. With herringbone, there is a bit more wastage of tile, so you may want to take that into consideration when purchasing.
Heather M says
what color of grout is used with the subway tile in your bathroom tub area?
Rachel says
In this bathroom, it is a bright white grout. I have also done a light gray called frost from Mapei in several bathrooms with white tile.
Anthony says
Hi Rachel, please help. I am installing a new tub and going to tile with a 3” x 12” deep bevel subway. I can’t for the life of me figure how to prevent water from getting behind the fixtures escutcheo
cover plate without heavy beads of caulk which I don’t want to do. I’ve reshercdd and can’t find anything online for this particular predicament. Any suggestions would be great. Thanx in advance.
Rachel says
Most escutcheons plates I have worked with often come with a foam ring on the back to prevent water. If that isn’t deep enough, there are a few things you can do. Caulk works, but it makes cartridge replacement or other repairs more difficult. I have always used plumber’s putty – shape it into a tube and then roll into a large ring (large enough to cover the hole the handle comes through but not large enough to smush out the sides of the plate). Press the ring onto the back of the plate. When you put the plate on, the plumber’s putty should be thick enough that it pushes into those gaps, creating a seal. You won’t see it from the outside, which I know can make people nervous.
You can see something similar in this video where they install the shower head – https://www.youtube.com/watch?v=tZH2_rfQfto When you smush
Jenn says
With beveled tile, did you use caulk next to the tub or did you use grout?
Rachel says
I use caulk for the area between the tub surround and the tile. You can see a photo of us caulking the bathtub here. I also generally recommend caulking between the tile and the drywall edge. My general rule is all home improvement projects is that two different surfaces or planes get caulked (baseboards/wall, tub/tile, two pieces of wood, etc) and same surfaces on the same plane get patched with the suitable material, for example wood filler, spackle, grout, etc. Caulk is generally more flexible in case the two surfaces move or flex independently of each other.
diane hallman says
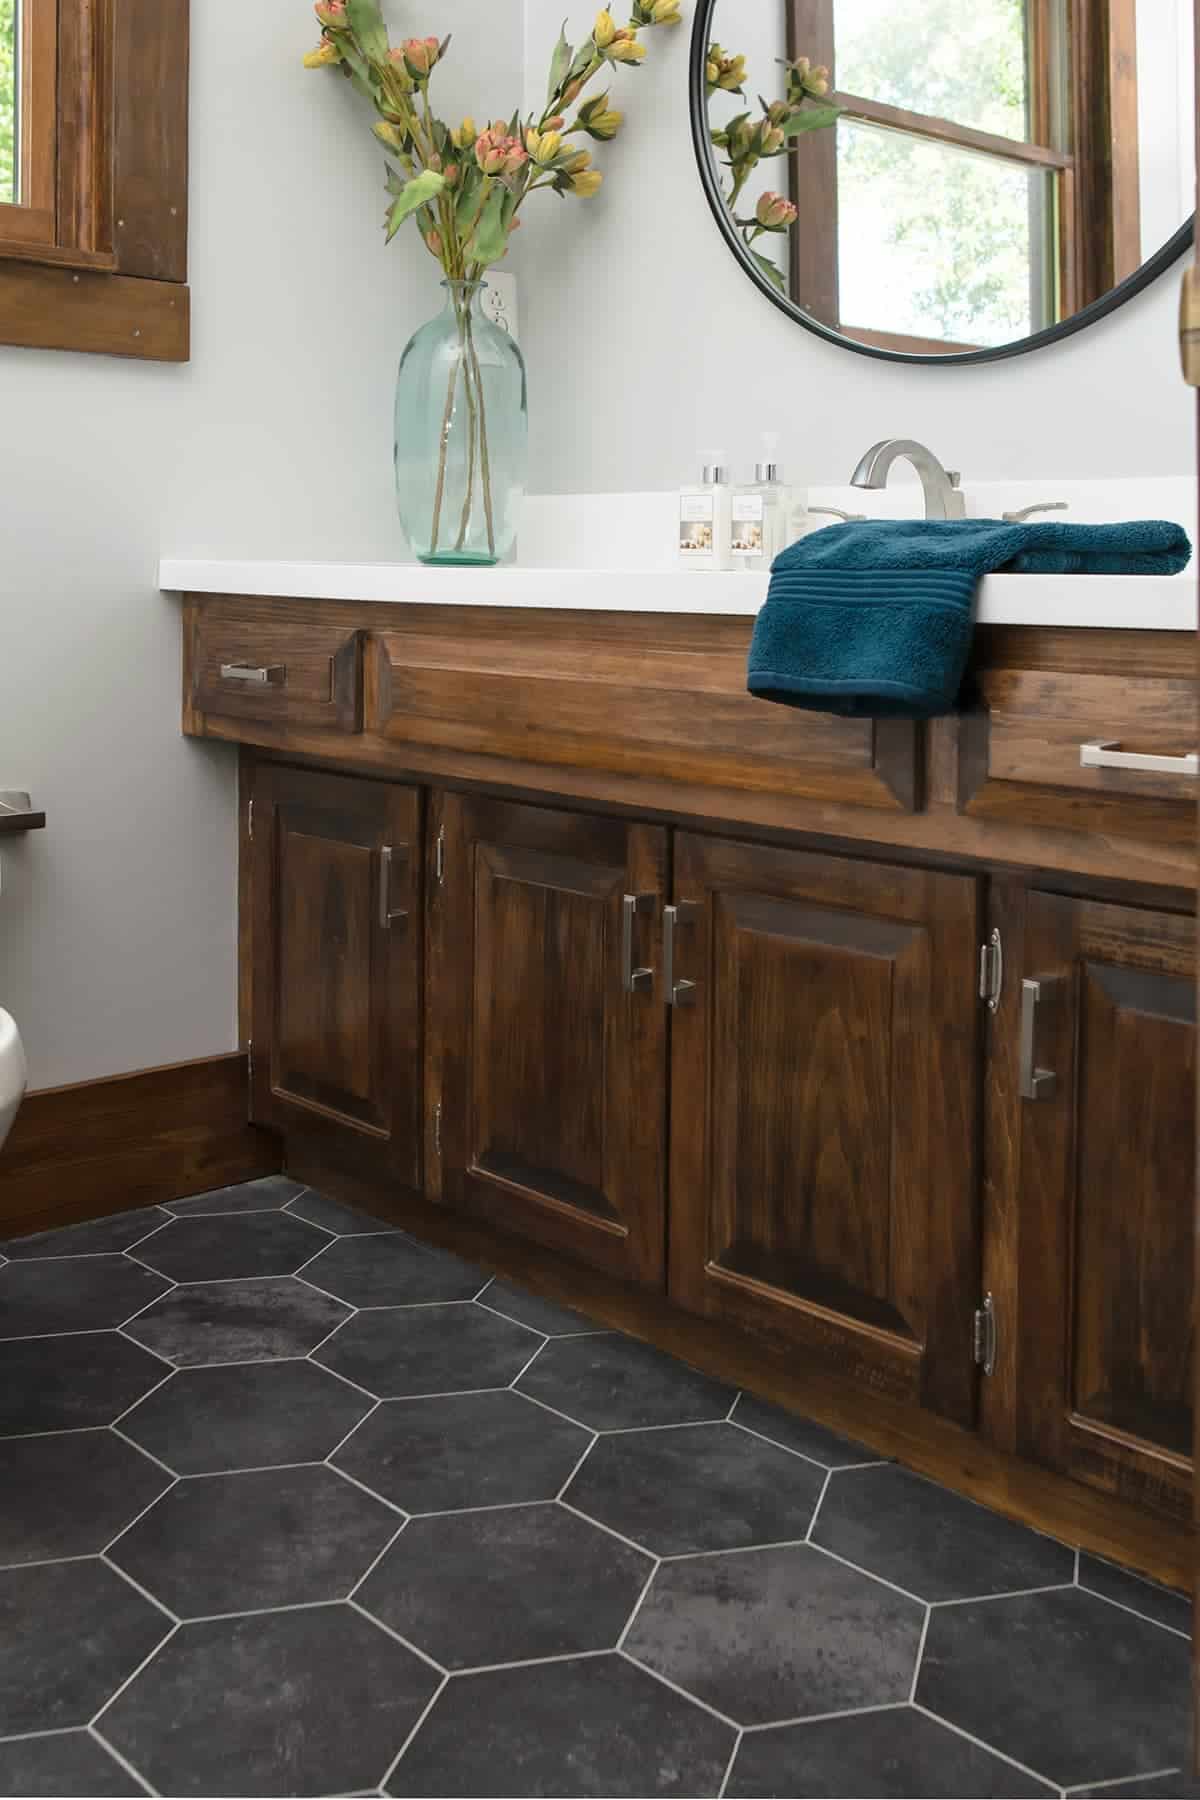
Hi, I am interested in tiling my shower using beveled subway tile for the walls. We are using honed basket weave mosaic for the shower floor. For the rest of the bath, the floor will be honed hex matte tile. Did you used gloss beveled tile or matte for the subway tiles in the shower walls? Don’t know if one can mix sheens or if it matters but for floors I think honed gives more traction.
Rachel says
Your tile sounds beautiful! You can definitely mix and match sheens to your preference. The subway tile I have used is what I would equate to a satin sheen, with a stone floor that isn’t shiny at all. I have mixed and matched many different tiles in other other projects and sheen wasn’t a direct factor, but I could see using sheen as a factor in certain applications.
Jim says
We are planning a bathroom shower project using beveled subway tile. The brand we selected does not have an accompanying beveled bullnose tile. Can we use a flat subway tile for the finished edge? Thank you
Rachel says
The problem with using a regular subway tile is that the edge is exposed, in other words the ceramic coating does not run over the edge. You can use a flat edging subway tile, which is similar to what we did in this project. One edge is coated or rounded off. Another option is to run a larger caulk line over the tile edge to mask it, but you would have to paint right up to the top of the tile as the edge won’t look as finished.
Anita Haley says
We are thinking of using beveled subway tile in the kitchen and not doing grout lines and using tile glue… what’s your opinion?
Thanks
Rachel says
I can’t recommend it in a kitchen. Grout protects the mortar and substrate from moisture and water/mold. Some mastics and grouts are water resistant, but they can also be sealed. My concern that not using grout would be particularly problematic at the kitchen sink where water could get behind the tiles and cause mold or other damaging problems. Also, tile generally doesn’t fit together that perfectly, so I don’t think it would be attractive without grout. However, there is another idea. Companies such as Aspect Tile make peel and stick tiles and I believe have some subway patterns. Those don’t require grout, I believe.
brandon says
Hi. So on this project you used a end cap piece instead of a shluter? Also is every end piece cut then to make them all the same height at the end cap.
Rachel says
I am not quite sure what you mean by shluter? To me, Schluter is a company that makes waterproofing and trims. If you mean the trim (usually a piece of metal with a flap that lays underneath the last column of tile), then no, I didn’t use trim for this project. You certainly could though if you wanted. I have used trim like that on a client’s kitchen backsplash to give it a finished edge. To anwswer your other question, the end caps come premade and the same size as in the photos. They are fairly common since subway tile is so popular now in the edging and trim section. The only cut I really made was to cut the top corner at a 45 angle, because I edged around the entire shower on the sides and top.
Joey Bardos says
Hi,
Gosh, I have been looking for an article like this for months to figure out how to do my bathroom.I have had my tiles for months and I have not even touched them because nobody can give any advice to me….not even the guy that is supposed to do the job….I even bought half tiles to solve the problem of the outer edges …thanks for the pics.
Joey.
Rachel says
Thank you! If you have any specific questions, feel free to let me know and I hope that I can help.
Kelly says
I just had 3D subway tile installed in my kitchen (backsplash). This was my first tile experience. One caveat is that the switch covers are not flush with the tile because of the curves. Any suggestions on how to fill the gap between the tile and the outlet cover?
Strauss says
You are so inspiring with your work! Thank you sharing, keep it up
Mike Heyduck says
Did you have any issues with the tile bevels where they meet the mixing valve and valve cover? I’m concerned with water getting behind the valve trim and ultimately in to the wall.
Rachel says
When installing the valve cover, we used plumber’s putty on the backside of the valve to seal the wall opening. You can find plumber’s putty here. You shape the putty in a ring on the backside of the cover around the edges, but the putty shouldn’t be visible from the front.
Matt says
Great looking project!
I’m about to tile our shower with the same beveled subway tile. When you did the mitre cuts for the corners did you try to leave space for grout or did you try to get them as close as possible?
Rachel says
We didn’t leave space so to speak. The corners filled in nicely with grout when we wiped with a sponge. The one problem we did have was the beveled areas (not the raised flat areas). If you wipe them with just a sponge, the grout made a diamond shape where the bevels met. After some trial and error, I found that pulling out excess with a gentle q-tip was the best way we could get the grout to look right, without the diamond shape. There may be other ways of doing it too. Good luck with your project!