Do you have a project that you just aren’t sure what to do with…yet? A project that just screams potential, but the reality looks much duller? Maybe the right idea hasn’t hit you yet, or you don’t have the confidence to just dive in.
Today’s project is like that. Thinking outside the box? I don’t even know where I put that proverbial box. But some projects have to wait for the right Aha! moment.
Let me back up a moment…
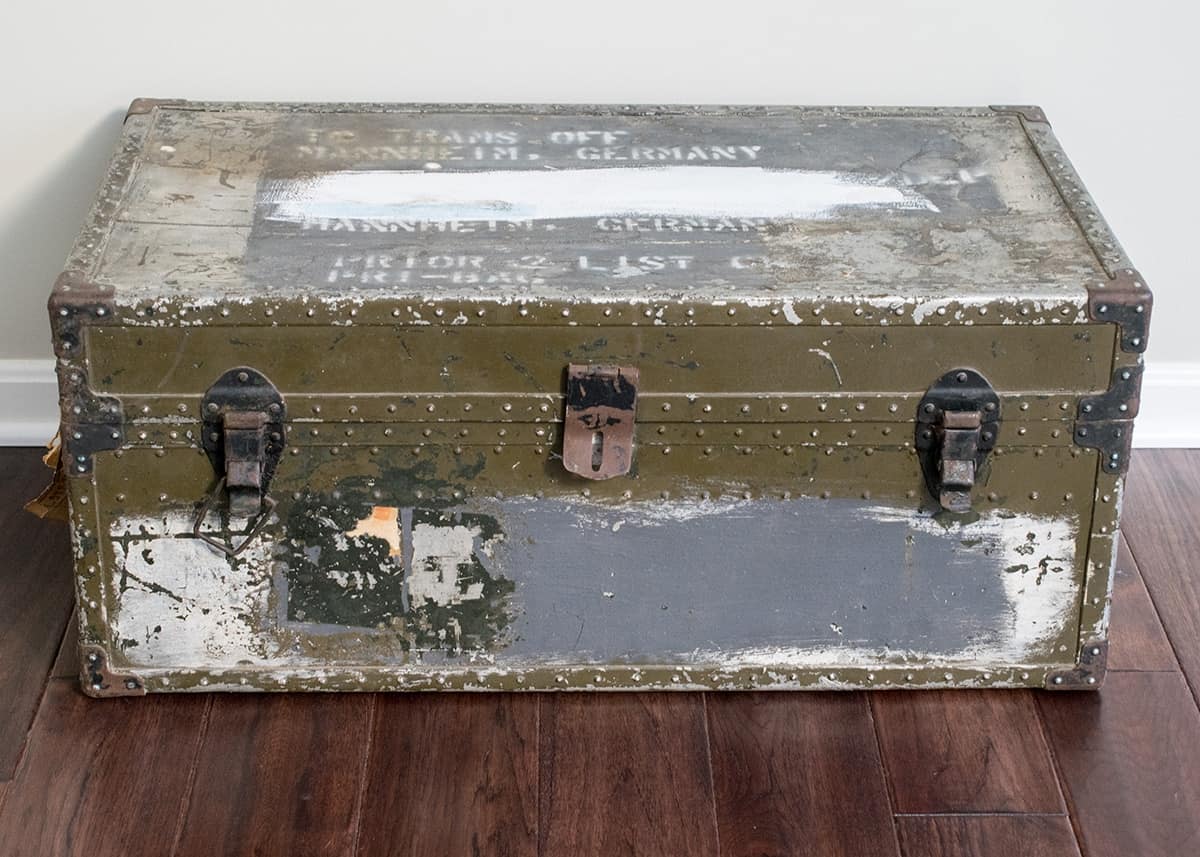
Old Metal Trunk Makeover
Last summer, my mother-in-law gifted me this dumpster find. Yes, she actually found this metal steamer trunk next to the dumpster and thought of me. She knows me so well!
It’s a Korean War Era army military footlocker. And, obviously, from the picture, it saw some battles of its own. Although she was excited to see what I would do with it, it sat and sat in lieu of other projects. Ones I had actual ideas to complete, but it did whisper to me that it was waiting patiently.
How to Strip Painted Metal
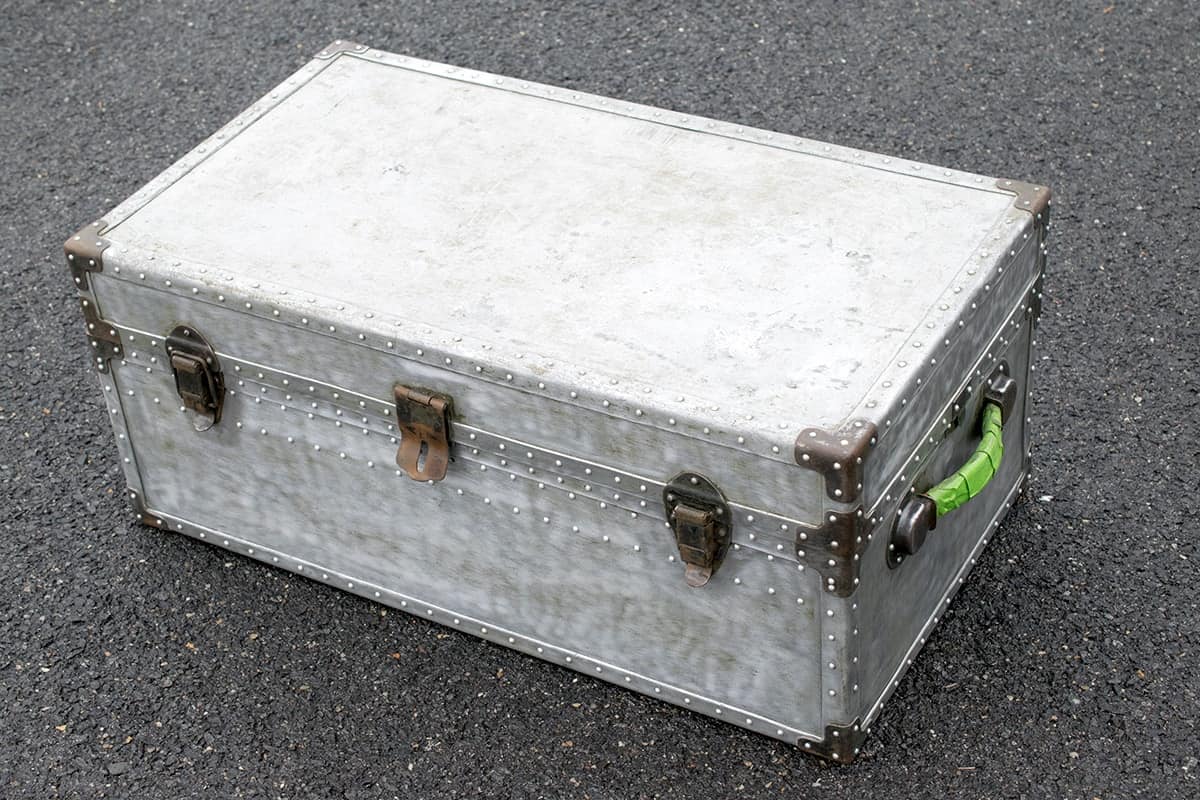
The first step was stripping all the nasty layers of paint to see what we had. (Update in 2025: The stripper I originally used to do this appears to have changed formula. I have used this stripper for other projects though and it works pretty well).
Paint strippers come in different forms, but the steps are the same. If interested, I have step by step guides to painting metal outdoor furniture and stripping wood furniture with great tips to get started.
- Pour the stripper into a container and work in a well-ventilated area.
- Using a chip brush, apply a thick layer, allowing the chemical to react with the paint and bubble (follow the directions on the stripper).
- With a rag or scraper, wipe and remove the liquid, along with the unwanted paint, repeating as necessary. Toothbrushes work well to get into crevices, but don’t use anything that may gouge or damage the underlying metal.
I cleaned the metal trunk afterward with mineral spirits and used a good rust remover. For the handles, I Ieft them in their current condition. Doesn’t it already look a ton better?
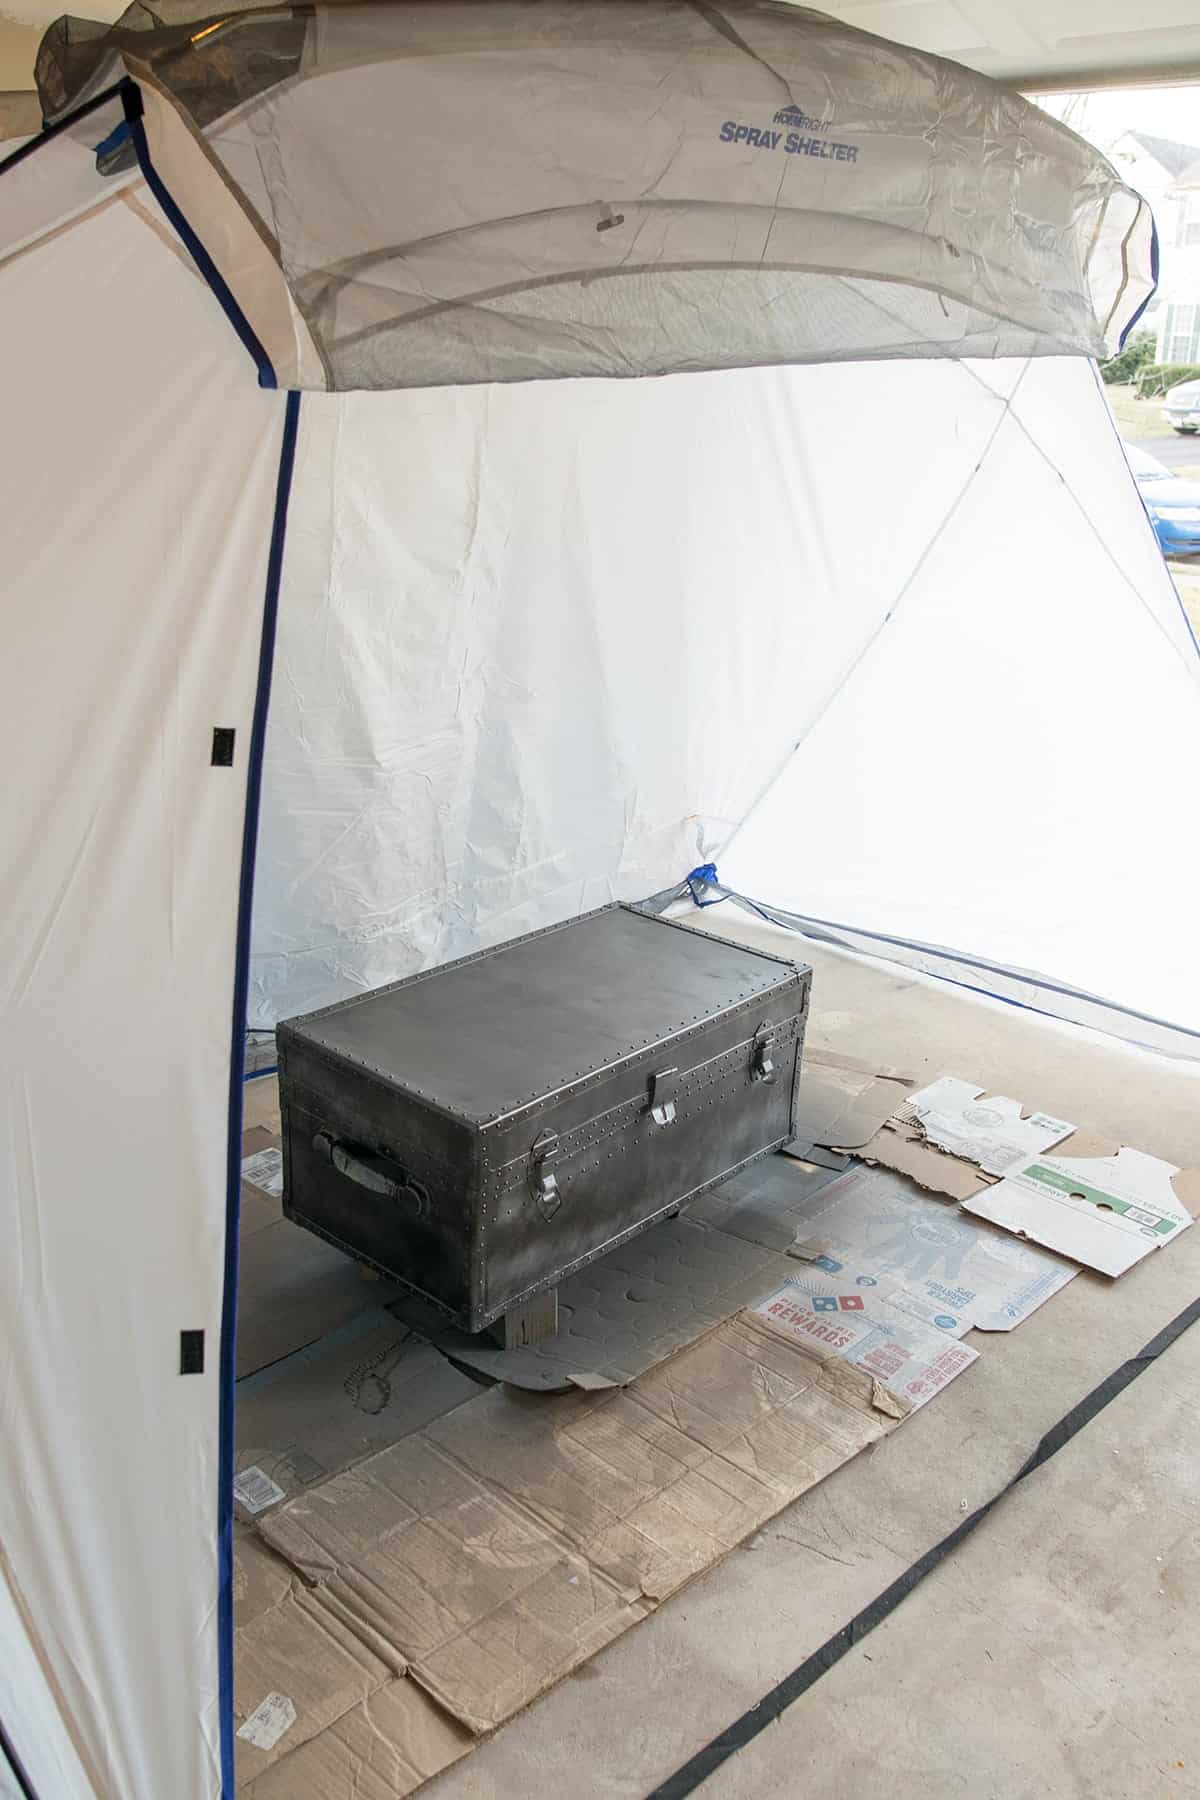
Painting Bare Metal
The trunk was banged up quite a bit. I used automotive bondo to fill in some of the larger dents. This step is necessary since I am covering the top with a paper material, but not entirely necessary if one is only painting.
Tips for painting bare metal:
- I love my HomeRight spray shelter. It helps with overspray and less dust.
- Painting must be done when conditions are between 30-80% humidity (40-50% is best) and temperatures above 50 degrees.
- Use an appropriate primer like Clean Metal Primer Spray.
- You can spray, brush, or use a metal spray paint.
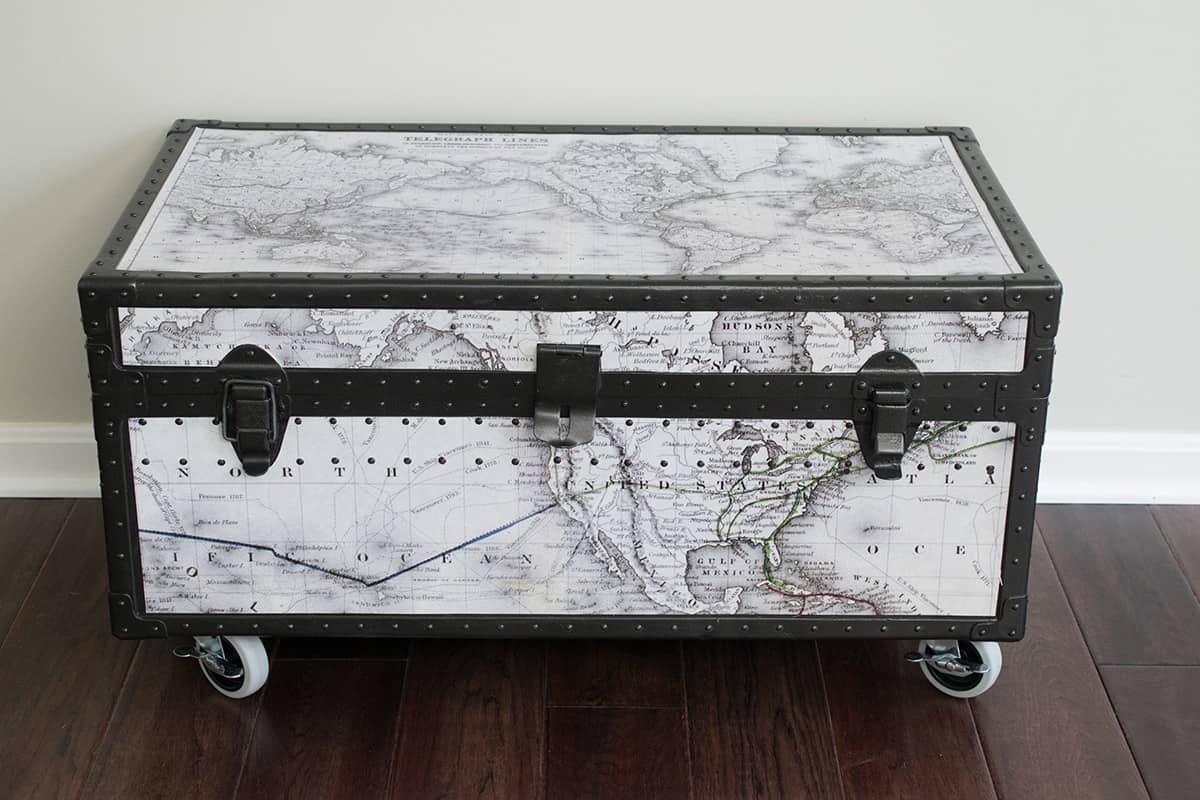
I primed the trunk and used Oil Rubbed Bronze to give it a metallic finish.
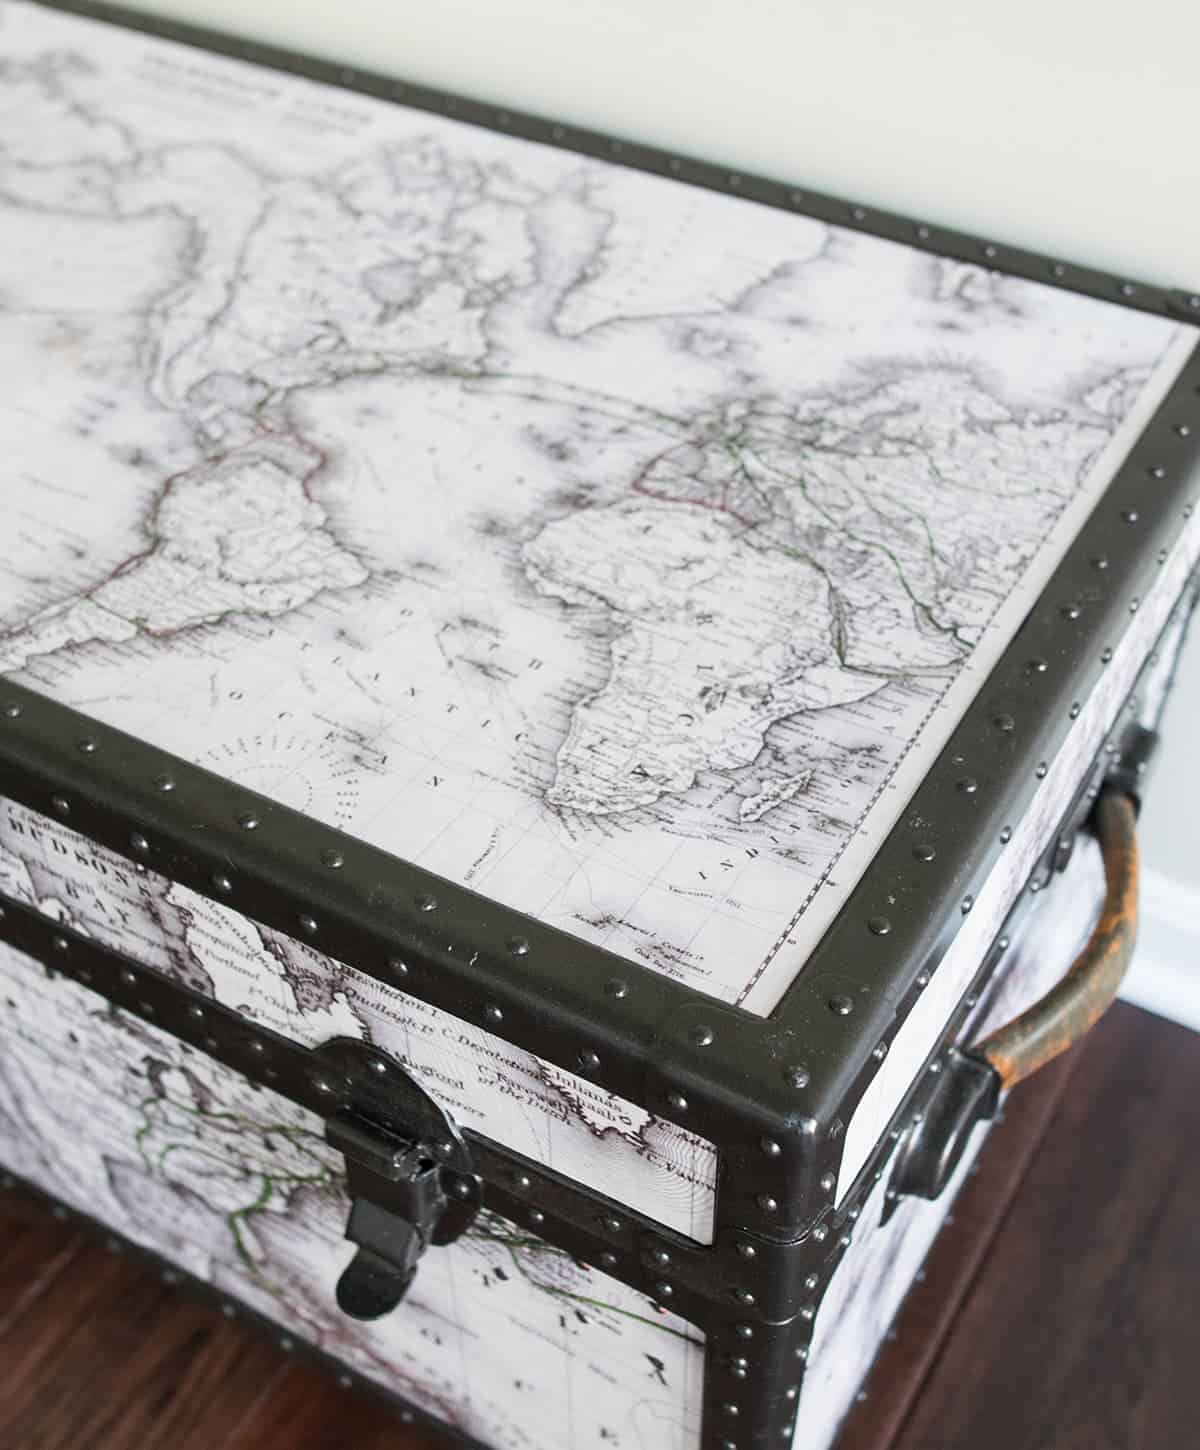
Covering a Metal Trunk
Because the trunk was so beaten up, I knew that a paint job alone would not be enough to make this steamer trunk sparkle. That’s why I decided to cover it in this vintage map. Note: My exact one seems to be no longer available, but the link is pretty close, and it is custom sizeable.
I used 2 sizes of this map to create the look. The top of the trunk is one complete map of the world with the border removed. However, the sides are a version that I custom sized to my needs. I added up the total dimensions of all four sides and cut out each part between the black metal rivets.
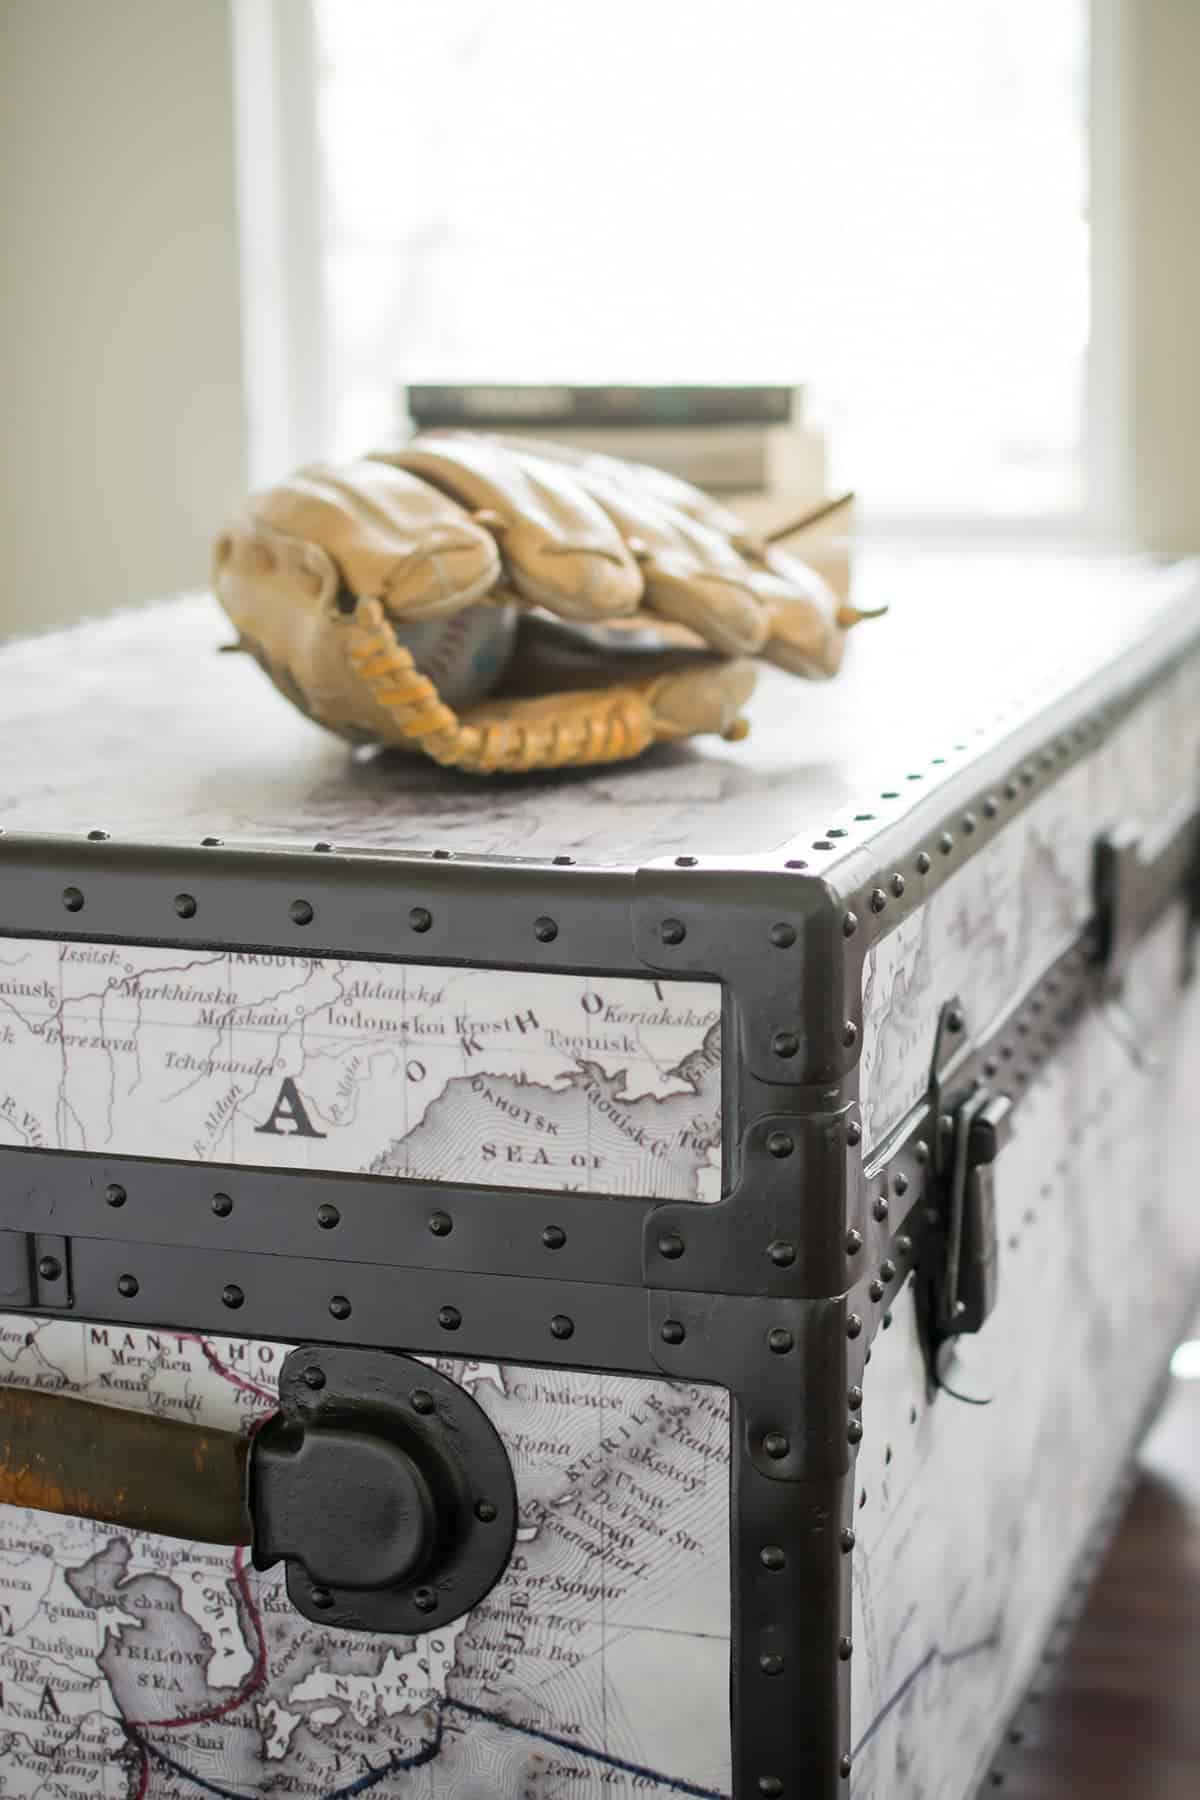
With the map, creating the template was the hardest part and took several hours. I used a craft knife to cut around the handles and locks. There is also a row of decorative bumps on the front of the trunk (see photo below), where I used a hole punch.
Tips for sealing the paper cover:
- I first sealed the paper with a few light coats of spray sealer on both sides.
- A spray was used first to avoid any of the paper stretching.
- I brushed mod podge on the trunk where I wanted to adhere the map. Mod podge works like a glue and sealer. It is thicker, so this kept the edges from rolling.
- After the map was adhered and completely dry, I brushed the top side with a few more coats of mod podge, drying in between, to further seal and make it more resistant to scratches and water.
- Although it is water resistant and well-sealed, I use coasters and am careful about water on it.
Final Touches
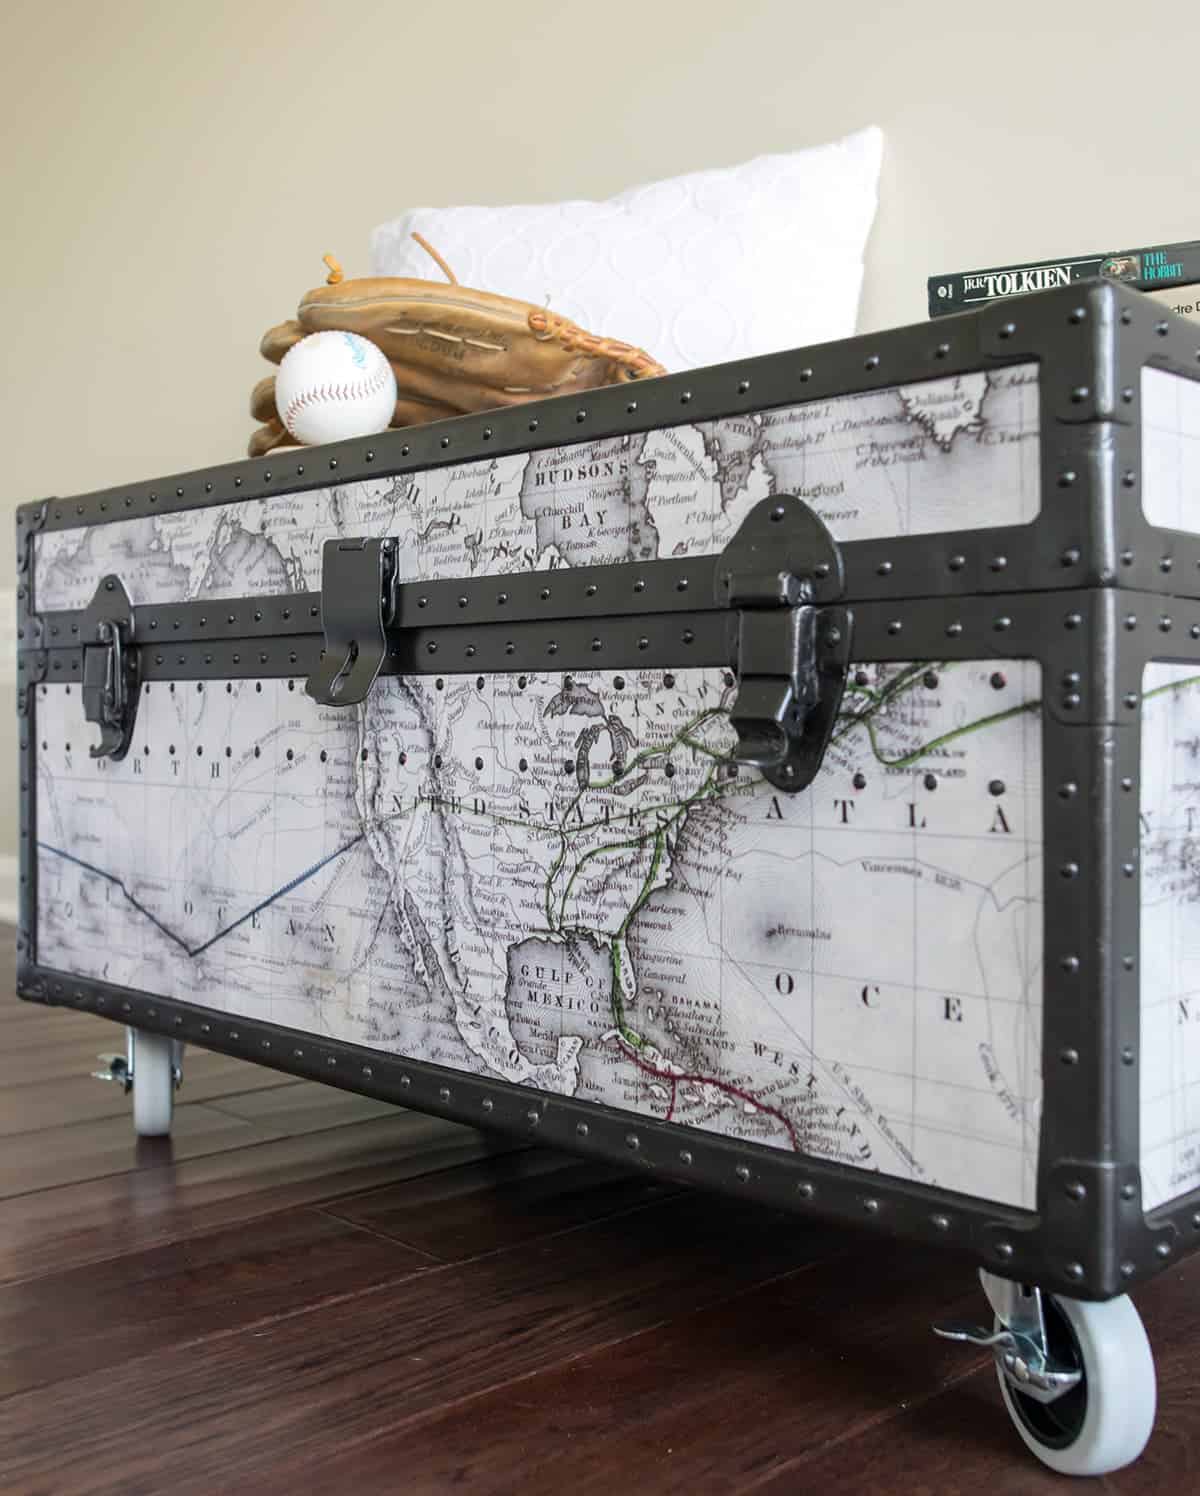
To add function and make it easier to move while full, we added casters to the bottom. This was done by drilling a hole in each corner to add the casters.

At first, I just loved the steamer trunk style, but I didn’t know what I would actually do with it. When my son saw my map plans, he begged to have it in his room. He actually promised to keep his toys off the floor if he could have it! Giant indestructible metal box and clean floors?! Sounds like a winner to me!
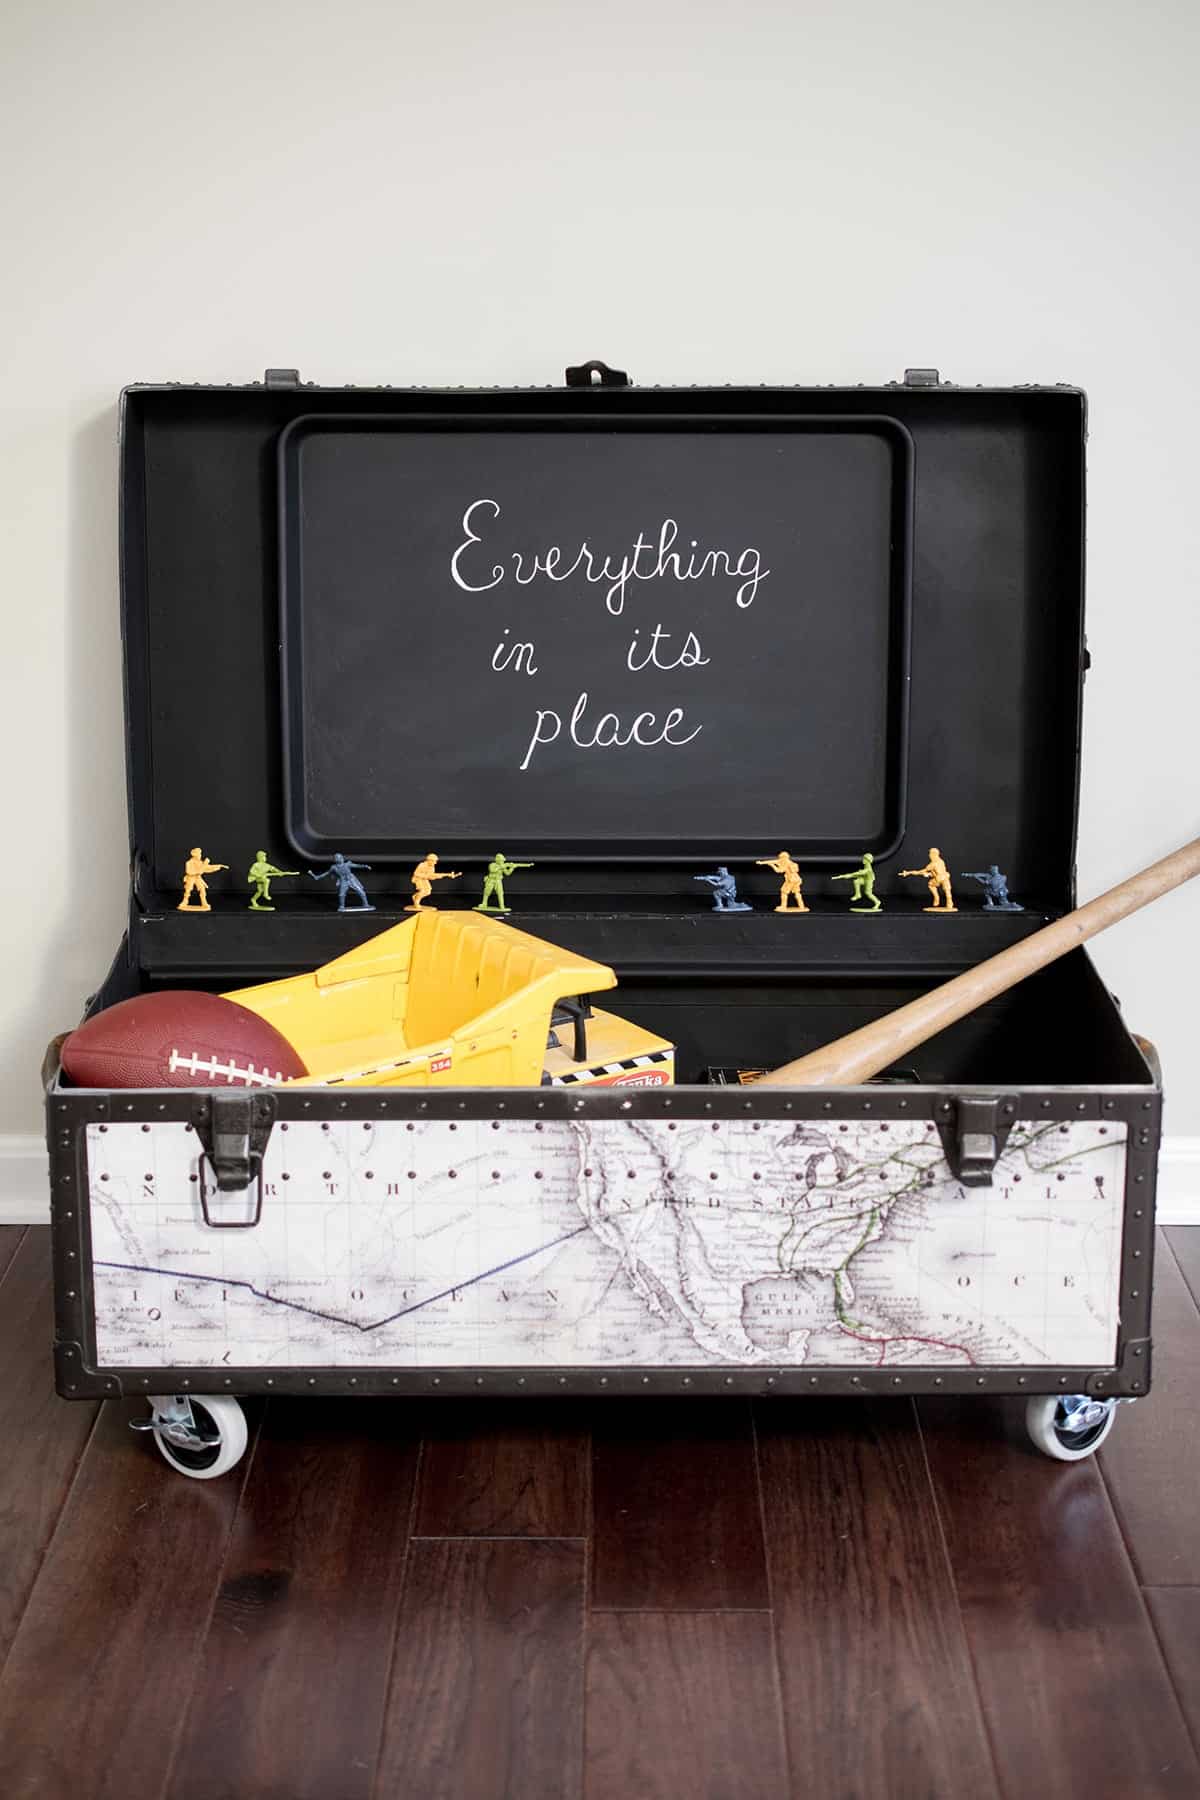
I took a plain cookie sheet and lightly sanded and painted it in chalkboard paint. I used velcro strips it to hang it inside the top of the box. This cookie sheet served a few purposes.
- It’s magnetic so he can add pictures or mementos. The trunk itself is not magnetic.
- The cookie sheet comes out easily and he can use it to draw or to keep his Legos at bay. #ForeverFindingLegosInTheWierdestPlaces
- I can write subtle reminders to him about his promise to clean up.
- It’s just fun!
So clearly, this was a pretty big project even though we finished it in about 4 days. However, looking at where we started with the trunk, I wouldn’t have known what it would be at first. It was just a hunch and a vision.
More furniture transformations
- Black Painted Furniture
- Paint without Brush Marks or Strokes
- Cerused Wood Makeover (Lime Finish)
- How to Paint Old Kitchen Cabinets
- How to Paint a Stair Rail that Lasts
- Executive Desk Makeover
Waiting until the right idea is sometimes the best course of action, but I hope that you also challenge yourself to get the project done and not sitting in a remote corner of the basement.
If you are still unsure, I always love reading emails and questions from readers so feel free to ask in the comments below or email me.

I hope you enjoyed this project and are inspired to share your newest painted furniture projects with me. Have a great weekend!

Grab our free series "Weekend Home Projects that will Transform Your Life" Sign up below to receive updates including free printables, organization tips, home improvement projects, recipes and more! |
More Interesting Furniture Before and After Projects
Patricia K says
I, too, love vintage maps, old trunks, globes and tinkering around the house to improve some pretty plain rooms. You have given me so many new ideas, I can’t wait to get started and convince my husband it was his idea. Bless you🙌🏻
Rachel says
Thank you so much! I completely get you on the convincing the husband part. *fistbump lol
Jeannie says
I came across your projects while searching how to paint my mini fridge and my jaw dropped at your creations! What awesome treasures you have! I am inspired and only hope to paint the old fridge and maybe add something! I look forward to seeing more of your work!
Jackie says
Hi! I love what you did with this. I just night a very similar trunk and I’m wondering what you did with the handles. Mine are leather- but one is ripped and taped back together so I’m trying to figure out a way to replace them. Do you have any suggestions?
Rachel says
Thank you so much for your kind words. I actually left the original handles as is. I only covered them with delicate painters tape when I spray painted the truck. Mine are some seriously distressed leather although I felt it was a nice touch to leave them original. However, if they had been taped I probably would have felt differently. I checked both of the trunks I own for how the handles are constructed. You could honestly buy a small piece of leather or something decorative and just rewrap/cover them and hand-sew the handles with a leather needle or make leather snaps. I would be hesitant to replace the entire handle on a metal trunk because the end caps are usually welded or nailed on and you may end up damaging the trunk in the process. I have another wood trunk that I have replaced several pieces on so I would personally be more confident in that. Here is a video I found for replacing them.
Esrael Rosales says
Hi so I bought the posters and the just came in the mail but I was wondering how you cut the posters? Like around the curves of the locks ?? I did the top of a desk in wallpaper and tried using a box cutter to give it a clean exact line but the didn’t go to well.. but I was able to hide it. I didn’t want the same thing to happen to the trunk because it would be way more noticeable Also what was your trunk make of ? Mine is made of what looks like plywood on the inside and I was wondering if I should add another sheet of top of it just because its so old..
Imgoog says
The result is so awesome!! Thank you for sharing the idea and instruction!
María Mercedes says
Rachel, tu trabajo con el baúl es maravilloso!!! Ha sido una inspiración para mí ya que tengo dos de ellos arrumbados en mi garaje. Felicitaciones y gracias!!!
Esrael Rosales says
LOOKS AWESOME! Where did you get the casters ? I Have one that belonged to my grandmother and I’ve always wanted to restore it or give it a facelift. I think now is the time for me to do it.
Rachel says
The casters I bought at Lowes. While they aren’t the nicest I have ever seen, they work well and cost about $30 for 4 I think.
Kelsie says
How do you attach the casters?
Rachel says
We drilled holes in the bottom of the trunk and attached the casters. Most Casters have a bolt at the top to attached them.
Nancy says
I have a locker like this that I “thought” I had updated until I saw this! Back to the drawing board! Yours is gorgeous!
Diane says
I have my dad’s trunk, WWII, thanks for the inspiration. He was also a map collector ??
Kathy says
I LOVE this! It turned out great. Hmmm…we have my husband’s old foot locker in the basement. Thanks for all the good info.
Rachel says
Thank you so much! All of my friends are now bringing me footlockers to see what I can do with them too, haha.
Sadbear says
Wow this is a travesty! So sad!! That was worth so much $$ as is vs now.
arielgarneau says
What a transformation!
Nicole Q-Schmitz says
I have an old trunk like this, and I would never have thought of updating it like this – so unique! Not sure if I’ll ever refinish mine, but great idea 🙂
Amanda says
Wow!!! It looks fantastic, I LOVE the maps!
Roxanne says
Rachel, what you did with this piece is amazing! I couldn’t love it more! Funny, my family members think of me too when they see curbside finds!
Rachel says
Thank you! When she brought it to me, I don’t think I would have thought then it would have turned out this good. Our families obviously know what we can do with other people’s trash. They must love us for thinking of us then, haha.
Sharon H. says
What did you paint the inside of the trunk? Was it the same as the outside? I’m redoing a trunk and don’t know if I should paint the inside or paper it.
Rachel says
I painted it with spray paint, mostly to save time and it was just going to store toys. It depend’s on what you are using it for. Papering/decoupage would be very nice and you can make it waterproof. You also don’t have to worry about paint chipping or transferring if that is a concern. I actually have another trunk where I will be papering the inside.
Meredith says
Oh my gosh, this might be my favorite makeover of yours yet! Inside and out, it has so much character and function, and it looks amazing. (My mother-in-law dumpster dives for me too!) And thanks for introducing me to the Creators Studio. I love Rustoleum, and can’t believe I didn’t know that forum existed till now.
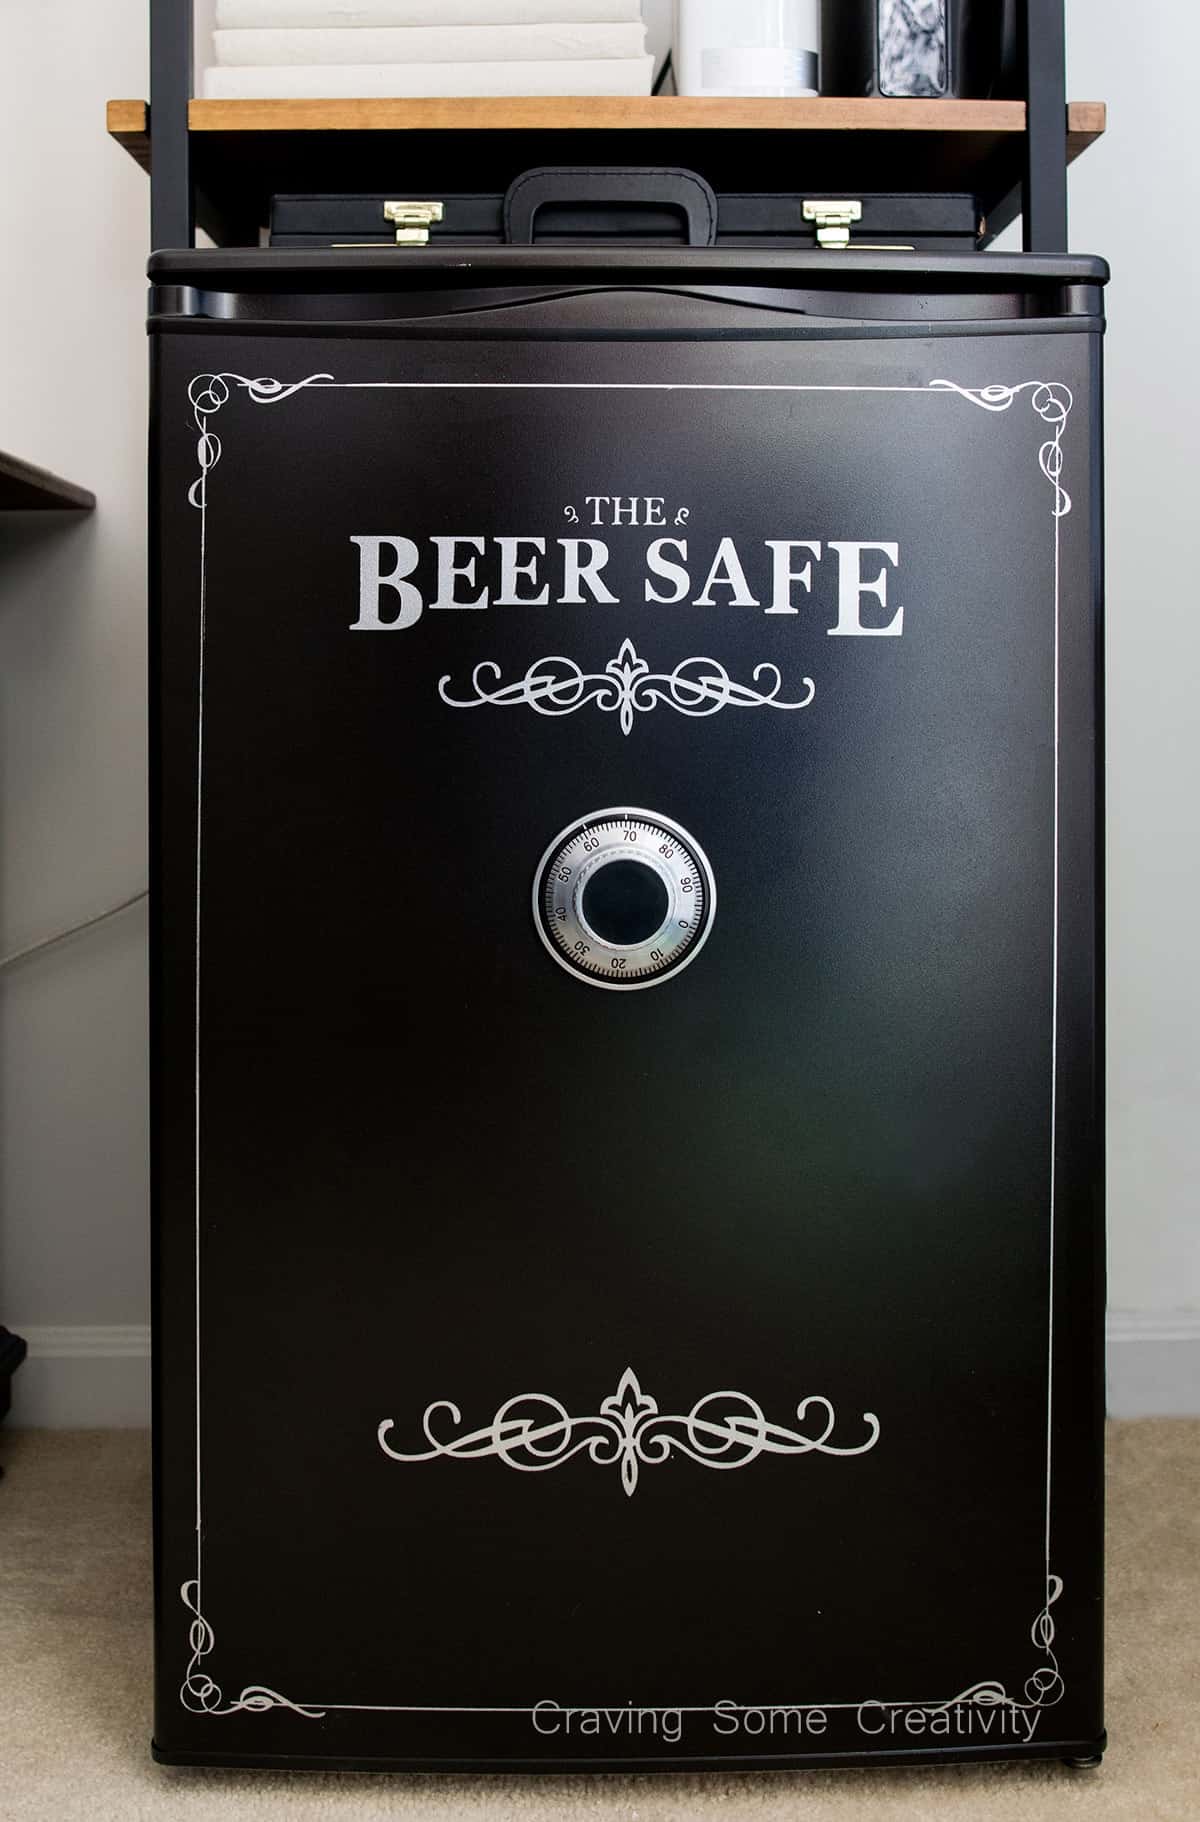
Rachel says
It’s definitely one of my faves if not my favorite. Nothing will ever beat the Beer Safe in hubby’s eyes, but that’s understandable, lol. I didn’t know about the forum until they challenged, but it is a really cool community. They have contests, good information, and inspiration.