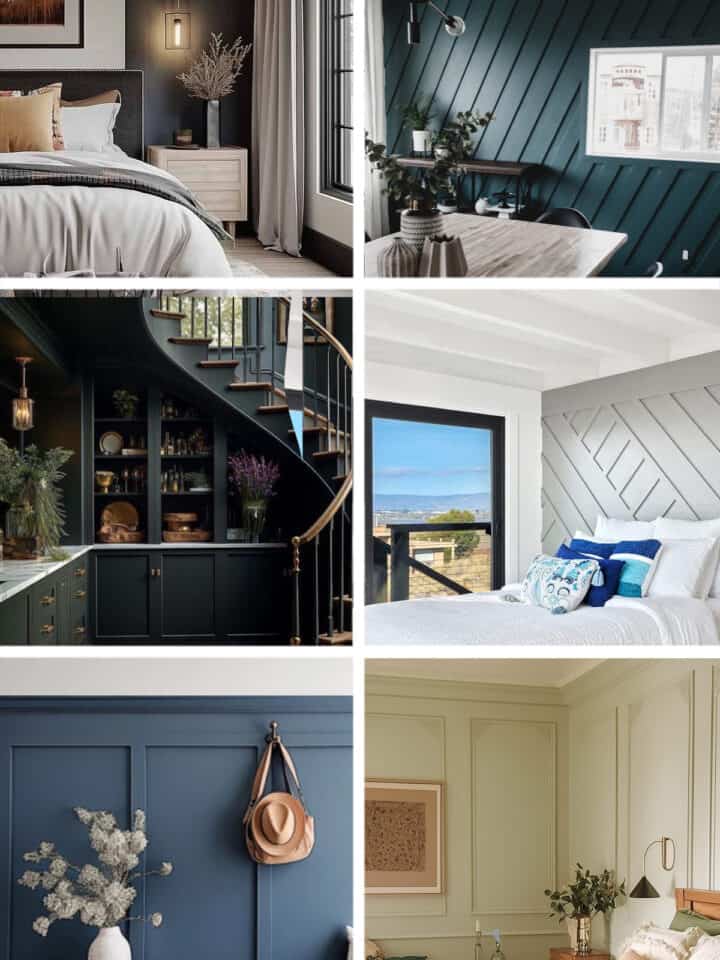
Thinking about adding picture frame molding on walls? Avoid the common mistakes that can lead to uneven lines, awkward layouts, and frustrating gaps. With the right planning and a few smart tricks, you can get a flawless, professional appearance.
We've tackled a lot of trim projects over the years, from cutting crown molding to caulking baseboards, so we've picked up plenty of tips to make the process easier. If you're new to trim work, don't worry - we'll cover all the tips you will need to design what’s right for your room! And if you're looking for more inspiration, check out our other posts on wall trim ideas for different styles and spaces.
If I’m being honest, putting up wall trim isn’t my favorite project to do but the results of this room speak for themselves. It is a bit tedious, but it’s important to keep the right flow, start with a great layout, and identify any obstacles ahead of time.
Plan Your Layout
This is a crucial prep step and it will greatly help you see any problems ahead of time.
First, decide how many ROWS you want on the wall. It is usually 2 or 3 depending on the height of the wall. Also, include chair railing, baseboards, and crown molding if desired.
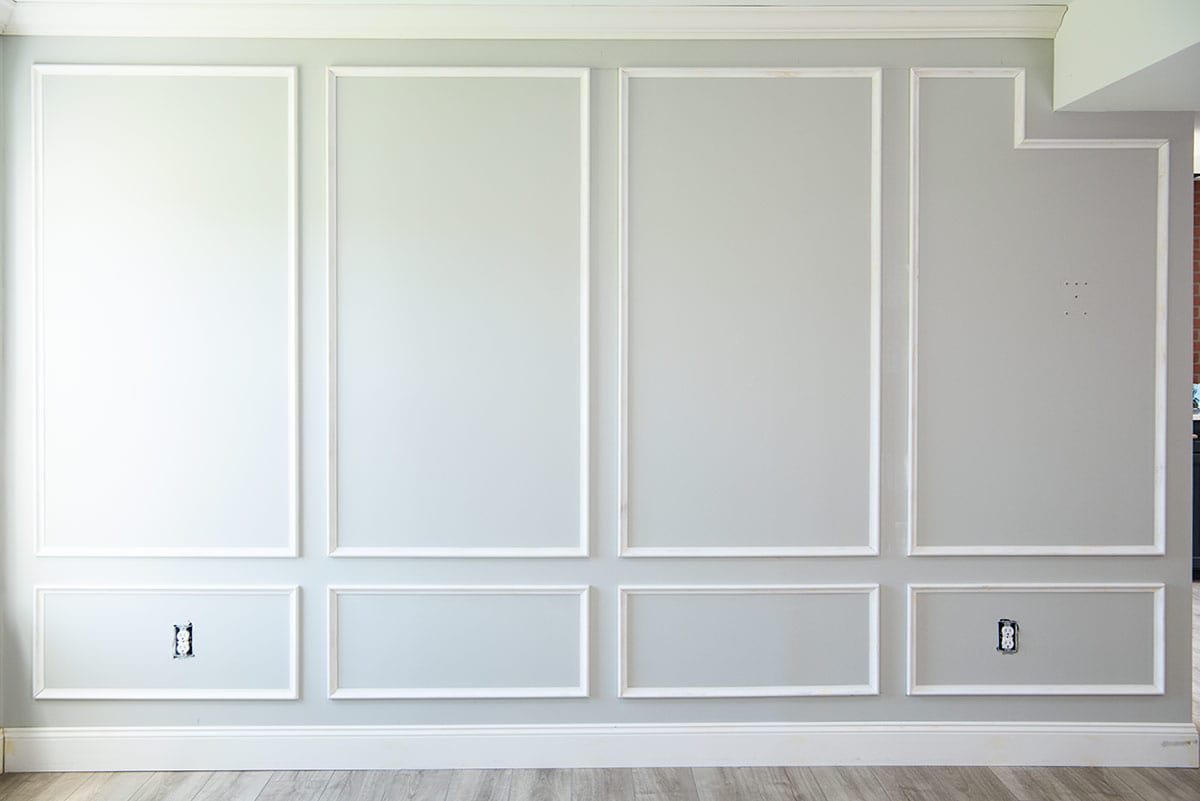
Next, measure your entire wall and then decide how many COLUMNS you would like. For our main wall, we decided on 4 columns. Draw out all your plans on a sheet of paper to scale.
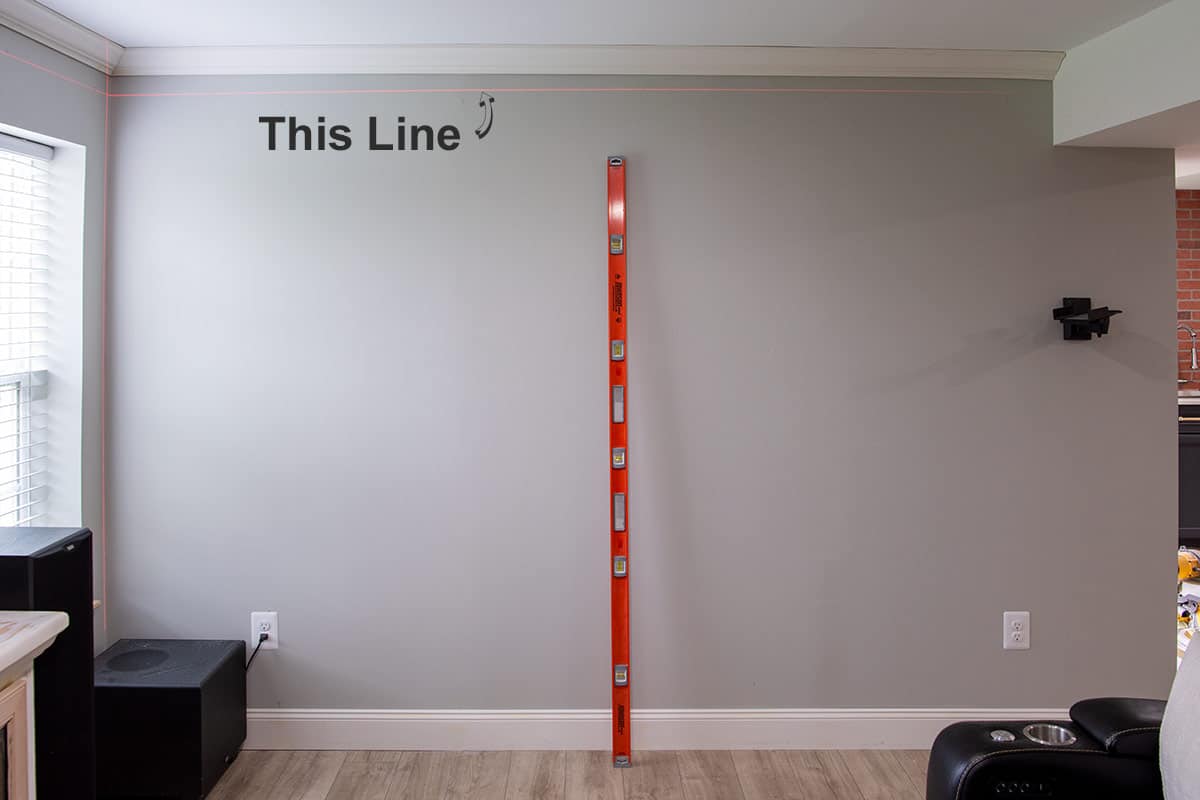
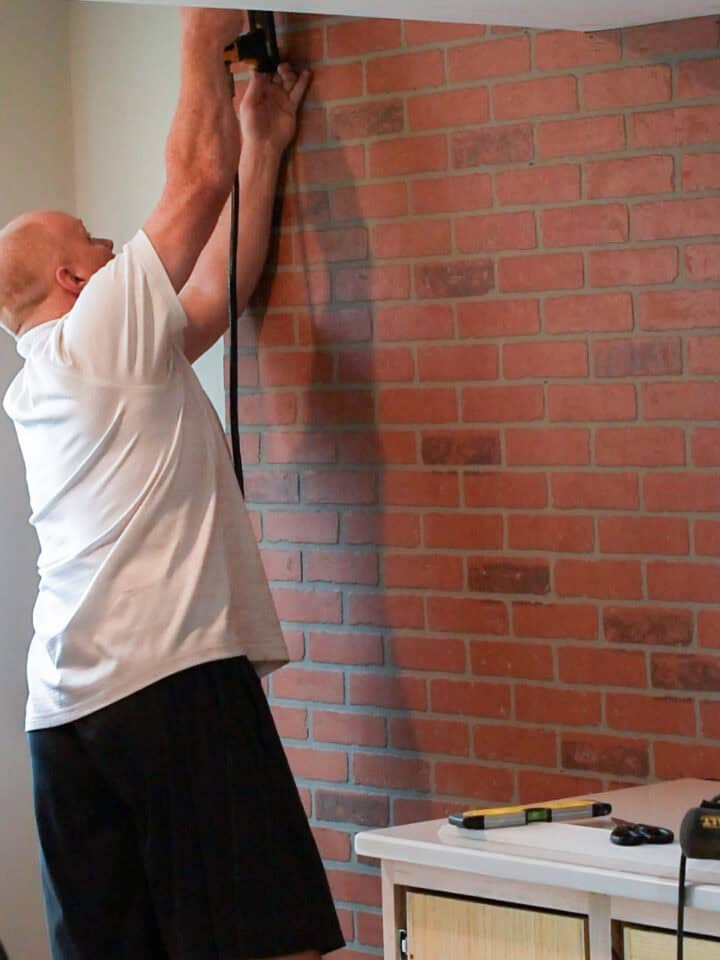
Third, check your walls for level and plump. Use a laser level or a really long level like 6ft preferably. This could make a difference in your design and it’s best to know issues when you are in the planning stages. I will talk about that a little further below.
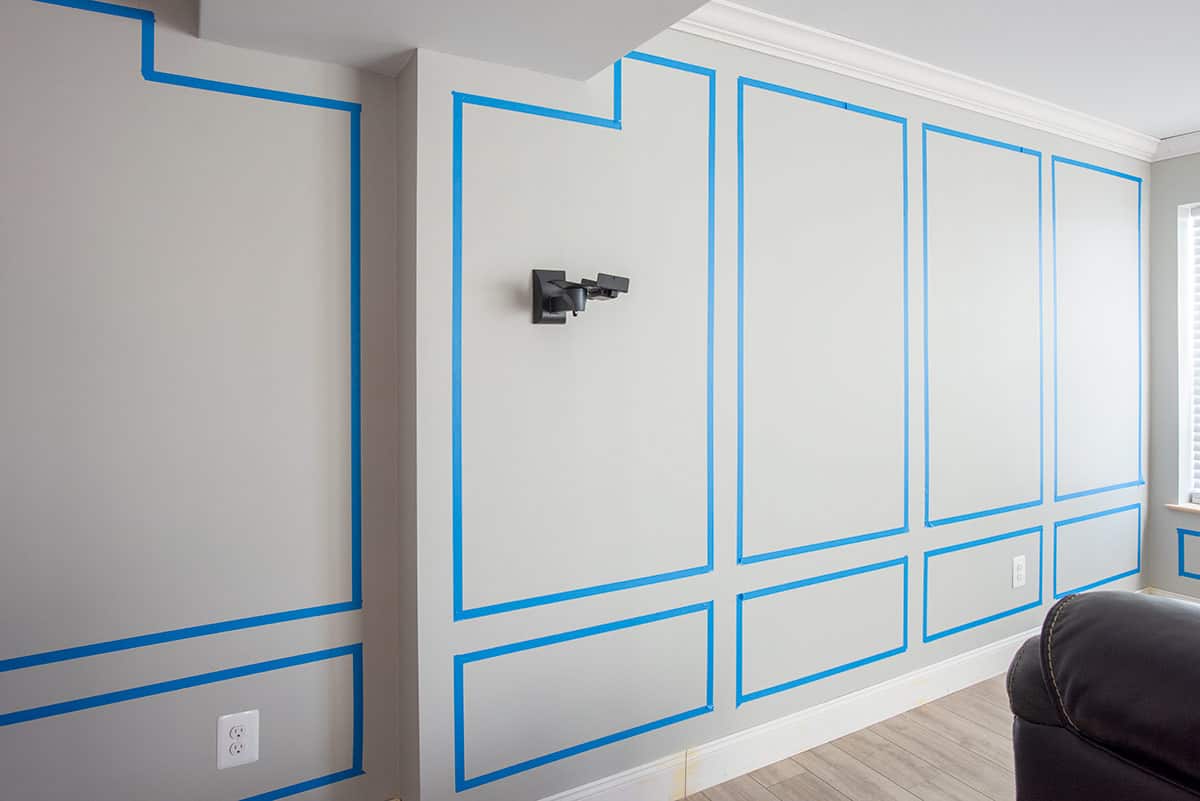
Lastly, I HIGHLY recommend using painter's tape on your wall and taping out a design prior to beginning the trim work so you can try different box sizes and choose the look you like best. Remember that the tape demarcates the outside of the box, if your trim is thicker than the tape.
Pro Tip!: If you don’t have to add baseboards or other trim after this project, consider painting the walls before putting up your trim. This will be much faster unless you use a paint sprayer.
How much space between picture frame boxes?
The distances between picture frames can be played with a bit depending on what look you like. The spacing is usually 3-6 inches.
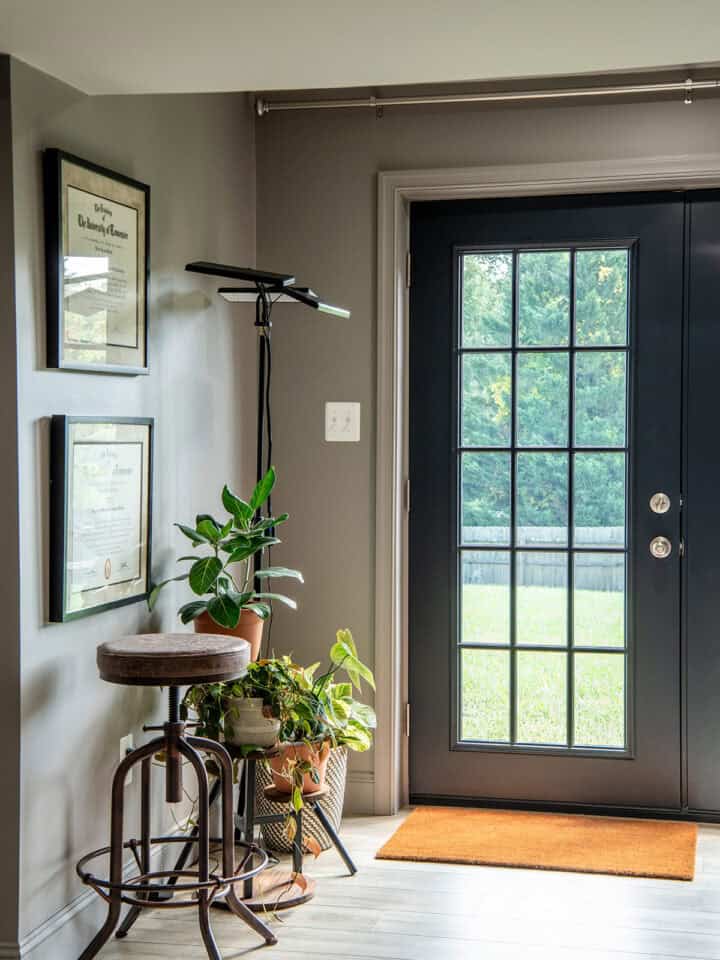
My decisions for sizing were based on a promise made to my husband about hanging two nostalgic prints from his college years. Therefore, the trimmed boxes needed to be large enough to accommodate them, while also keeping the prints appropriately spaced on the wall.
How wide should the boxes be?
To figure out the size of your boxes, the equation looks like this:
Total wall measurement – (distance between frames (number of columns +1))
Number of Columns
For example, let’s say your spacing is 4 inches between boxes on a 128-inch-long wall and you want 4 columns. To get the box measurements, this would be 4 x 5=20, and then the 20 subtracted from 128 =108. Now, the 108 is divided by 4 (the number of columns), making your boxes 27 inches wide (from outside trim to outside trim).
How tall should the boxes be?
As far as determining the height of each row, this is totally up to you. For ours, we lined up the top of the lower boxes with the window ledge. The remaining space excluding the 3.5-inch gaps was the top column.
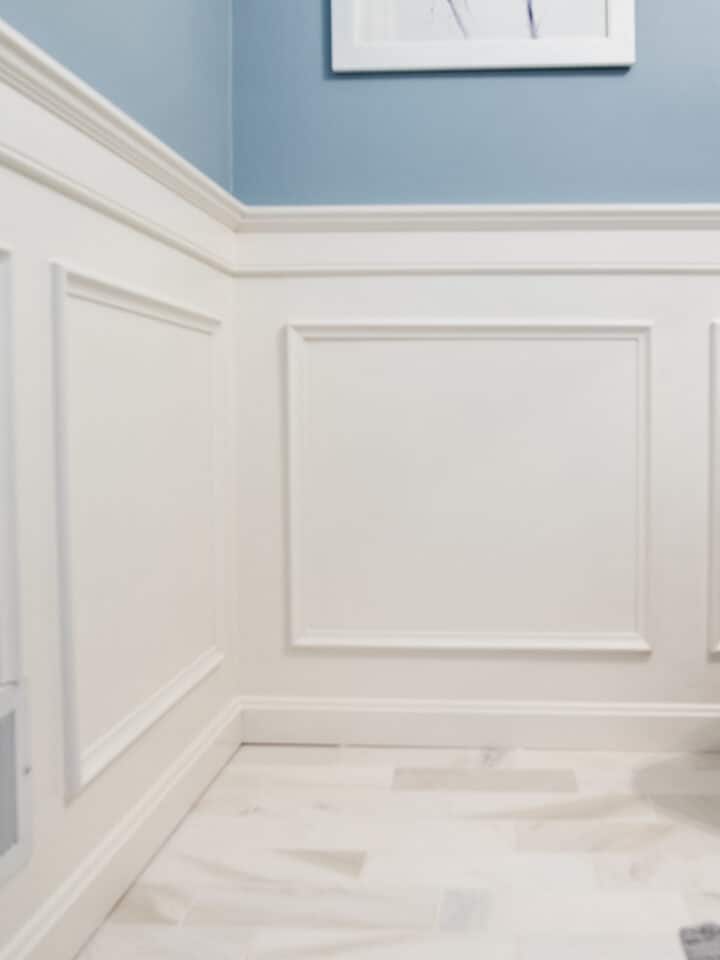
Inset Wall Panels or Picture Frame?
There are many different styles of wall trim. One style is inset wall panels like this one from Lived in Nook blog. While this is beautiful for a single wall, it is quite daunting for walls with door casing, wrap around corners, and obstacles such as HVAC grates.
Gothic or Victorian era buildings from which this style is inspired didn’t have outlets or air conditioning to work around. Therefore, Picture Frame Moulding achieves a similar look while being a little simpler.
How to Deal with Walls that Aren’t Level
In real life situations, you will find that walls are never square, but how to deal with these problems will depend on how uneven the walls are. You will need to work visually rather than being held to a measurement.
Our walls sloped, which we didn’t pay attention to until after we installed the crown molding – big mistake! We ended up pulling that board up and redoing it. Thankfully, we could reuse the same board since only one corner was coped.
- For a slope under ¾″ over 10 feet, I would mostly ignore it. Hold up a piece to the part out
- If your ceilings are not level, the easiest fix for this is to add the crown molding first. Crown molding can be twisted slightly to make a level ceiling that will make everything easier to work with. Alternatively, you can lay the boxes first completely level, and the add the crown molding with your spacing template.
- For slopes larger than ¾″ over 10 feet, adjust your box tops as you go keeping the angle of the ceiling. You may have to cut the corners at angles different than 45 to keep tight corners.
Working Around Obstacles
Obstacles like air returns, vents, and outlets may require some managing. I recommend treating each obstacle independently, meaning there is no one size fits all solution. Here are some examples of different ways we dealt with obstacles:
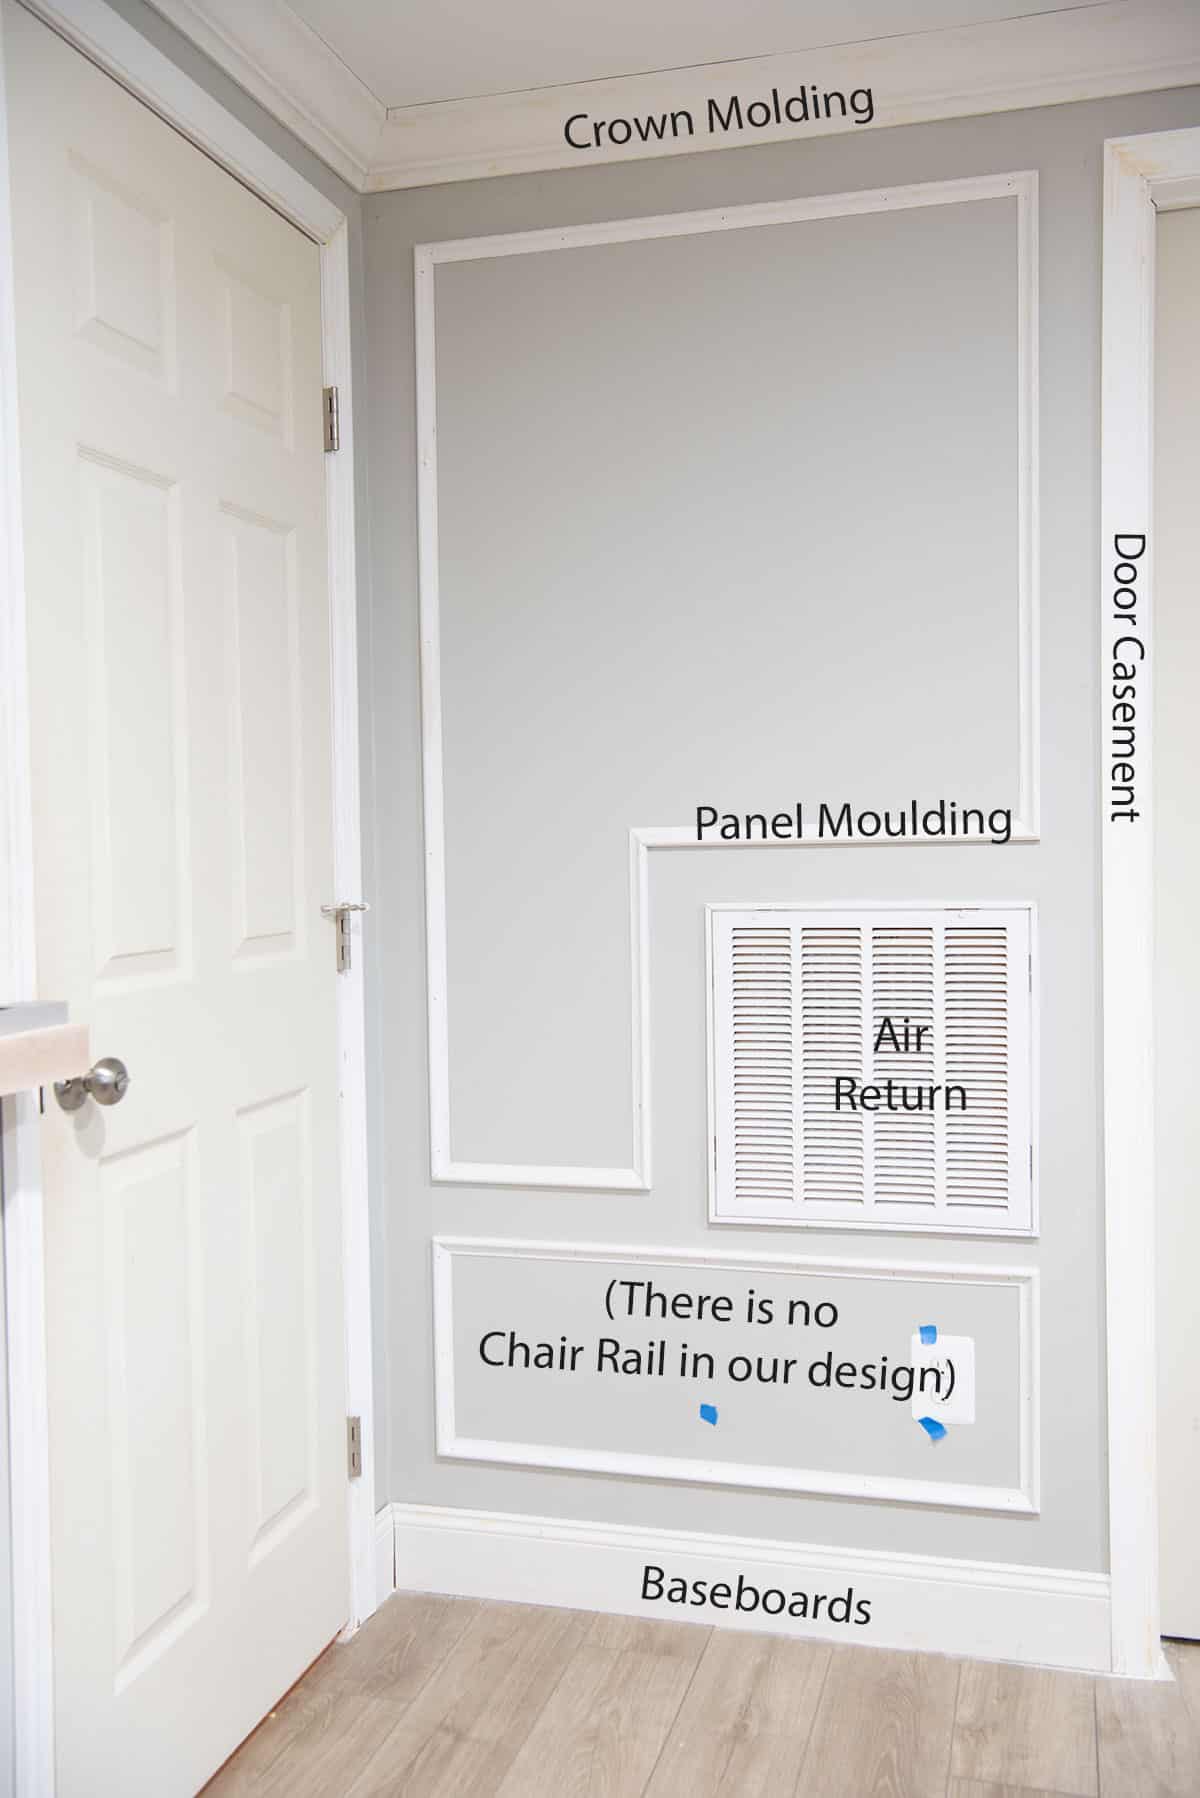
Air Return and Vents
Our air return is right in the middle of the door – no moving that. We simply went around it. The whole wall and all trim will eventually be the same color, so I expect it to fade into the background like everything else.
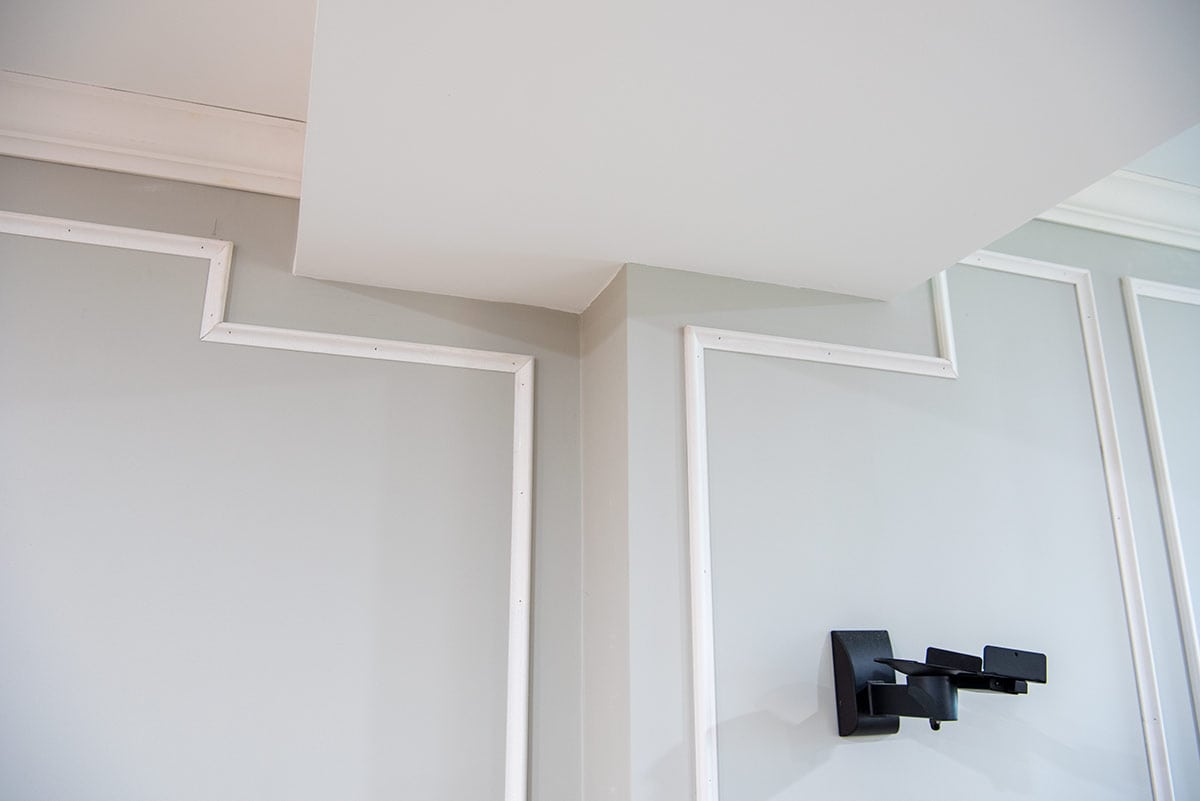
Bulkhead or Soffit Changes
We also did something similar with a bulkhead that runs the length of the basement. Overall, I think this solution adds movement and dimension without being distracting in any way.
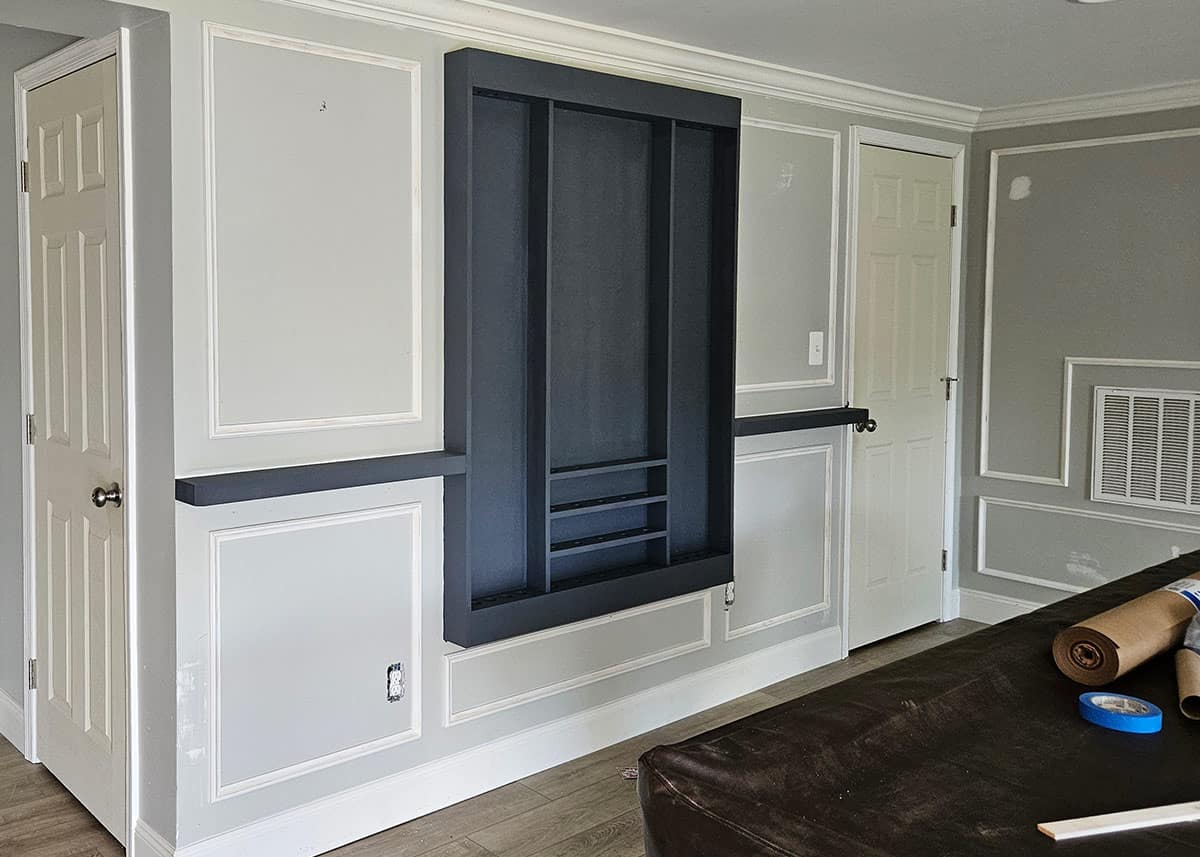
Not all Walls Need to Be the Same
Not every wall needs to match perfectly. We treated the wall above as if it was completely separate from the rest of the design. Being flanked by doors helped that visual separation.
First, if we had to work around the pool rack with counter height shelves for drinks. So, we adjusted the heights of the trim rows and made the space outside the boxes 4 inches on the top and bottom. Overall, it makes this particular wall feel like a feature rather than skirting a problem. We built the pool rack and shelves ourselves, so they are currently painted in primer left over from the cabinets. They will all be painted in the same wall color.
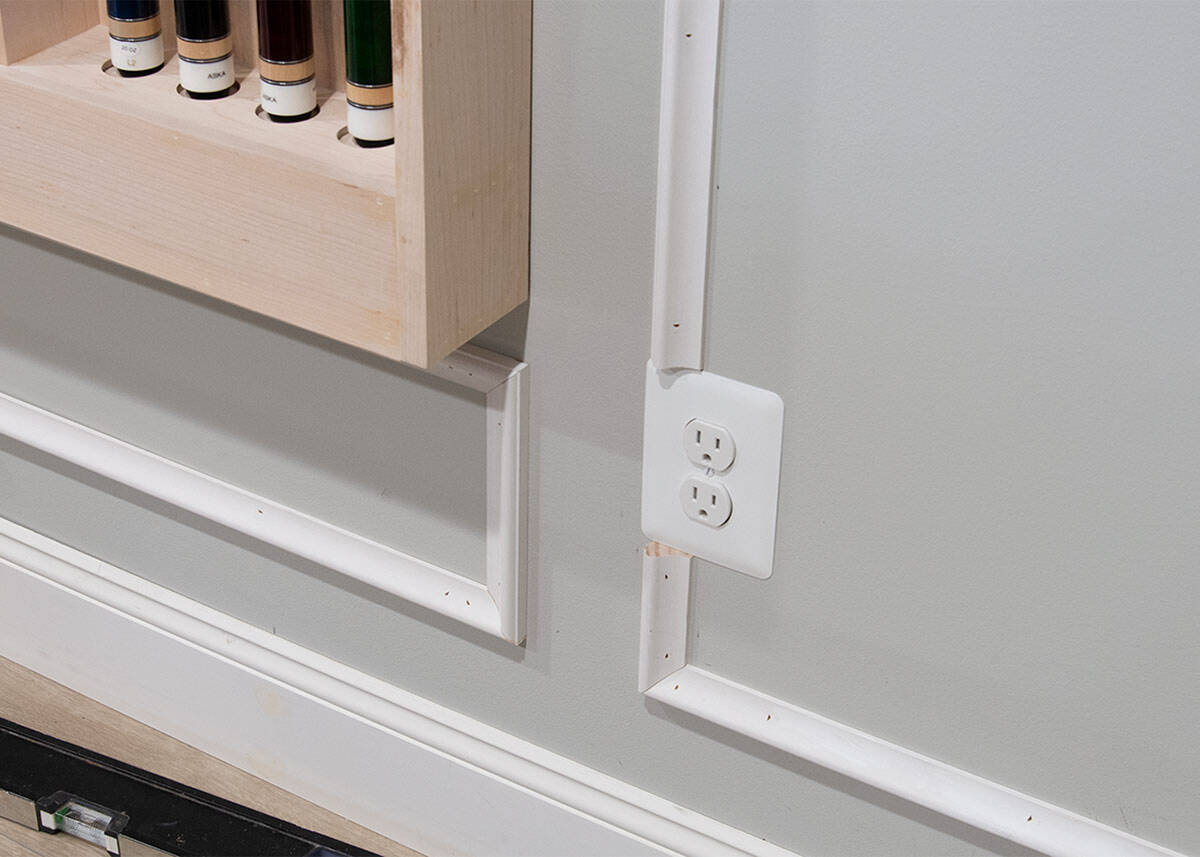
Outlets
The outlets on this wall are not the same distance from the wall edge. While we could have moved this outlet, I felt it was fine to cut into the box. When painted, its not really noticeable.
For outlets that just barely crossed into the path of the trim, I have also cut the outlet cover to fit it in.
We will be working on painting the basement over the next few weeks and I'll be sharing all my favorite tips for that soon!

Grab our free series "Weekend Home Projects that will Transform Your Life" Sign up below to receive updates including free printables, organization tips, home improvement projects, recipes and more! |
More Wall Decorating DIYs
PS I love seeing your creations! Be sure to take a photo and tag #cravingcreative on Instagram! You can also stay in touch with me through following me on Instagram, Pinterest, and subscribing to the newsletter!
Leave a Reply